Rate this article :
This article was useful to you ?
Yes
No
Vous avez noté 0 étoile(s)
Procédure
Minification is the act of reducing the size of a file, generally a CSS style sheet, a JS script or an HTML file, in order to improve the loading time of the site. It's a common practice that's easy to put in place to improve site performance. Because these files are created by humans, they are littered with comments, spaces and line breaks, while the names of functions and variables are often long and descriptive so that anyone can understand and modify the file without having to decipher it.
These elements are therefore essential for a human but totally useless for a machine, and only make the file heavier, leading to an increase in the use of bandwidth and therefore the loading time of your site. This is where minification comes in: by removing these superfluous elements from the file, it is possible to significantly reduce its size, without compromising the content or operation of the site in any way.
An example is worth a thousand words, so let's take the following unminified CSS file:
/* Change the size and background of the paragraphs in the class */ p.class { font-size: 15px; background-color: blue; } /* Change the colour of the input tag */ input { color: white; }
By minimising it, its content appears as follows:
p.class{font-size:15px;background-color:blue;}input{color:white;}
With all the superfluous characters removed, it is more difficult to find your way around the file, particularly when it was originally several hundred or even thousands of lines long, but on the other hand it is now a few Kb lighter.
Reducing the size of a file from 60 Kb to 55 Kb, for example, may seem insignificant, but it represents a significant reduction, in this case of around 9% of the total file size.
The effect is all the more visible if all the files on the site are reduced: if each file is reduced by 9%, this translates into an overall reduction of 9% in the weight of the site, which corresponds to as much less data to load, speeding up the loading of the site.
There are two ways of doing this: manually replacing the content of each file with a minified version or automating the minification through extensions or other scripts.
The first method might be viable for a small, homemade site (without using a CMS such as WordPress) but would quickly become complex and time-consuming as the number of files to be processed increases. For a WordPress site, this would simply be impossible to maintain: a typical WordPress installation contains hundreds of CSS files, not counting all the extensions you might install, and these files are reset to their initial state with each update, which means starting the process all over again each time your site is updated.
That's why it's preferable and recommended to use an extension that will minify your site's files automatically, such as our LWS Optimize extension.
LWS Optimize, a site optimisation extension made by LWS, offers minification of all your site's HTML, CSS and JS files, in addition to the file caching system, which is activated by default on the extension. By default, minification is pre-activated in the plugin.
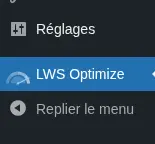
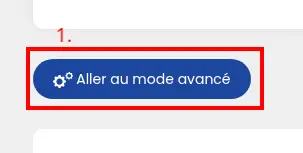
To manage minification in more detail, go to the plugin's settings, then click on "Go to advanced mode" and finally go to the "Front-End" tab:


Here, check or uncheck the options "Minify CSS files", "Minify JS files" and "Minify HTML" to activate the minification of all files:


Confirm your choice by clicking on the "Save new configuration" button at the bottom right.
Minification is managed on your site, but as it is linked to the file cache system, you will need to purge this cache so that the new settings take effect on the pages of your site. To do this, go to the "Caching" tab and click on the "Empty cache" button next to the "Manual purge" action:


If you don't want certain files to be minified, you can return to the "Front-End" tab and click on the "Exclude files" button of the action of your choice to open the exclusion modal:

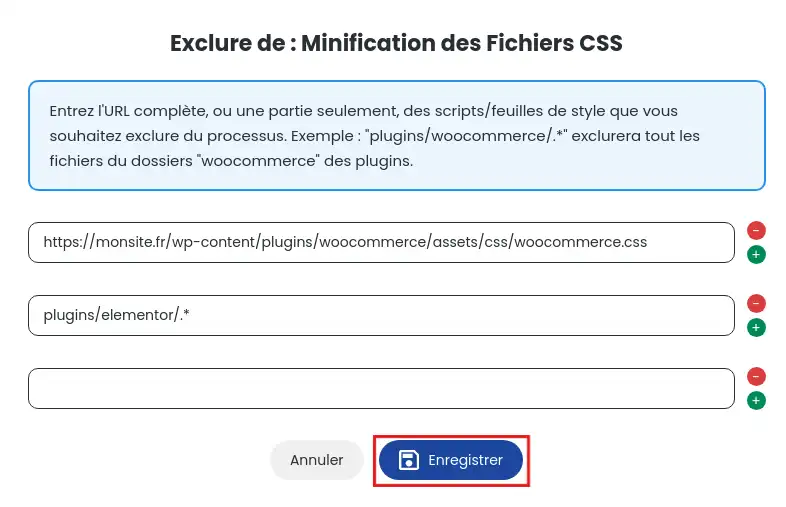
In the field of the newly opened modal, enter the full URL of the file you wish to exclude, or just part of it if you wish to exclude all files whose URL contains that part. You can click on the green "+" button to add other URLs or on the red "-" button to remove them. You can exclude as many URLs as you like. Once you've finished, click on the "Save" button to save your changes.

In the example above, the "woocommerce.css" file, located in a folder for the WooCommerce extension, and all the CSS files for the Elementor extension have been excluded from CSS file minification. Once again, you will need to clear the file cache in order to apply your exclusions.
When creating the cache for a page on your site, LWS Optimize will search the page for all and
HTML minification, on the other hand, is a little different from the others: the entire content is recovered once the other actions have been carried out and the page loaded, then minified before being cached in "wp-content/cache/lwsoptimize/cache".
You now know how to :
🚀 By optimising your files with minification, you take a giant step towards a faster site and a better user experience. 🌐
🙌 Thanks for following along in this technical article! If you have any questions or feedback about the minification service or the LWS Optimize extension, please don't hesitate to leave us a comment. Your feedback is invaluable in helping us to constantly improve our services. 💬
Rate this article :
This article was useful to you ?
Yes
No
0mn reading
How can I combine the files on my WordPress site with LWS Optimize?
0mn reading
How do I preload CSS files on my WordPress site with LWS Optimize?
0mn reading
How do I disable WordPress emojis with LWS Optimize?
0mn reading
Lazy Loading WordPress: boost your site's performance with LWS Optimize