Rate this article :
2.5/5 | 2 opinion
This article was useful to you ?
Yes
No
Vous avez noté 0 étoile(s)
Sommaire
Procédure
The purpose of this documentation is to explain how to install and use NextCloud on Android to back up data on its storage space.
You can then activate synchronisation.
1. Connect to the play store on your Android phone
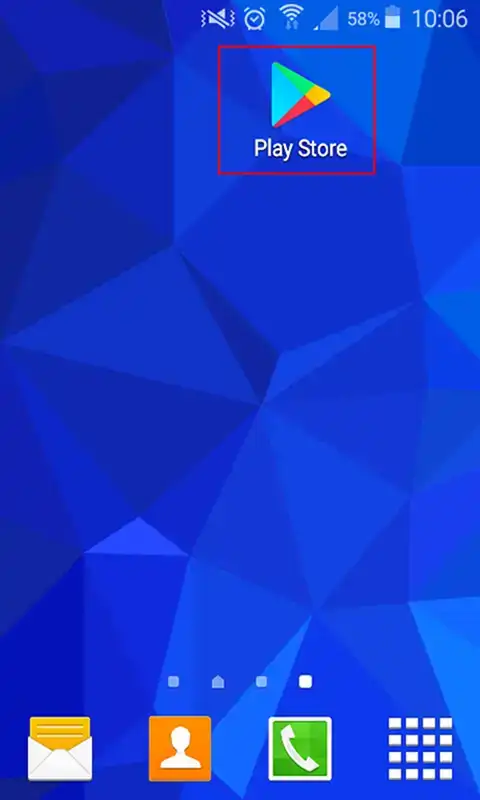
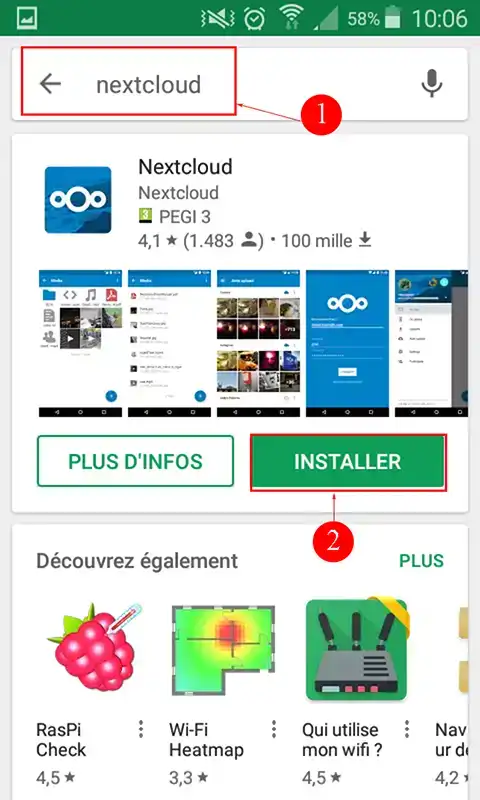
2. In the Google Play search window, look for the"NextCloud" application then click on install.
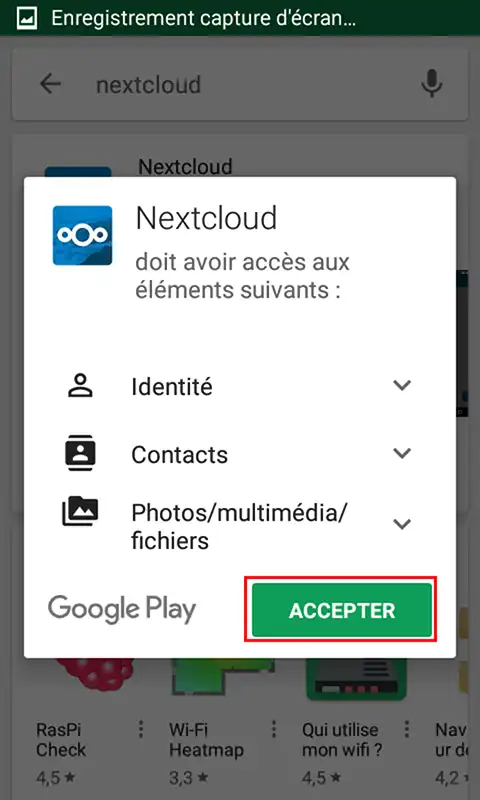
3. Click on the"Accept" button to launch the installation of the NextCloud application.
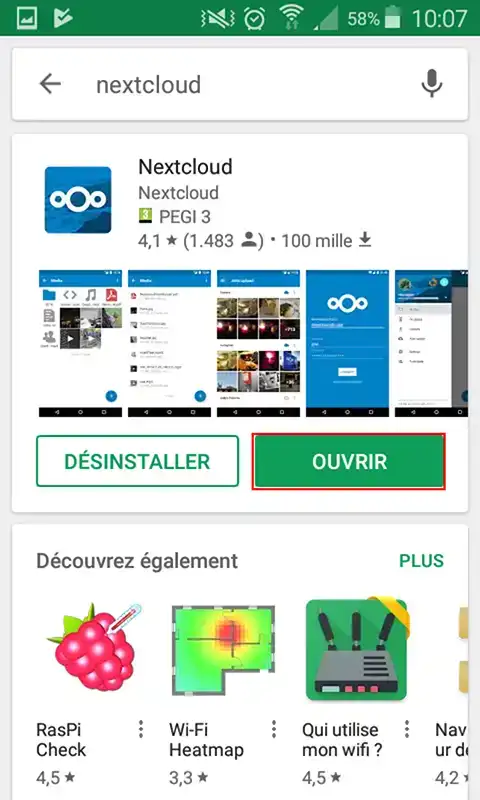
4. Once the software has been installed, click on the"Open" button to start it.
1. When the application opens, click on the"Ignore" tab to move on to the next step.

2. Enter the address of the NextCloud storage server and click on the arrow.
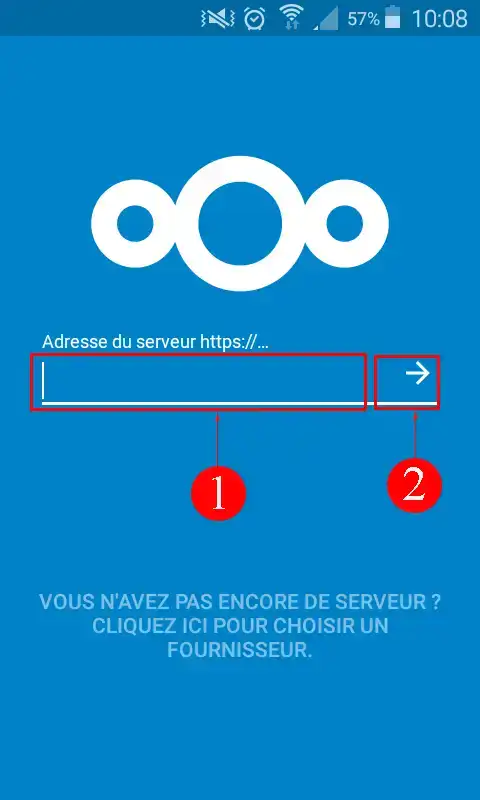
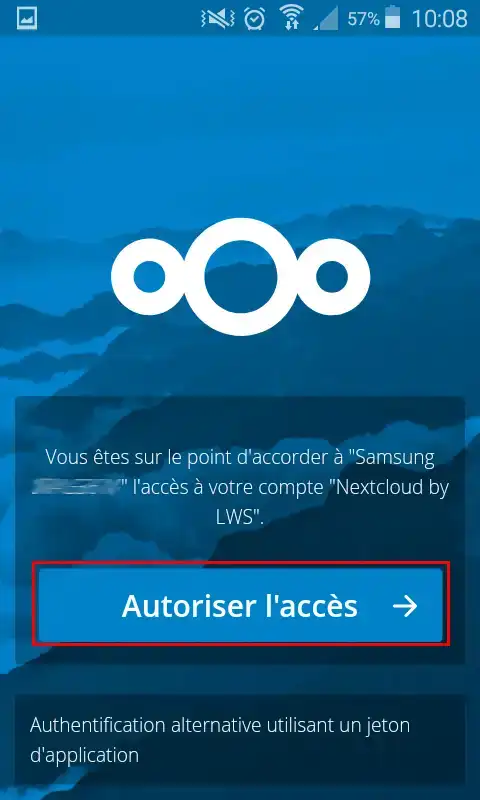
3. Click on the"Authorise access" button. Authorisation enables the smartphone to be traced in the web application logs.
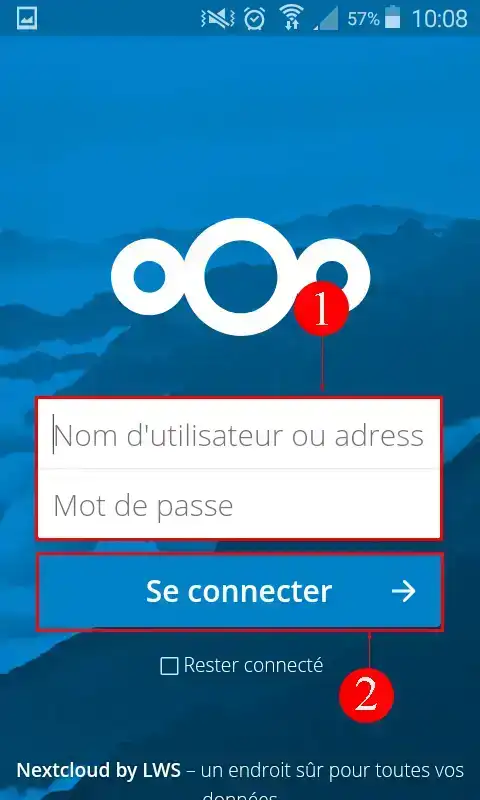
4. Enter your username and password in the box provided. The username and password were sent to you by email when you subscribed to the storage package.
1. Once you have logged in, click on the folder of your choice or create a new folder to store your documents and/or photos. To create a new folder, simply click on the "+" tab at the bottom right of your screen. Then click on the folder icon.
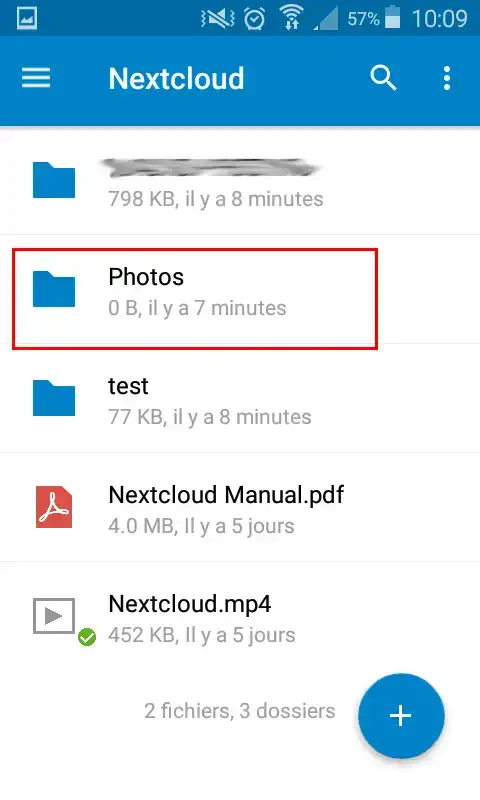
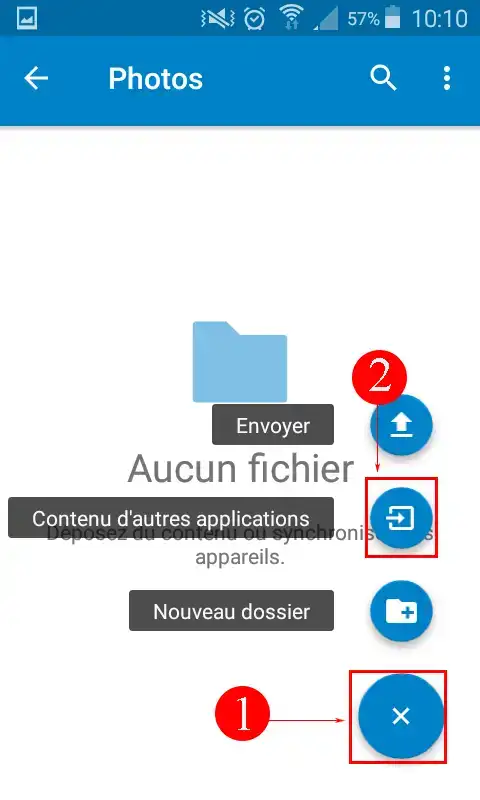
2. Once you are in the folder you want, click on the"+" tab at the bottom right of your screen and then on the"Content from other applications" tab.
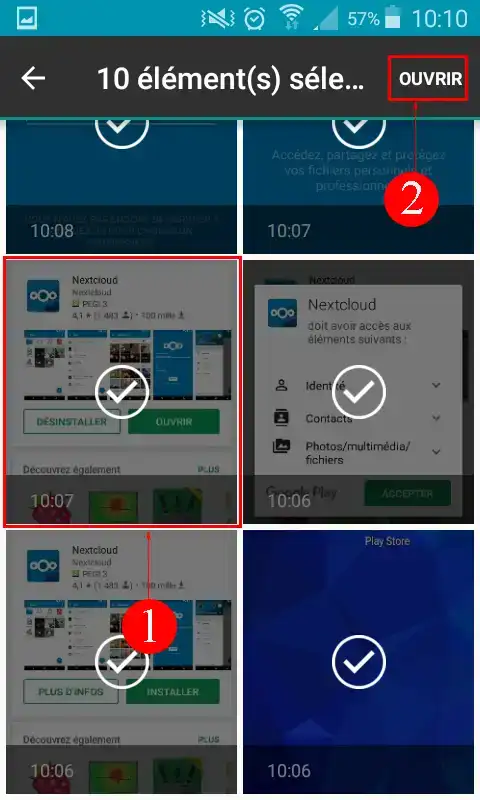
3. With a single click, select the photos you want to import to your storage space. Then click on the"Open" button to upload them.
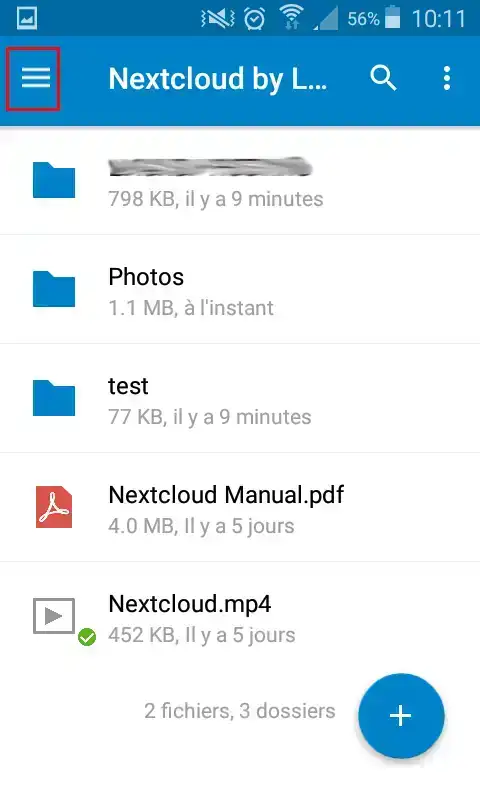
1. Click on the"Menu" tab at the top left of your application.
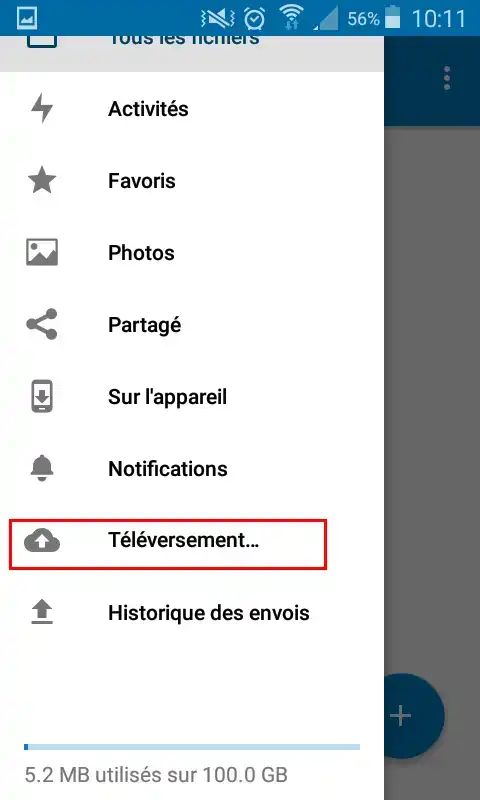
2. Click on the "Upload" tab.
3. Click on the"Menu" tab next to each photo folder to set up synchronisation of the folder in question with your storage space.
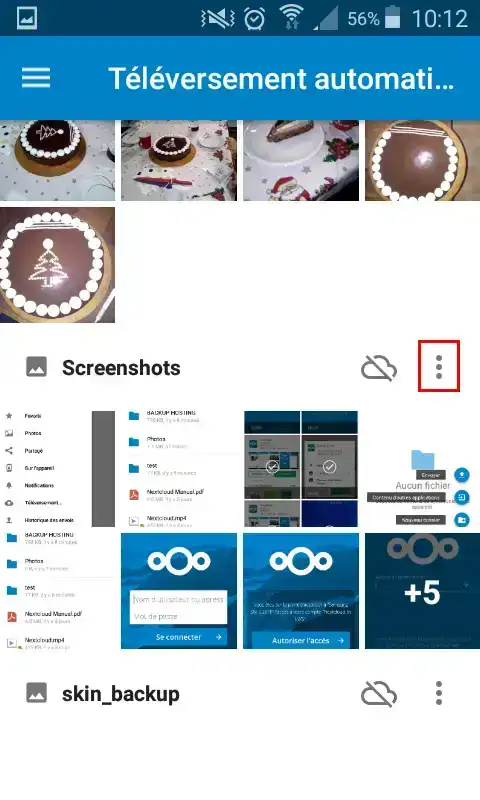
4. Click on the icon next to"remote folder". This allows you to define the folder in your storage space that should be synchronised with the photos folder on your device. You can also define other options, such as synchronising your photos as soon as you are connected to the Internet via Wi-Fi, and creating sub-folders to classify your photos by month and year. Finally, activate synchronisation of your photos folder.
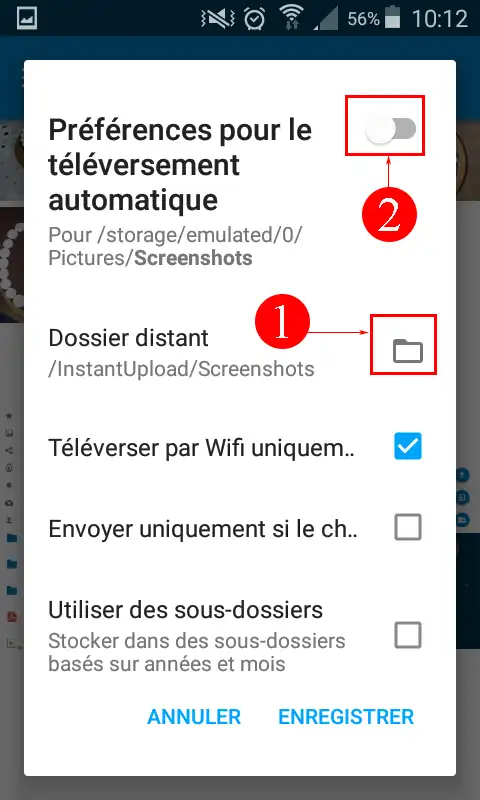
You can click on the'Cloud' icon behind each folder to activate synchronisation.
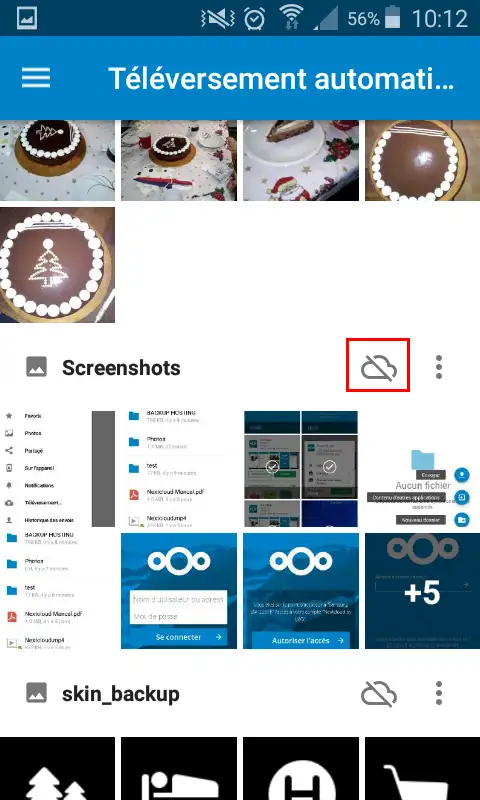
You now know how to download and use Nextcloud on Android. If you don't yet have an online storage package or would like to upgrade to a cloud storage package with advanced features, consult this documentation to place your order, and find information about the Nextcloud and Nextcloud Pro packages here.
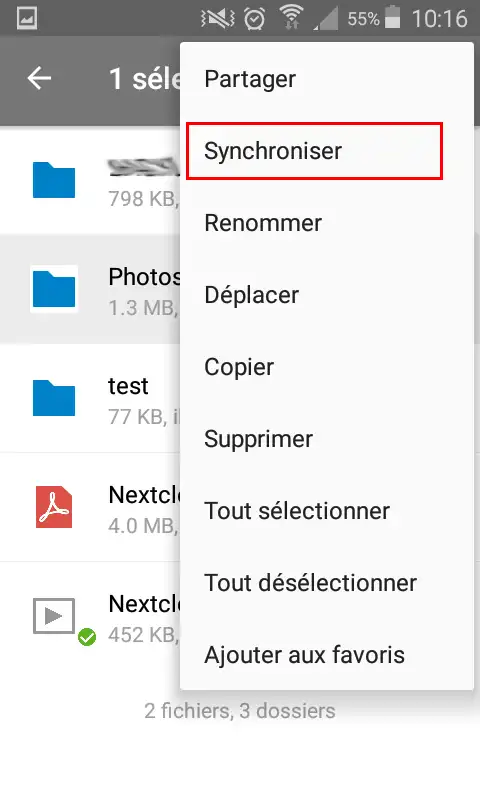
If you've taken a lot of photos and want to synchronise your NextCloud application with your storage space straight away, you can force synchronisation if you wish.
1. To do this, long-click on the folder concerned
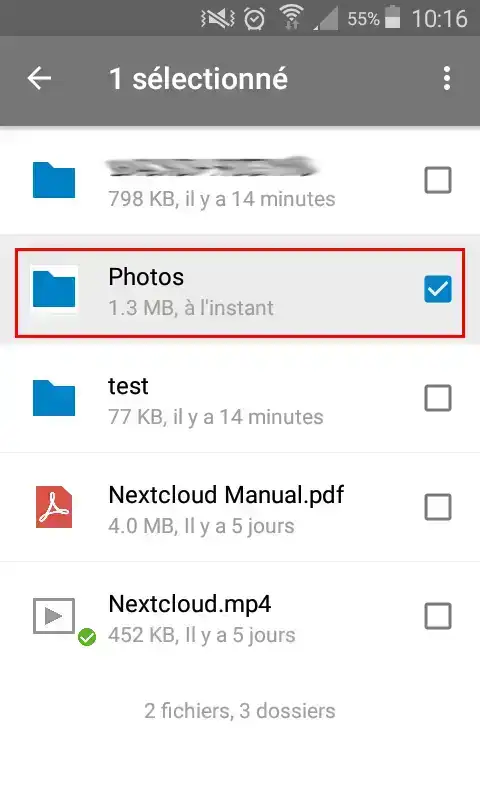
2. Click on the"Menu" icon at the top right of your NextCloud application and then on the"Synchronise" button. Depending on the type and quality of your Internet connection, it may take several seconds for synchronisation to start.
It is also possible to install the NextCloud application on other devices such as:
Rate this article :
2.5/5 | 2 opinion
This article was useful to you ?
Yes
No
0mn reading
Using NextCloud on mobiles and tablets
0mn reading
How do I use NextCloud on Windows?
0mn reading
How do I use NextCloud on Linux?
0mn reading
How do I use NextCloud on a Mac?