Rate this article :
2.4/5 | 5 opinion
This article was useful to you ?
Yes
No
Vous avez noté 0 étoile(s)
Sommaire
Procédure
It can be handy to be able to back up and restore your Mac in the event of a breakdown. Apple's Time Machine offers a simple solution for backing up locally, but for greater security and availability, you can also back up your data in the Cloud. The LWS Cloud, in conjunction with SMB technology, offers this possibility.
Time Machine is one of the most emblematic functions introduced by Apple for its macOS operating systems. It is an integrated backup solution that allows Mac users to easily preserve their data, configurations and software.
Time Machine is available on all types of Mac, including Macbook Air, iMac, Mac Mini, Mac Pro and Mac Studio.
Time Machine automatically creates hourly backups of your data for the last 24 hours, daily backups for the last month and weekly backups for all previous months. These backups are kept as long as storage space allows or on an external drive.
Some interesting features:
In addition to backup, Time Machine offers a particularly useful restore function. Imagine accidentally deleting an essential file, or worse still, suffering a technical problem that resulted in the loss of crucial data. Time Machine lets you go back in time by browsing different backups to find the precise version of the file you are looking for.
Although external hard drives and other local storage methods are practical, they are susceptible to breakdown, loss or theft. With cloud storage, your data is kept in secure data centres with advanced security protocols.
By combining Apple Time Machine with the cloud, users benefit from a robust backup solution that ensures their data is preserved in a variety of circumstances.
To store backups of your Mac, you first need a cloud storage service: Online Backup for MAC with Time Machine (€7.99/month for 250 GB).
Next, you'll need a user with enough disk space to back up your Mac's data. You can use the default user created when you purchased your Cloud, which uses 75% of the storage space by default.
If you want to create a new user for your Mac backup storage, follow these steps, otherwise go straight to the configuration stage.
Step 1: First you need to log in to your LWS customer area.
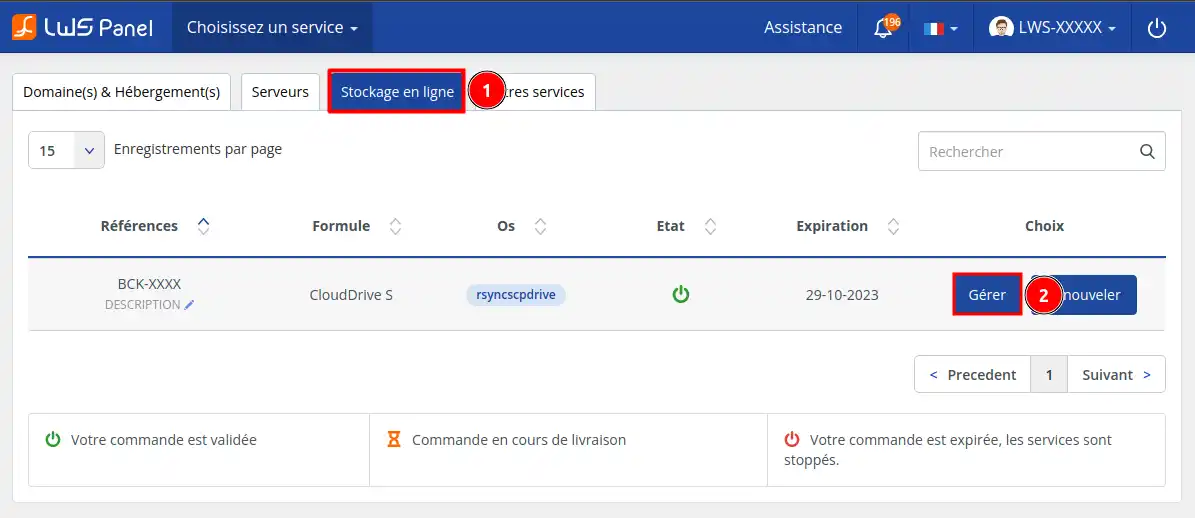
Step 2: Click on the Online Storage tab (1) then on the Manage button (2)
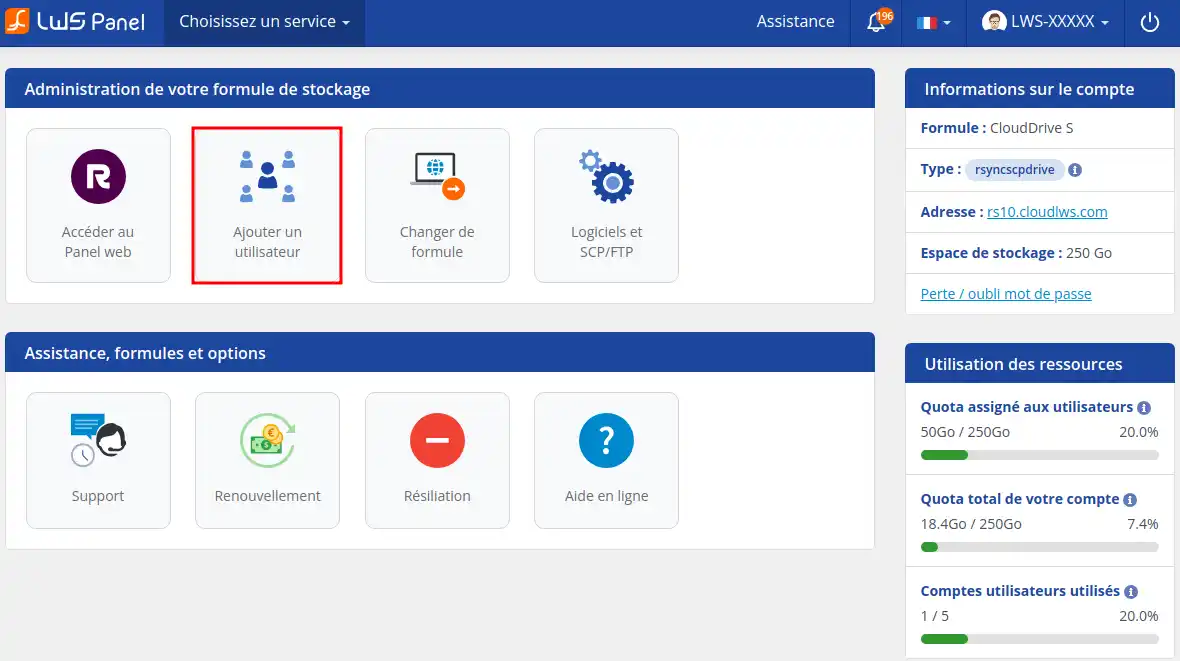
Step 3: Click on the Add a user button
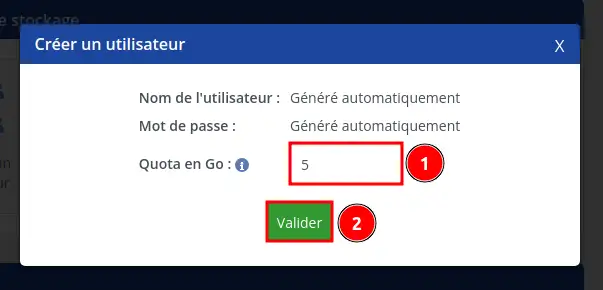
Step 4: Set the space you wish to allocate to your user (1) then click on Validate (2)
Step 5: An email will be sent to you with the new user's login details.
Keep this information (address, username and password) close to you for further configuration.
Time Machine is already present on your Mac by default, so let's get started!
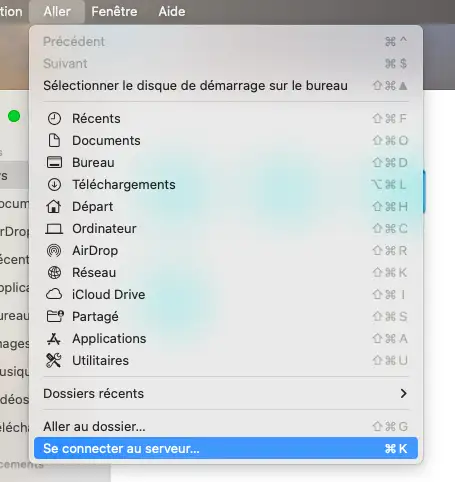
Step 1: Open Finder and click on Go at the top of your screen, then click on Connect to server...
Step 2: Next, enter smb://address-of-your-server.com/user
Replace the address and user with those you received in the email when you created your user.
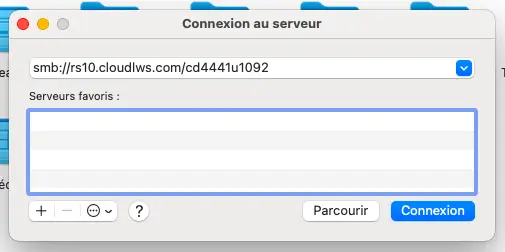
Step 3: Then click Log in

Step 4: Here, enter the cloud user name and the user password. Keep the password and click Connect.
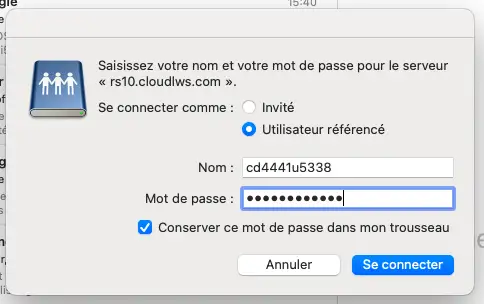
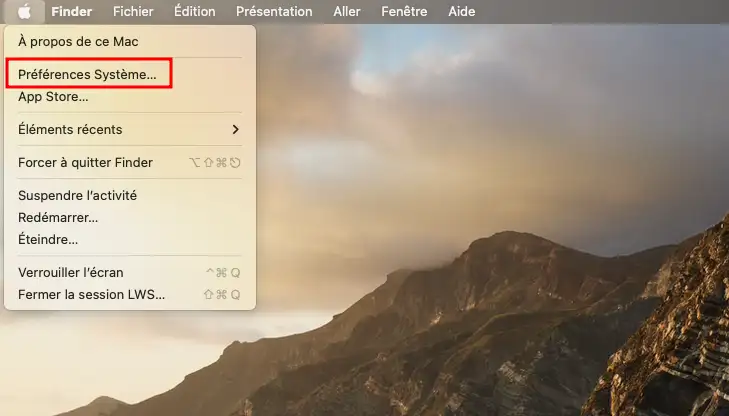
Step 5 : You are now connected to the server, now click on Apple at the top left of your screen, then System Preferences
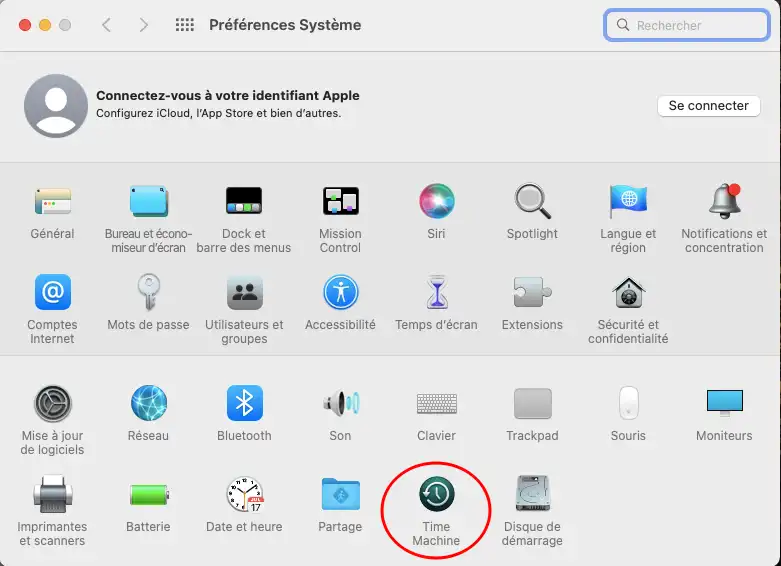
Step 6 : Next, search for Time Machine and open the application.
Step 6 : Once in the application, click on View Time Machine in the menu bar and then click on Choose a backup disk.
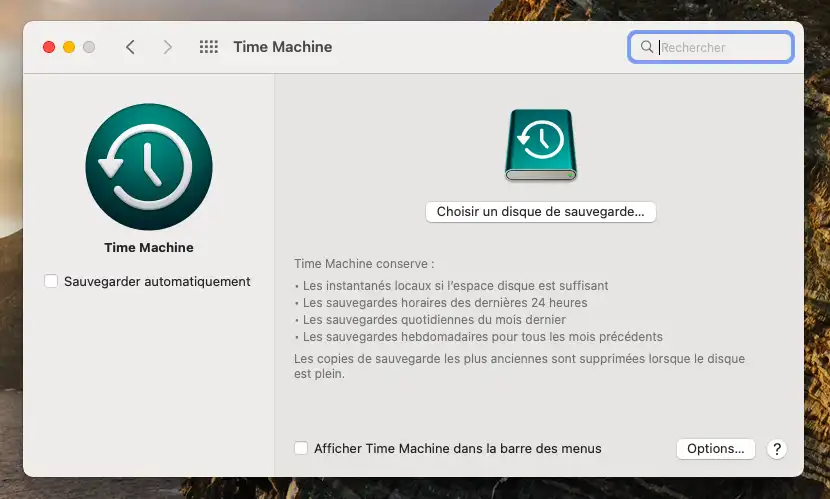
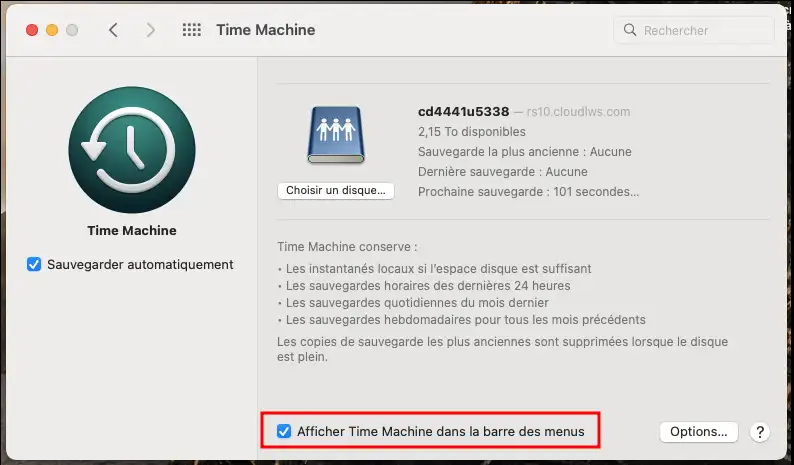
Step 7 : Choose the recently added server, and click Use Disk
.webp)
Step 8 : For easier access to your backups and Time Machine management, check "Show Time Machine in the menu bar".
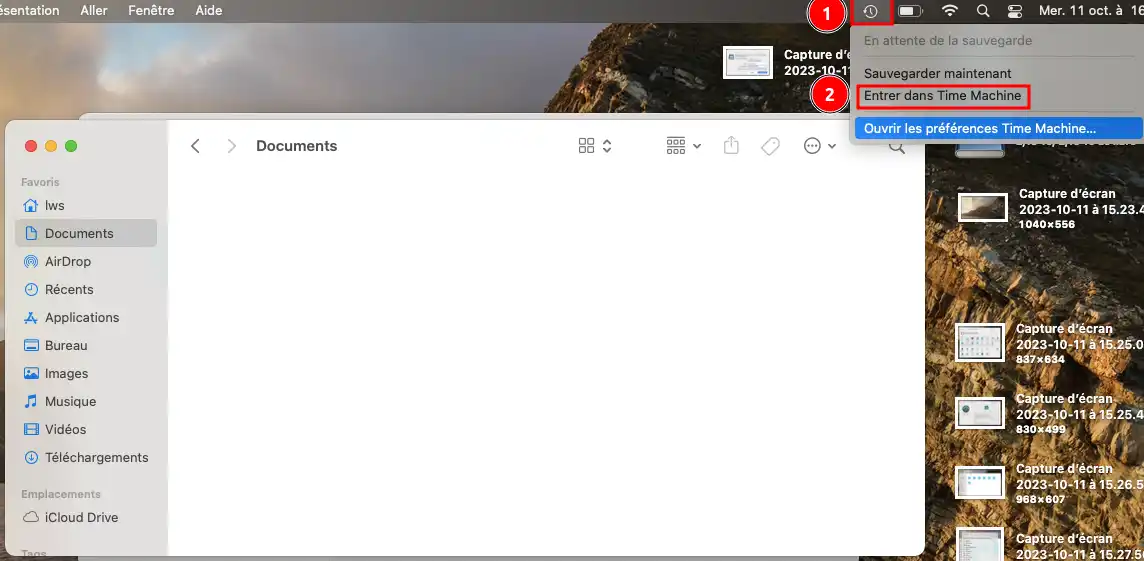
Step 9 : Time Machine is now correctly configured, click on the tab (1) at the top of your screen, then on Enter Time Machine (2).
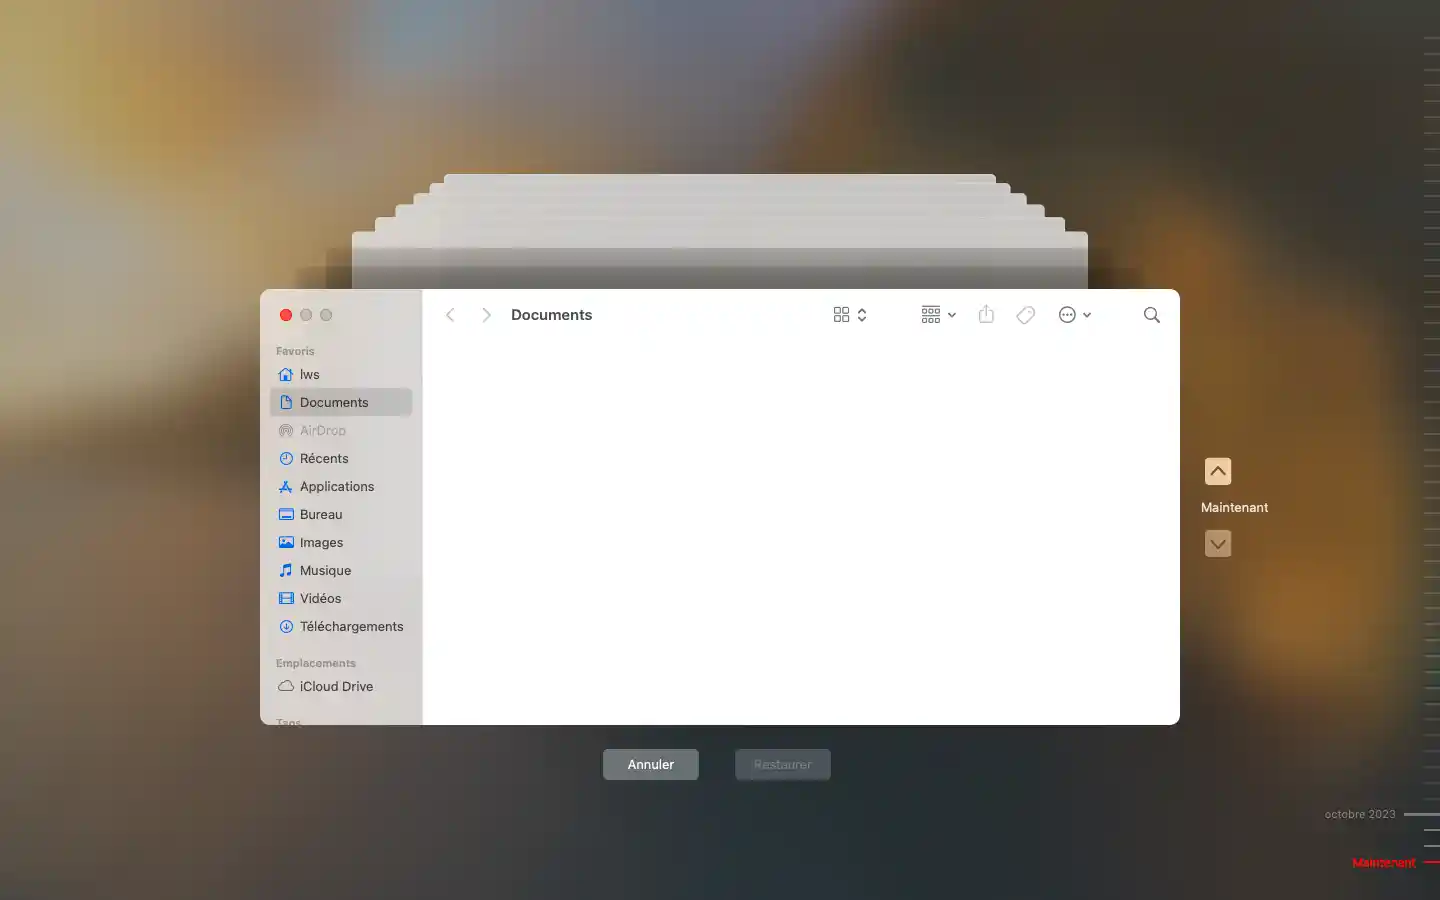
Now you can use Time Machine. On the right-hand side of the interface, you'll find a timeline and you can browse through the backups you've made, and then you can recover documents, data, etc.
You now know how to link Time Machine to your cloud to secure your data. ???? Don' t forget, LWS customer service is always available if you encounter any problems or have any further questions.
Thank you for taking the time to read this documentation. We strongly encourage you to leave a comment to ask questions, share your experience or give your opinion on our service. Your feedback helps us to improve! ????
For more information and services, please visit https://www.lws.fr/sauvegarde-mac-time-machine-cloud.php.
Rate this article :
2.4/5 | 5 opinion
This article was useful to you ?
Yes
No