Rate this article :
This article was useful to you ?
Yes
No
Vous avez noté 0 étoile(s)
Sommaire
Procédure
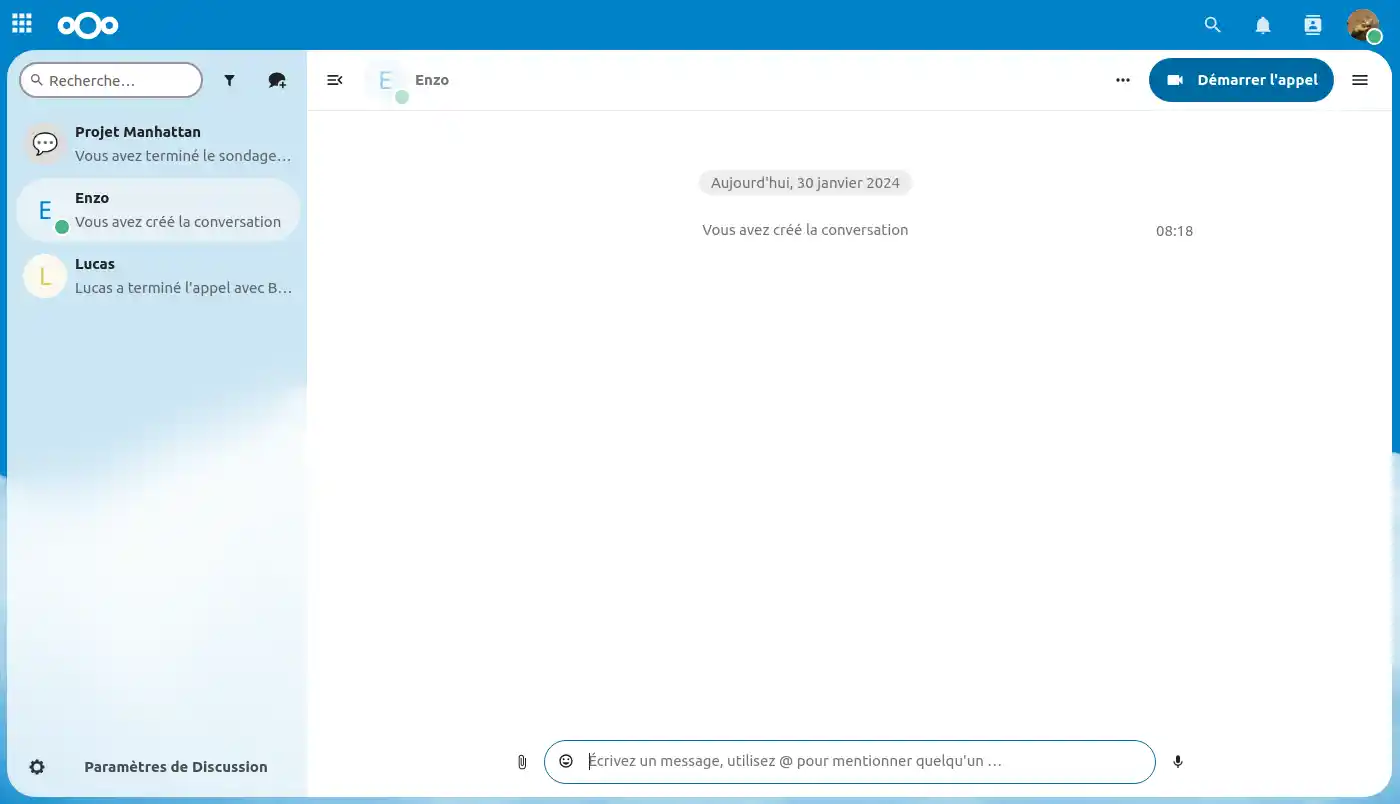
In this documentation, we'll look at the various features offered by the"Talk" conversation application on our Nextcloud online file storage solution.
Talk offers an integrated solution for real-time communication, enabling users to collaborate effectively from a distance. The application also includes a videoconferencing system. To find out more, click here!
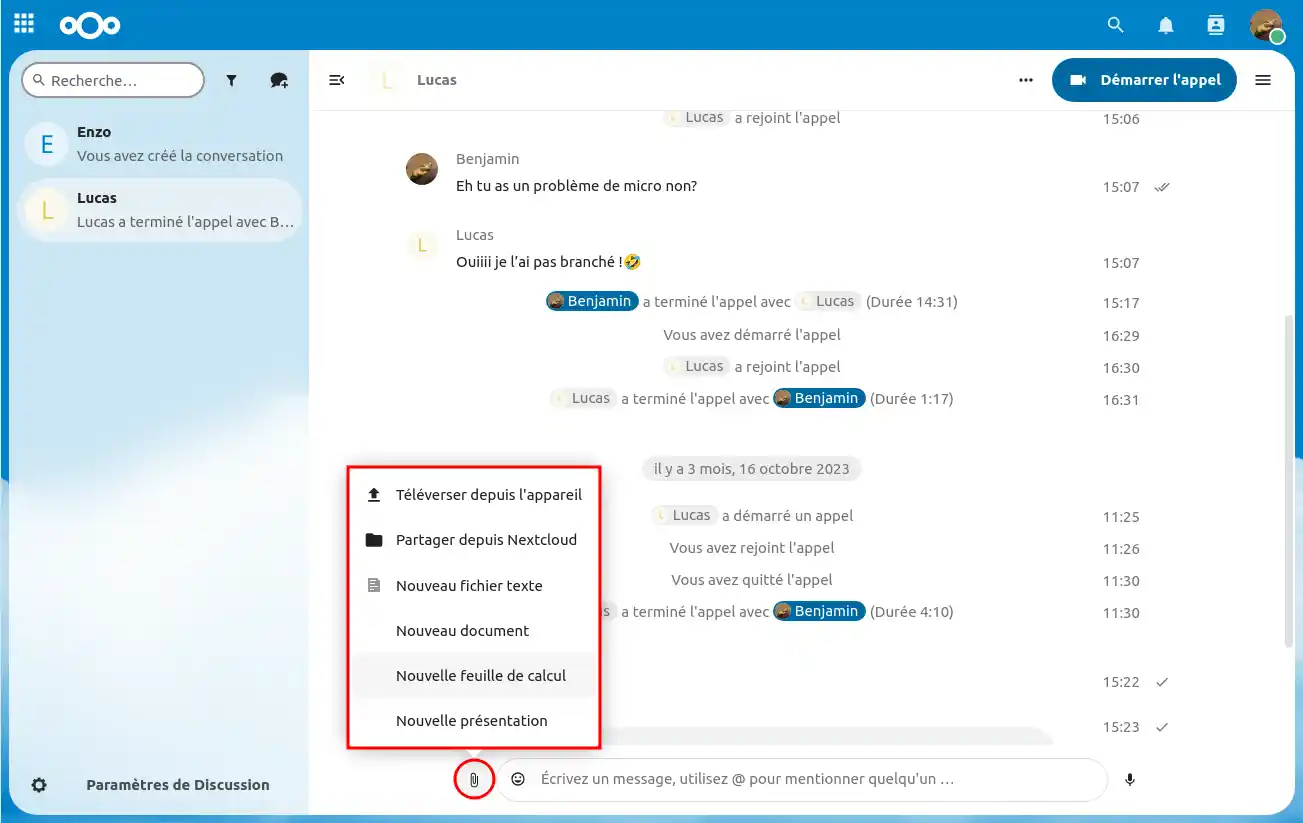
The Talk discussion interface is not limited to simple text messages. You can share files with your colleagues directly from the chat for more effective collaboration.
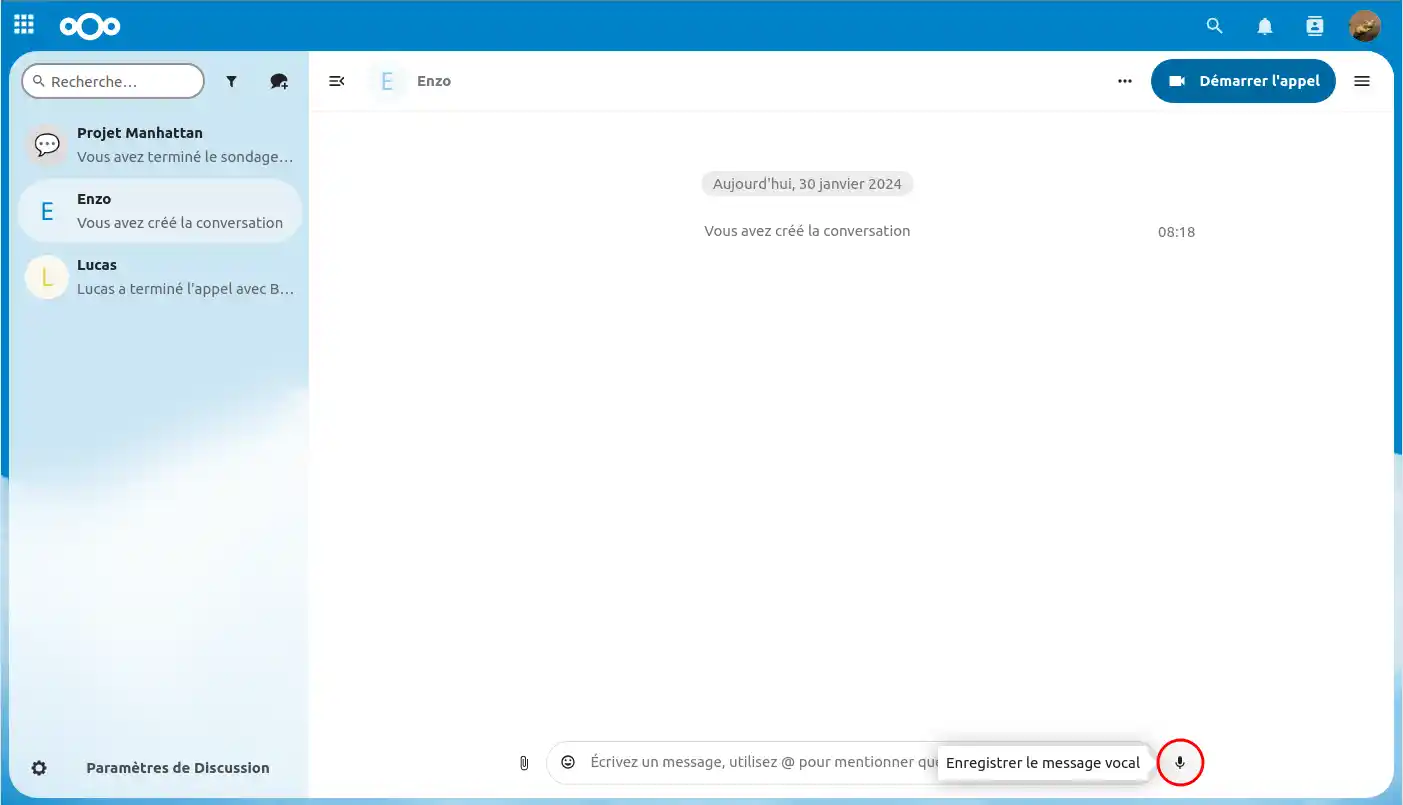
From within a chat, you can send voice messages, which is useful if you don't have time to write, or to make yourself better understood by the person you're chatting to!
Step 1: Click the microphone icon "🎙️" at the bottom right.
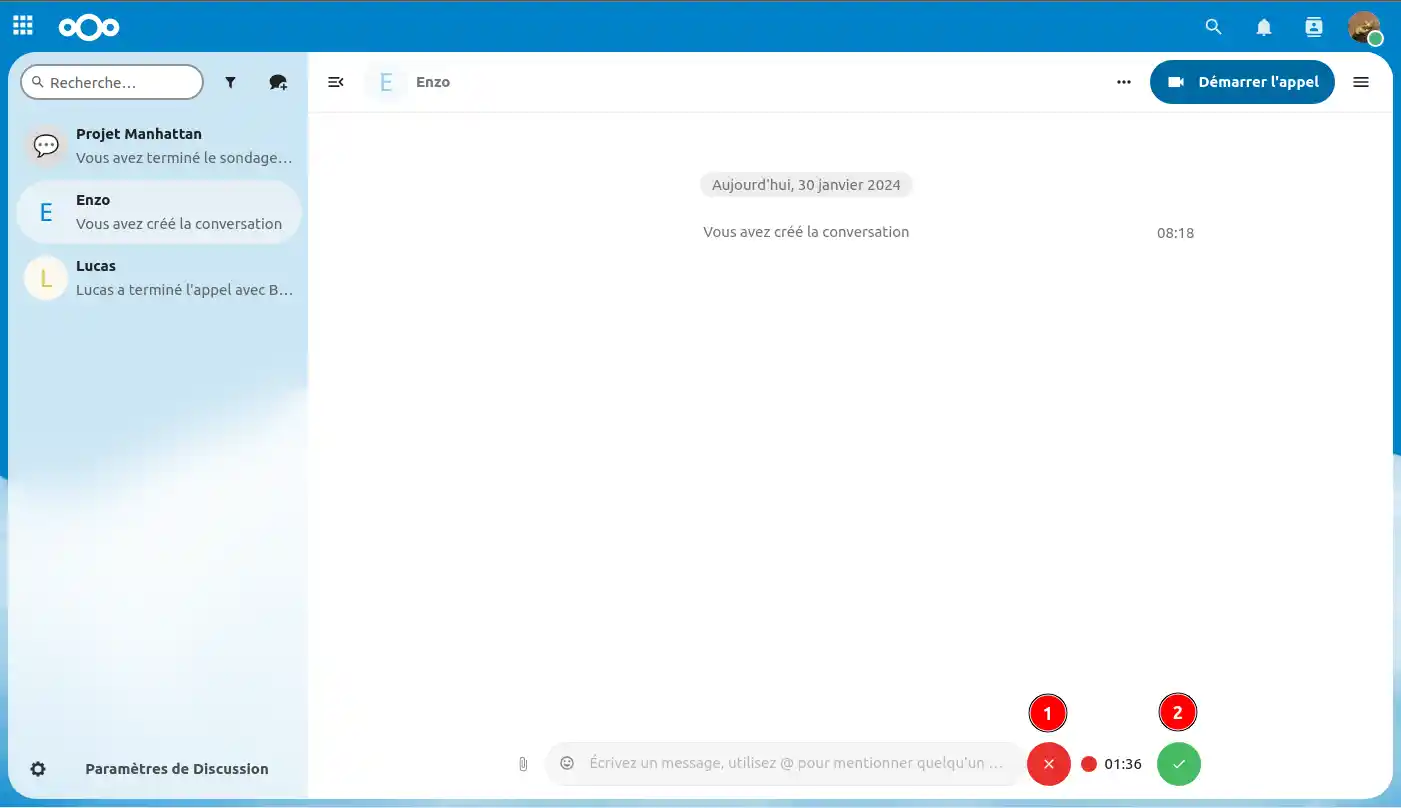
Step 2: Record yourself for as long as you wish, click on the"red cross"(1) if you wish to cancel the voice recording or accept by clicking on the "green tick"(2).
Step 3 : Once you have accepted, you can "Download"(1) the voice, "Increase playback speed"(2), "Play voice"(3), "Send"(4) or "Abort"(5), in which case the voice will be deleted.
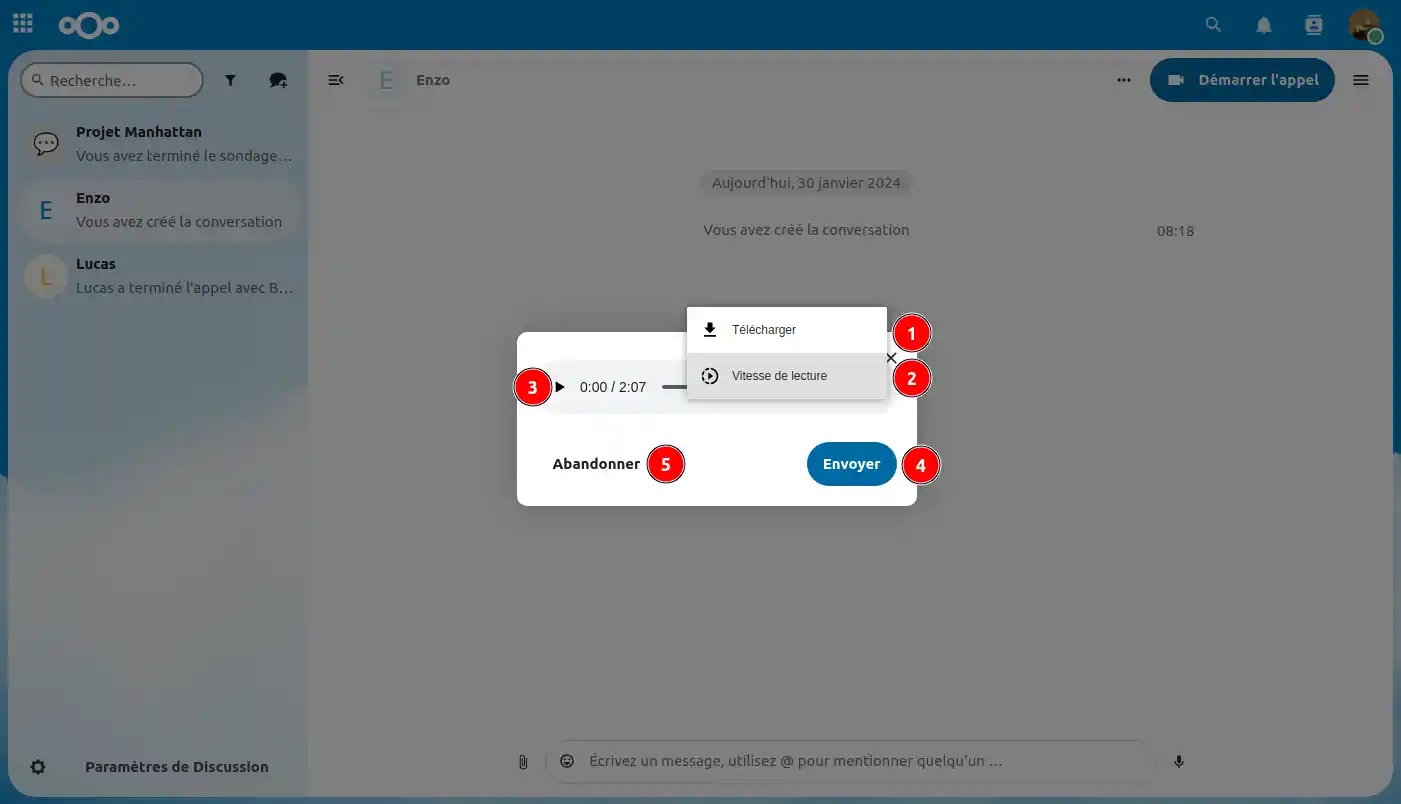
Now you know all about voicemails from the Talk chat interface!
Organise your conversations by project, team or theme by creating discussion groups. This allows you to group relevant discussions within each group, making it easier to manage and find information.
Step 1: Click the "💬+" icon(1) in the top right-hand corner and in the drop-down menu, click "+ Create a new conversation".
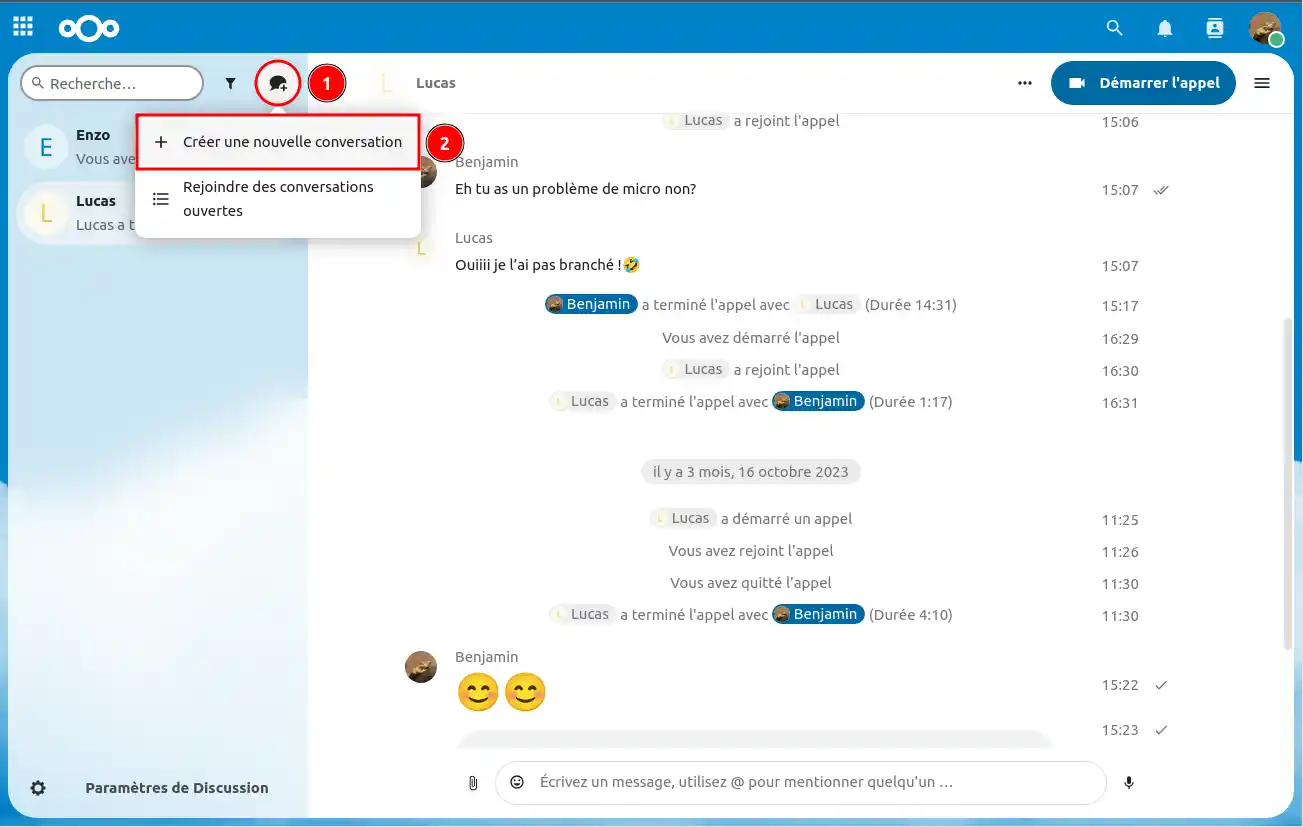
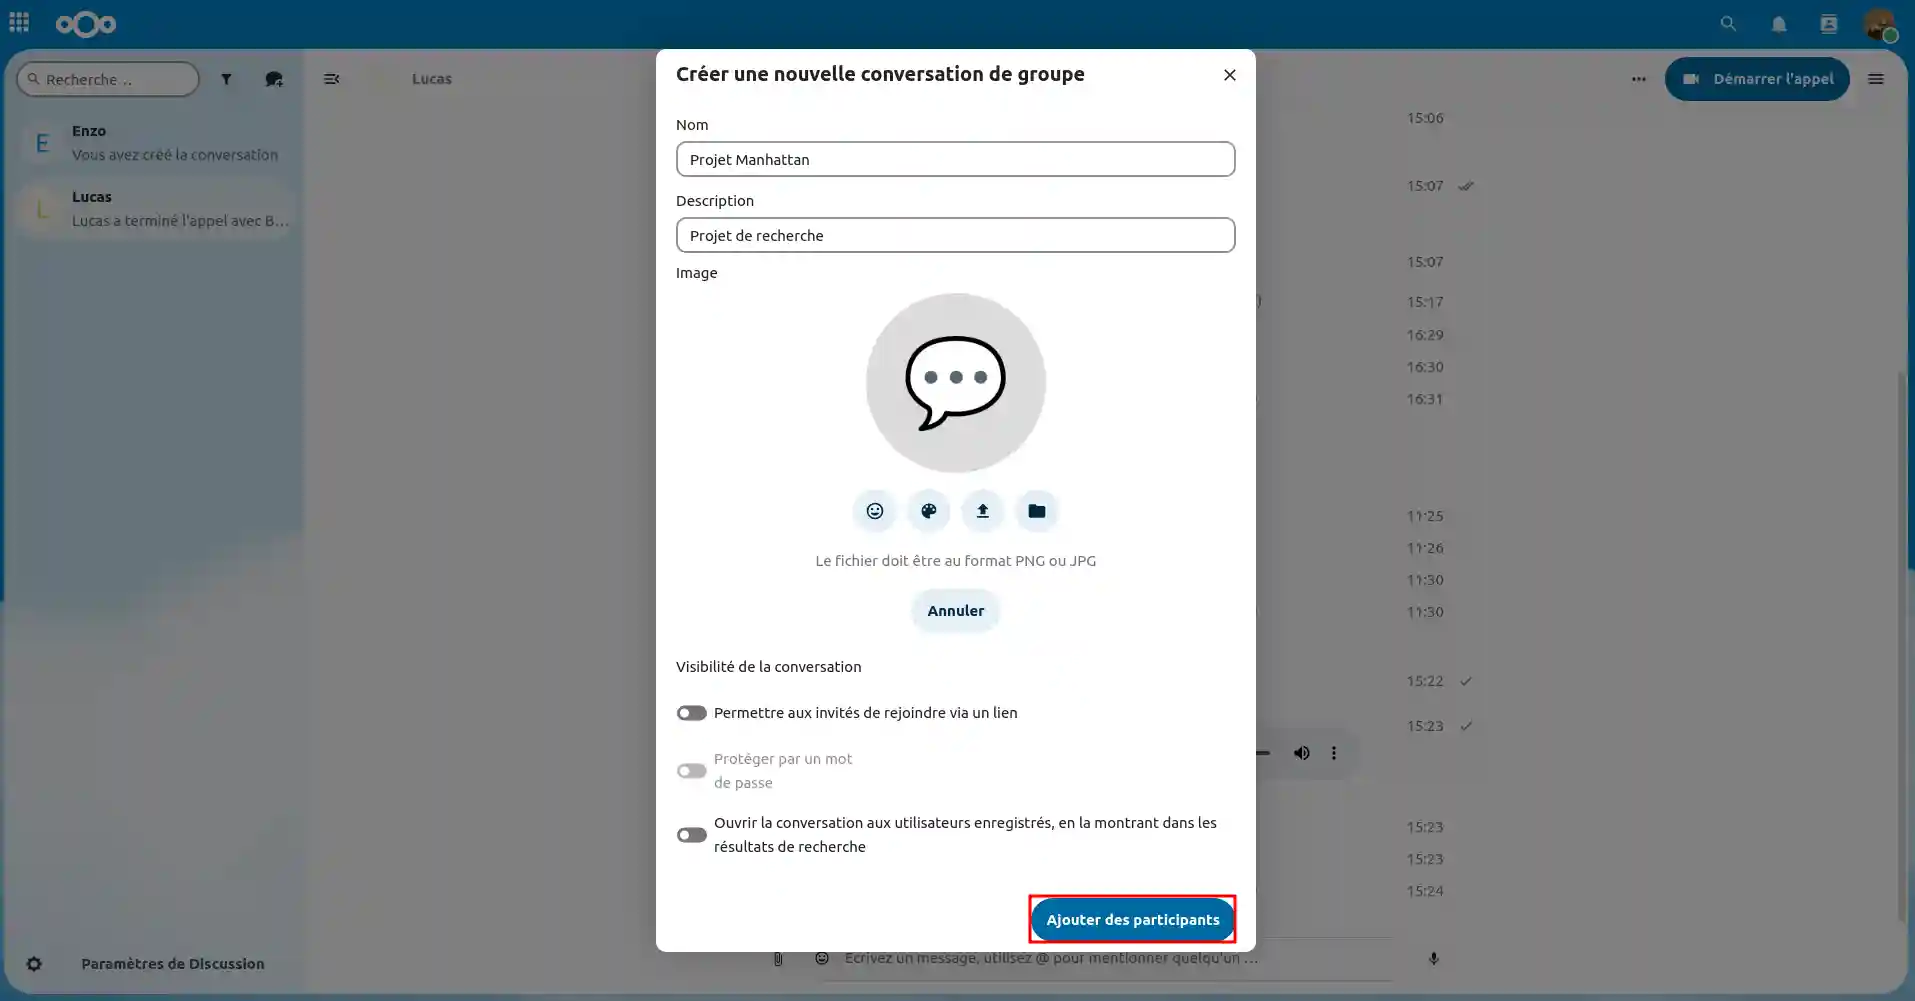
Step 2: Fill in the information requested: Name, description, choose an image or icon representative of the conversation topic. Adjust the visibility settings for the conversation, and choose how you want to access the discussion group, then click on "Add participants".
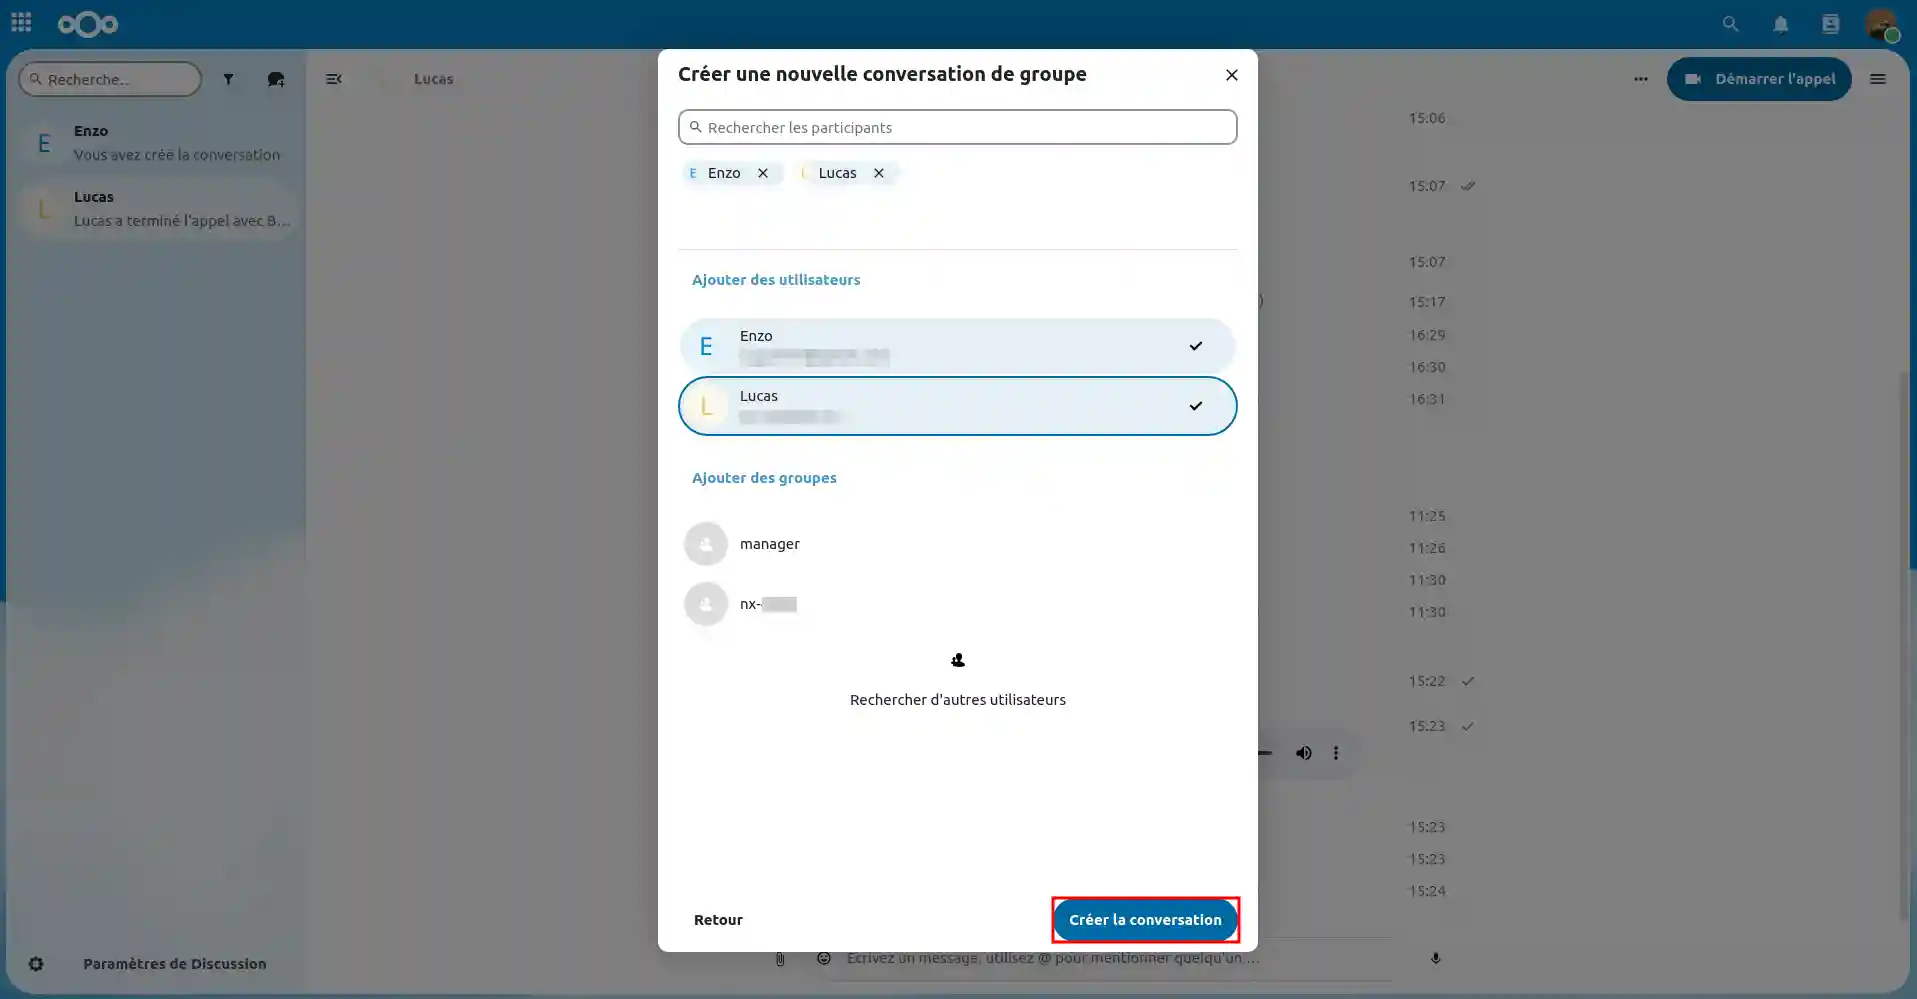
Step 3: Add the desired participants to the conversation. Then click on "Create the conversation".
In discussion groups, you can create polls to quickly obtain answers and opinions from members. This feature is ideal for making collaborative decisions and getting everyone involved.
Step 1: In a group, click on the paperclip icon '📎 ' at the bottom left (1). Then click on "Create a new survey" (2).
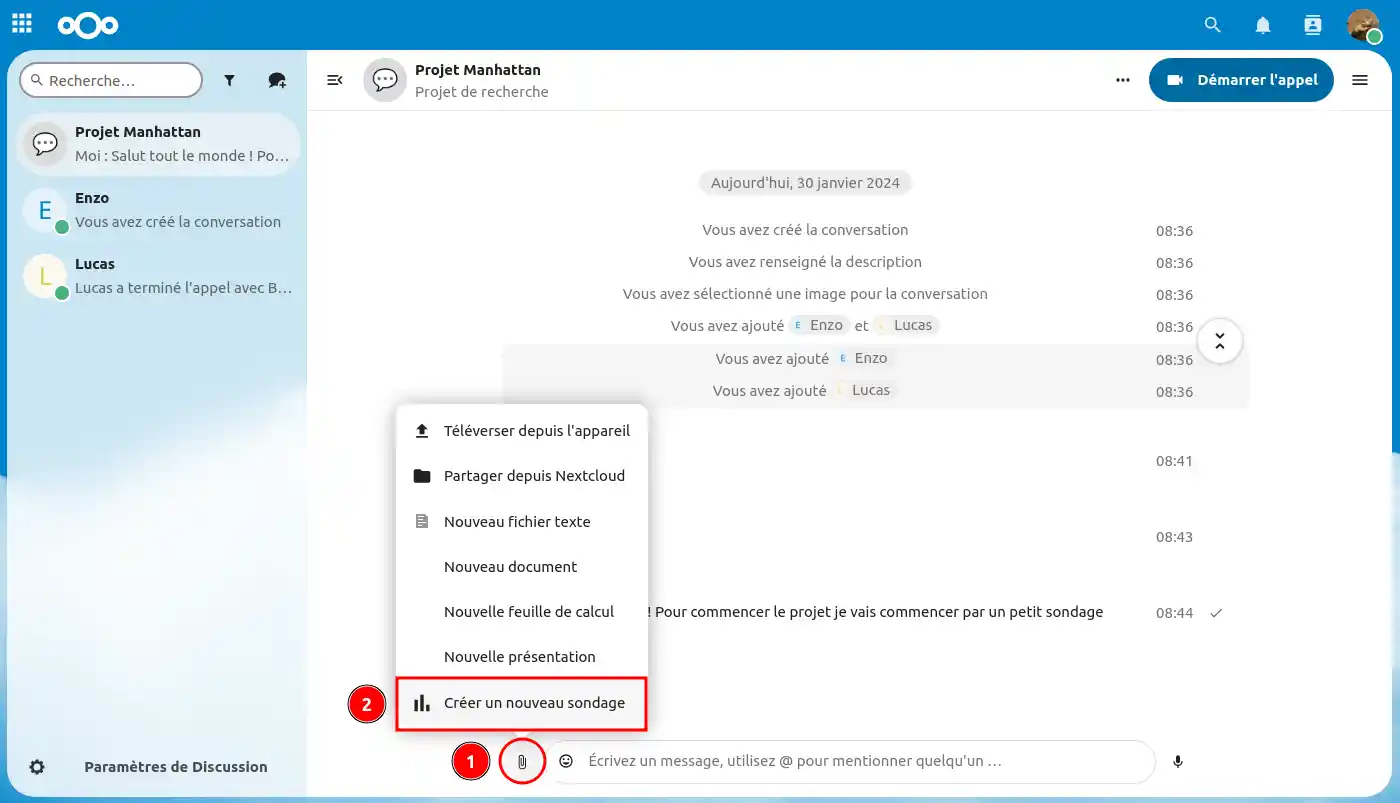
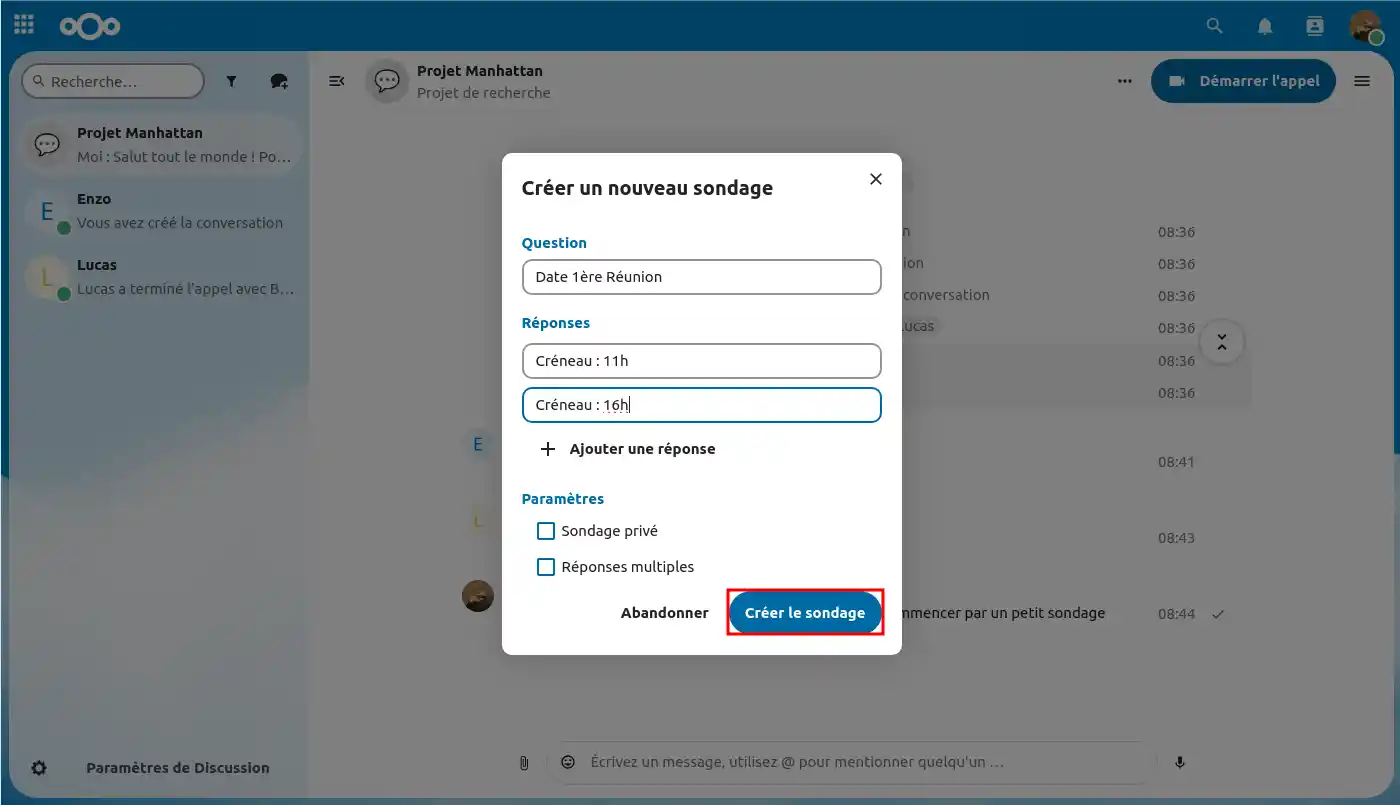
Step 2: Here, enter the elements you need to make the poll. Then click on " Create survey" when you're finished.
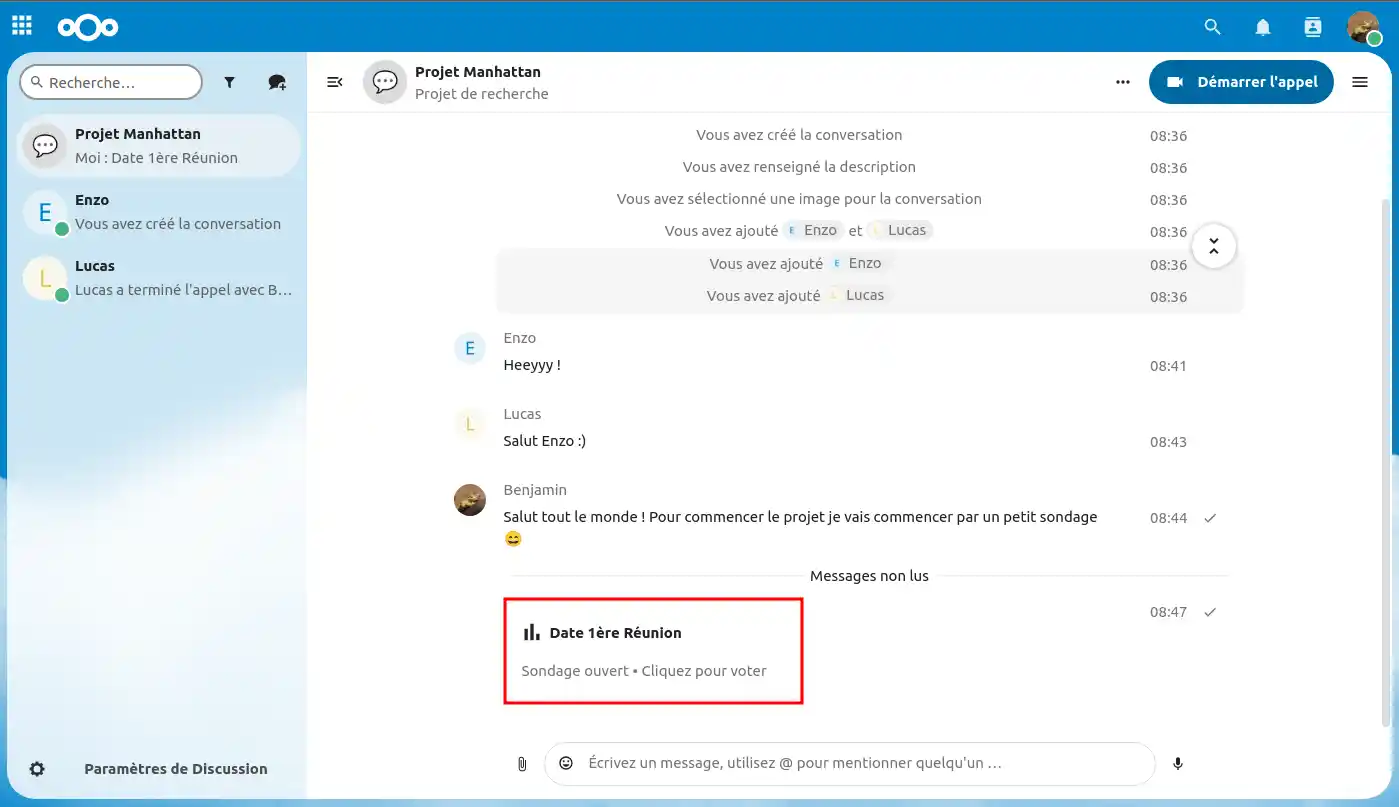
Once the poll has been created, the various people in the group can vote until the creator ends the poll.
To vote, all you have to do is click on the poll, choose what you're interested in and confirm your vote by clicking on the button!
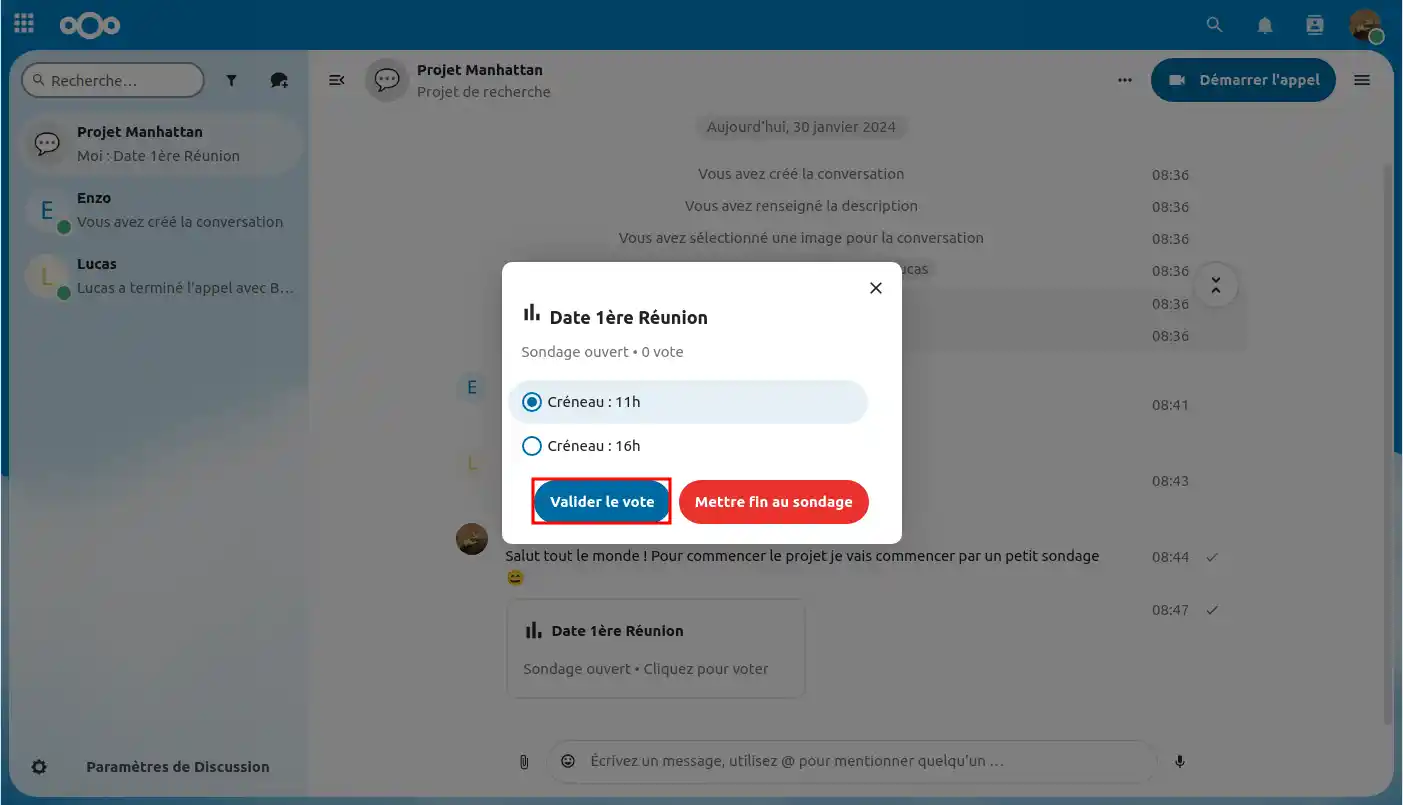
As soon as everyone has voted, I can end the poll by clicking on the "End poll" button (1).
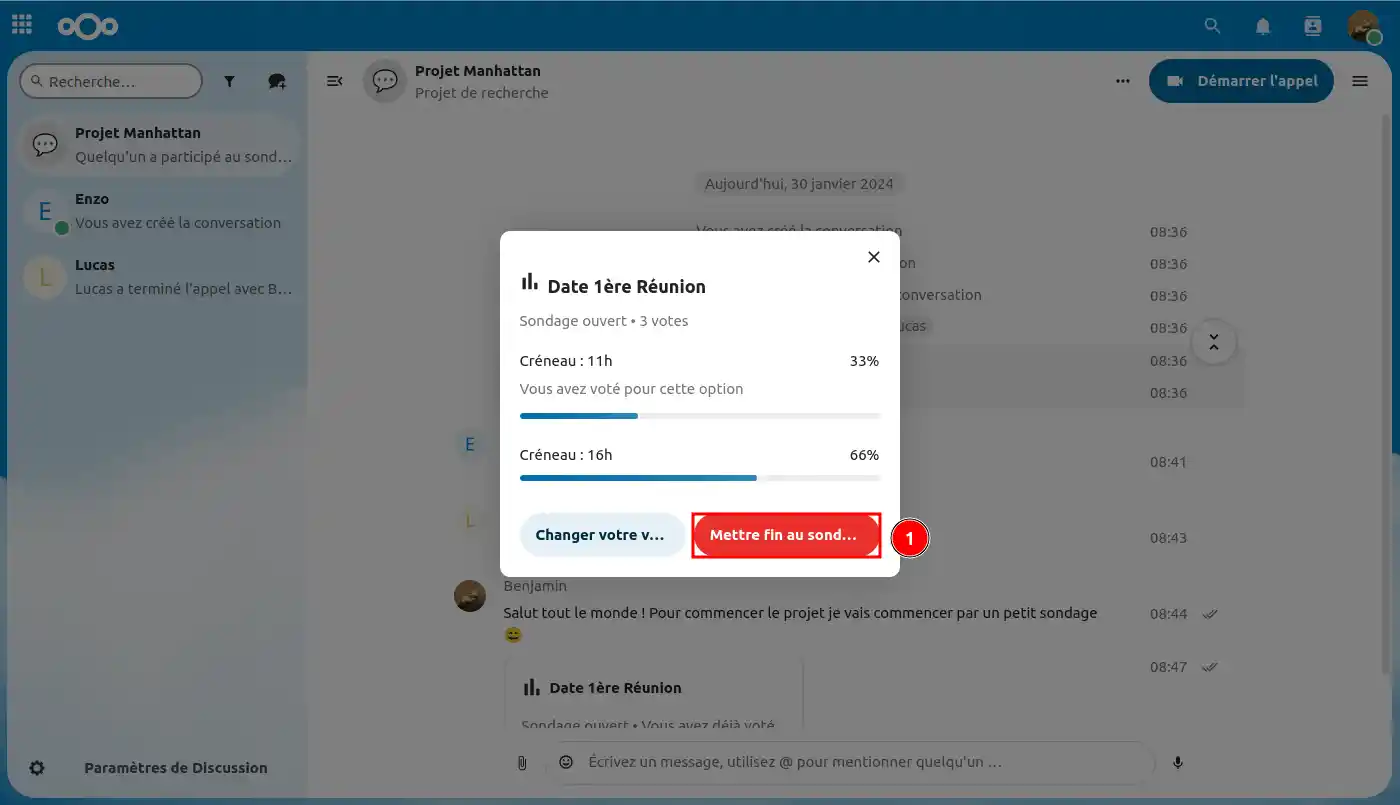
Now you know how to create a poll with your colleagues on a discussion group!
You can react to and interact with messages in a group or in a simple discussion.
To do this, simply hover your mouse over a message, and a small menu to the left of the message will appear.
From this menu, you can :
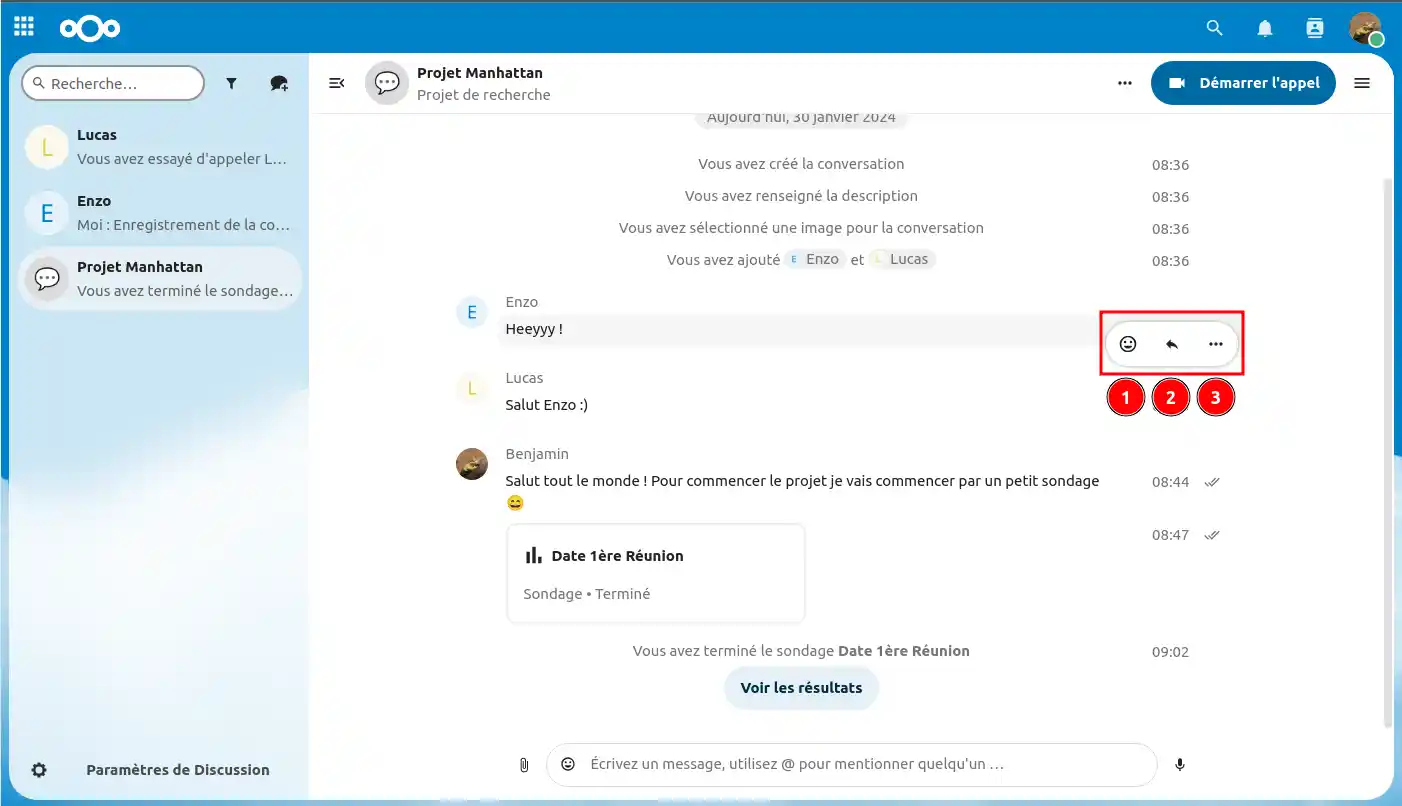
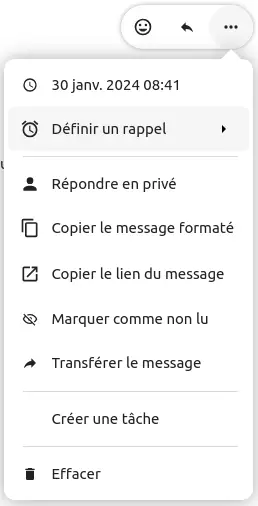
Here are the options you have by clicking on the three little dots:
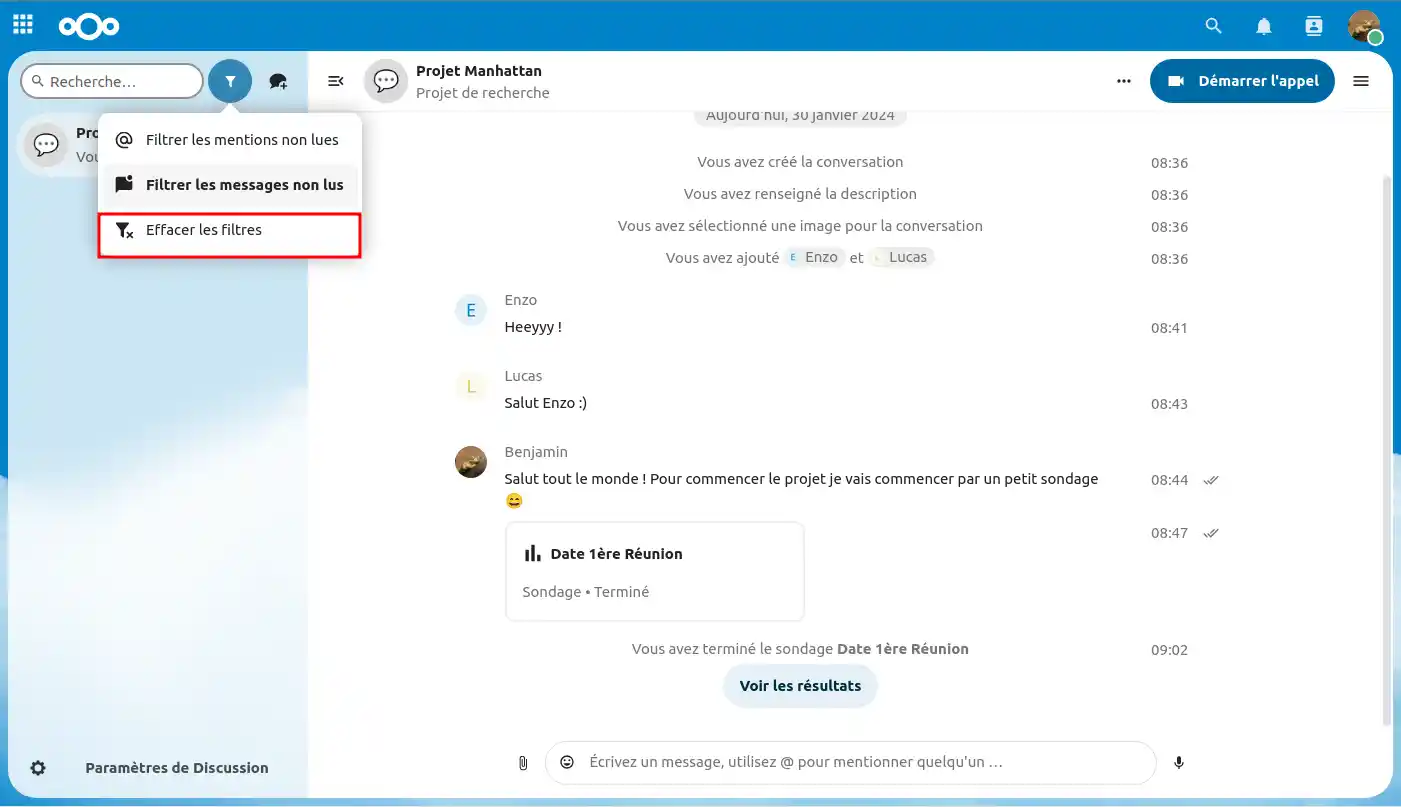
You can filter your conversations using the filter button next to the search field.
There are two filtering options:
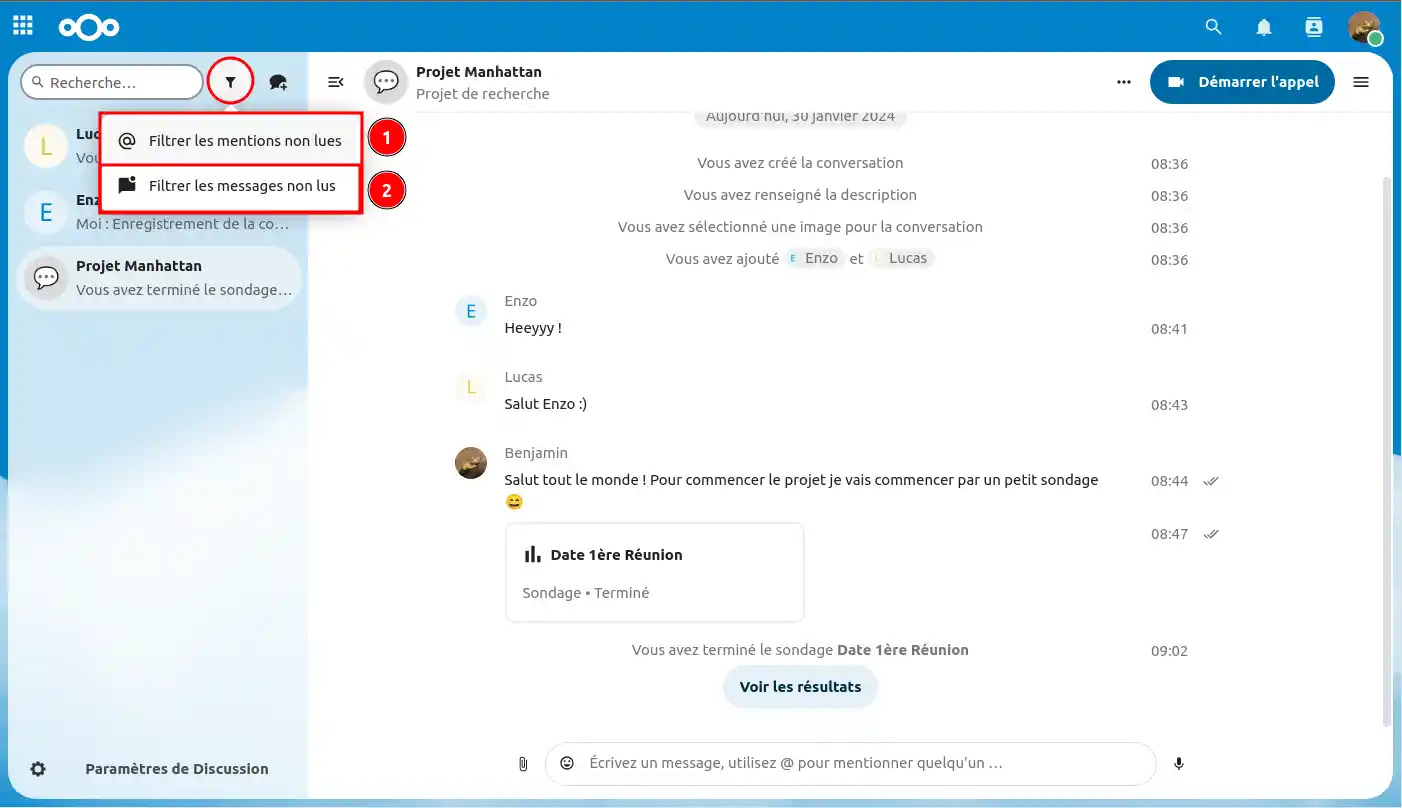
Once you have selected a filter, you can "clear filters" to return to the basic view of your discussions.
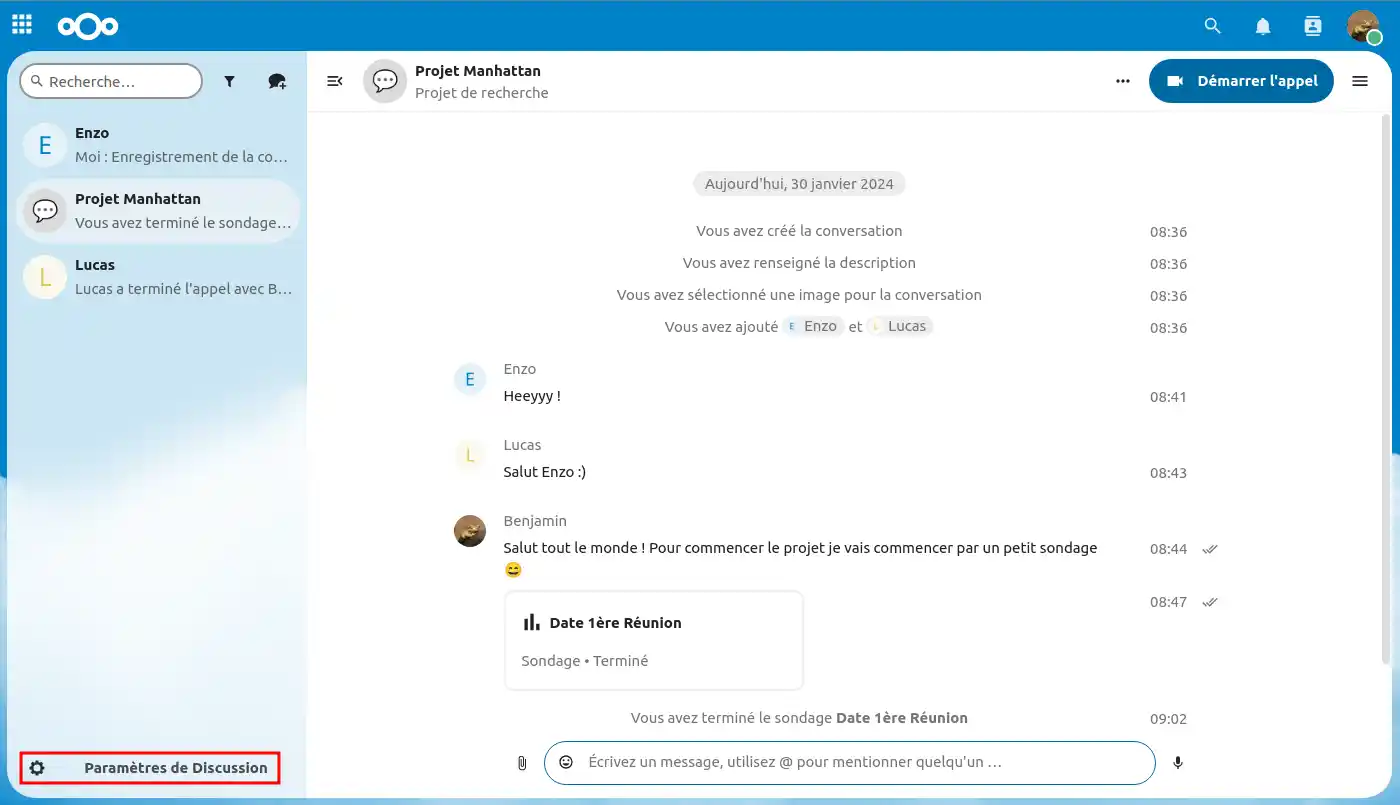
Now let's tackle the Talk application's chat settings.
To get there, click on the 'Chat Settings' button at the bottom left of the screen.
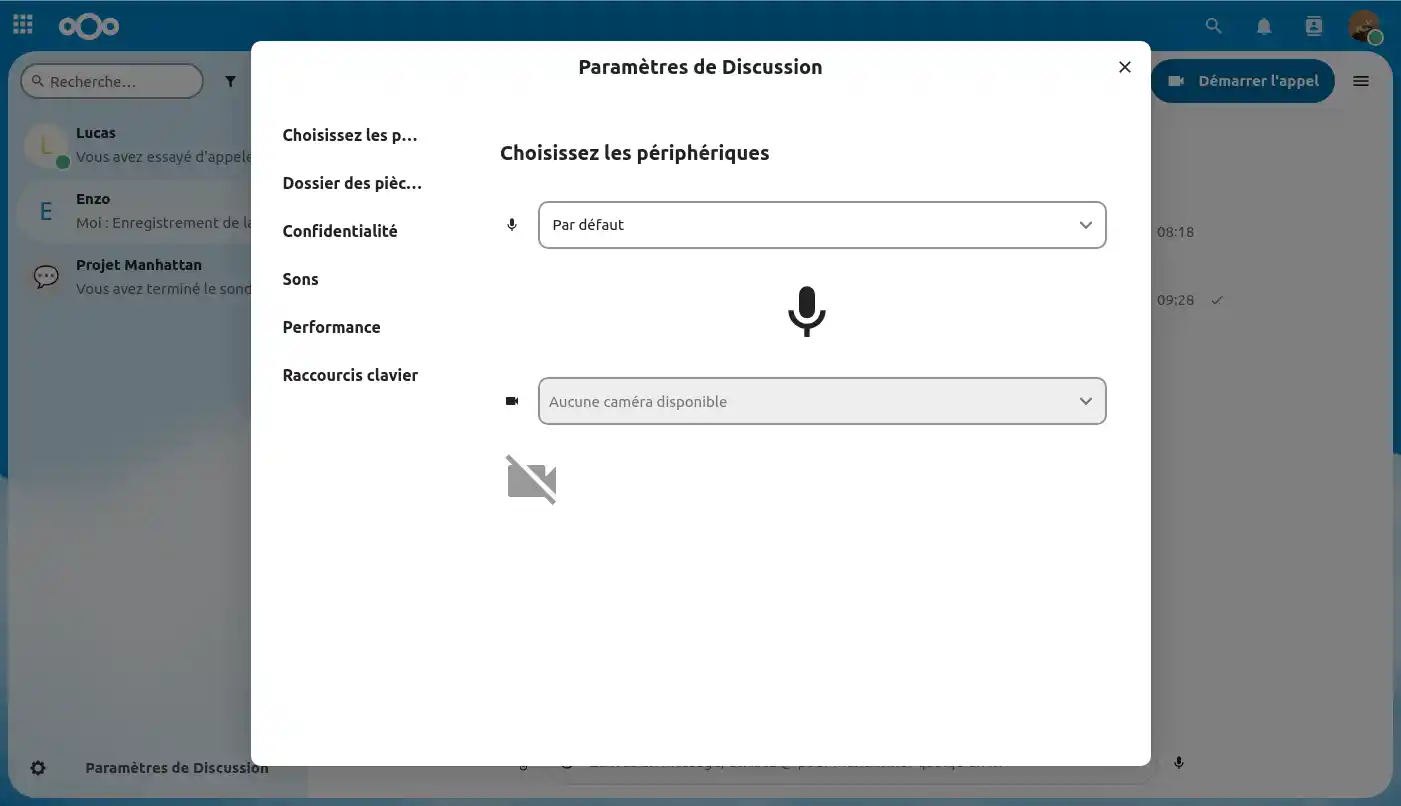
Once the chat settings are open, we start by setting the audio and video peripherals, which comes down to your microphone and speakers (headphones, earphones etc.)
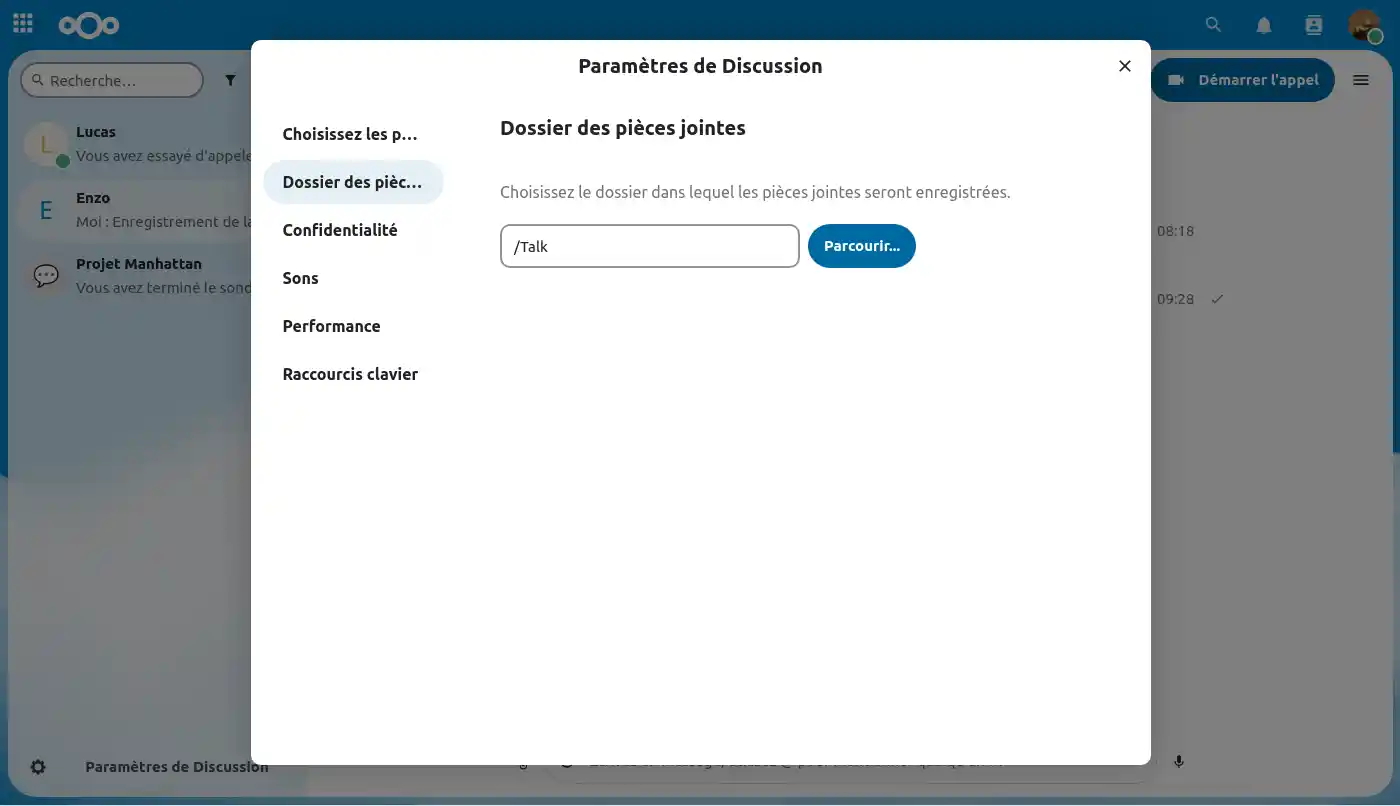
Next, you can set the location in your file space where the various attachments from your Talk chats will be stored.
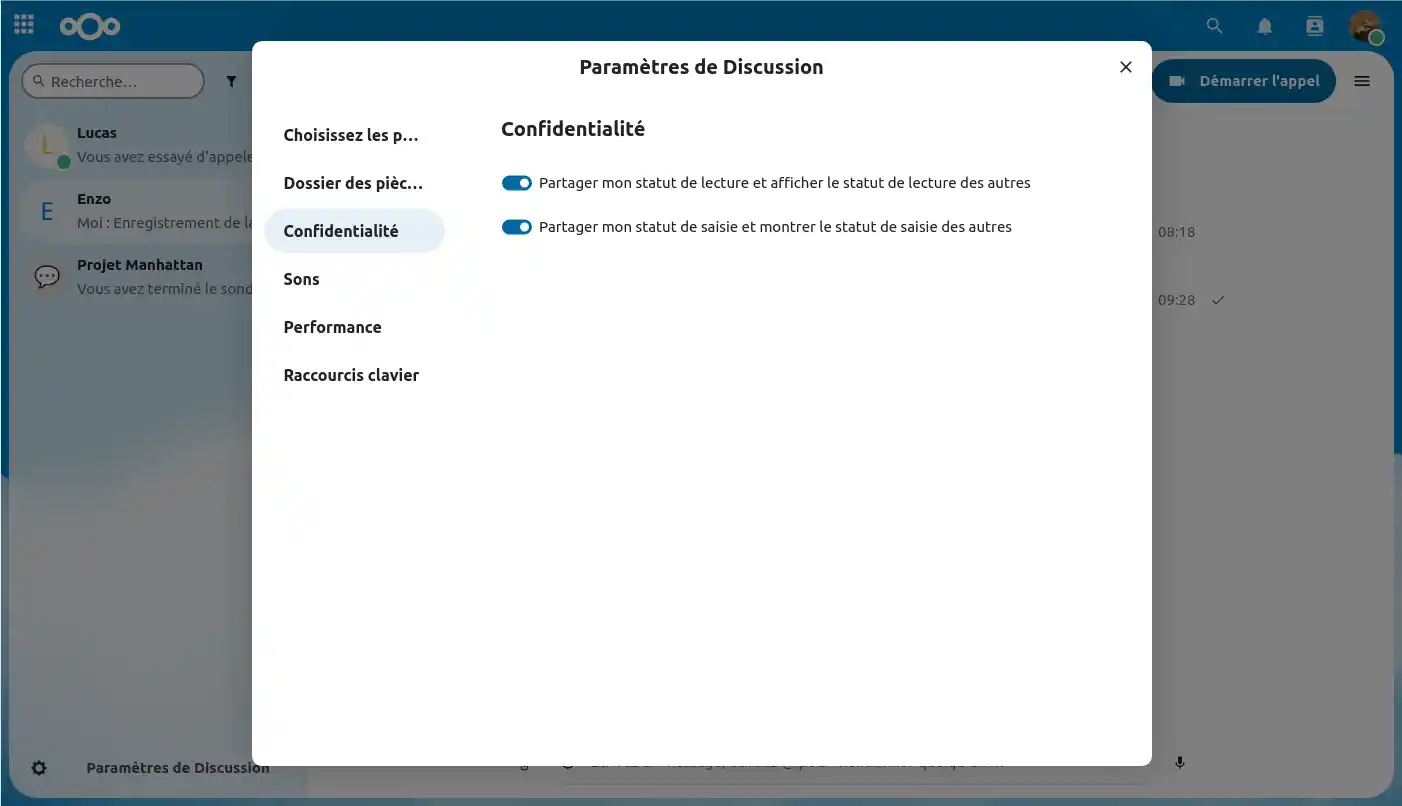
Here you can choose whether or not to share different statuses with other users:
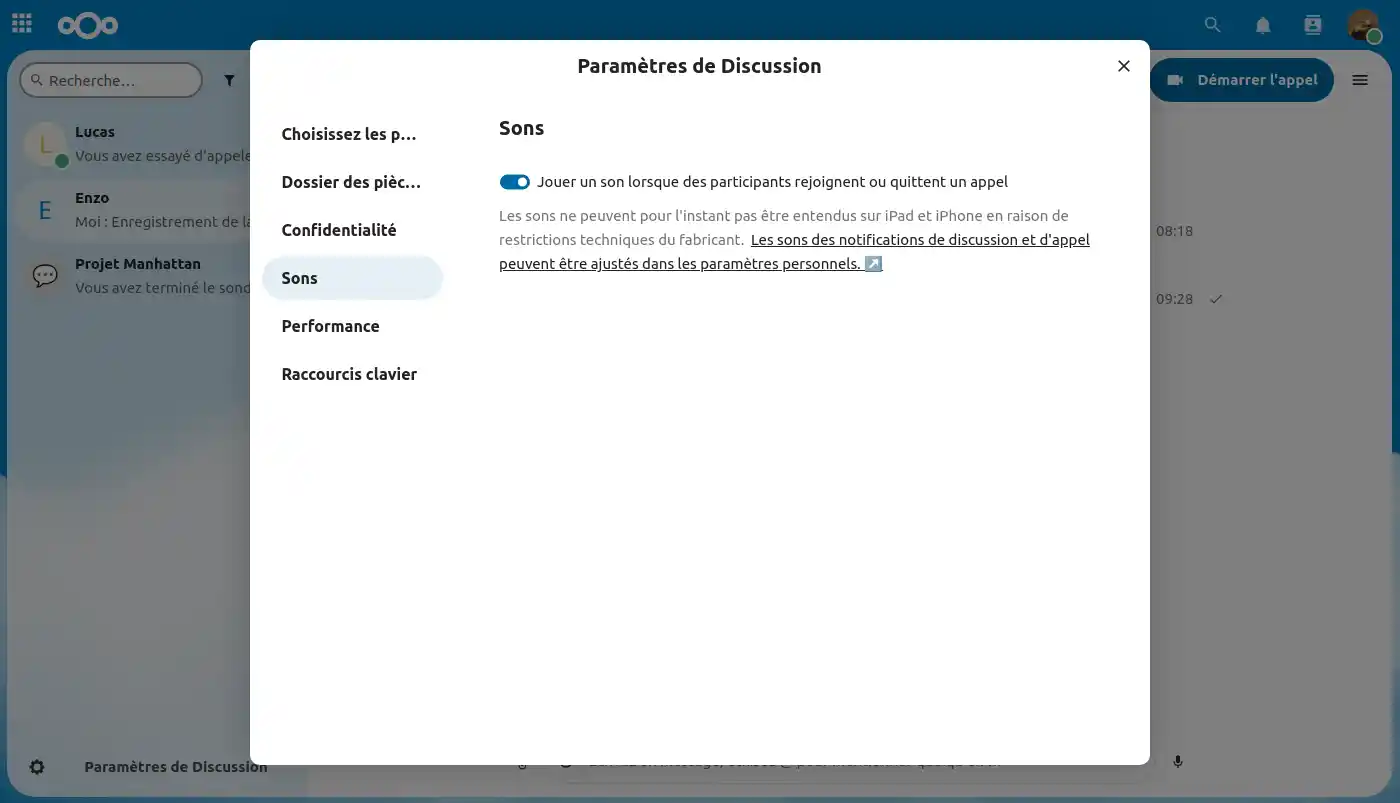
In the sound settings, you can activate or deactivate sounds during video conference calls. Specific sounds are emitted when a member joins or leaves a call.
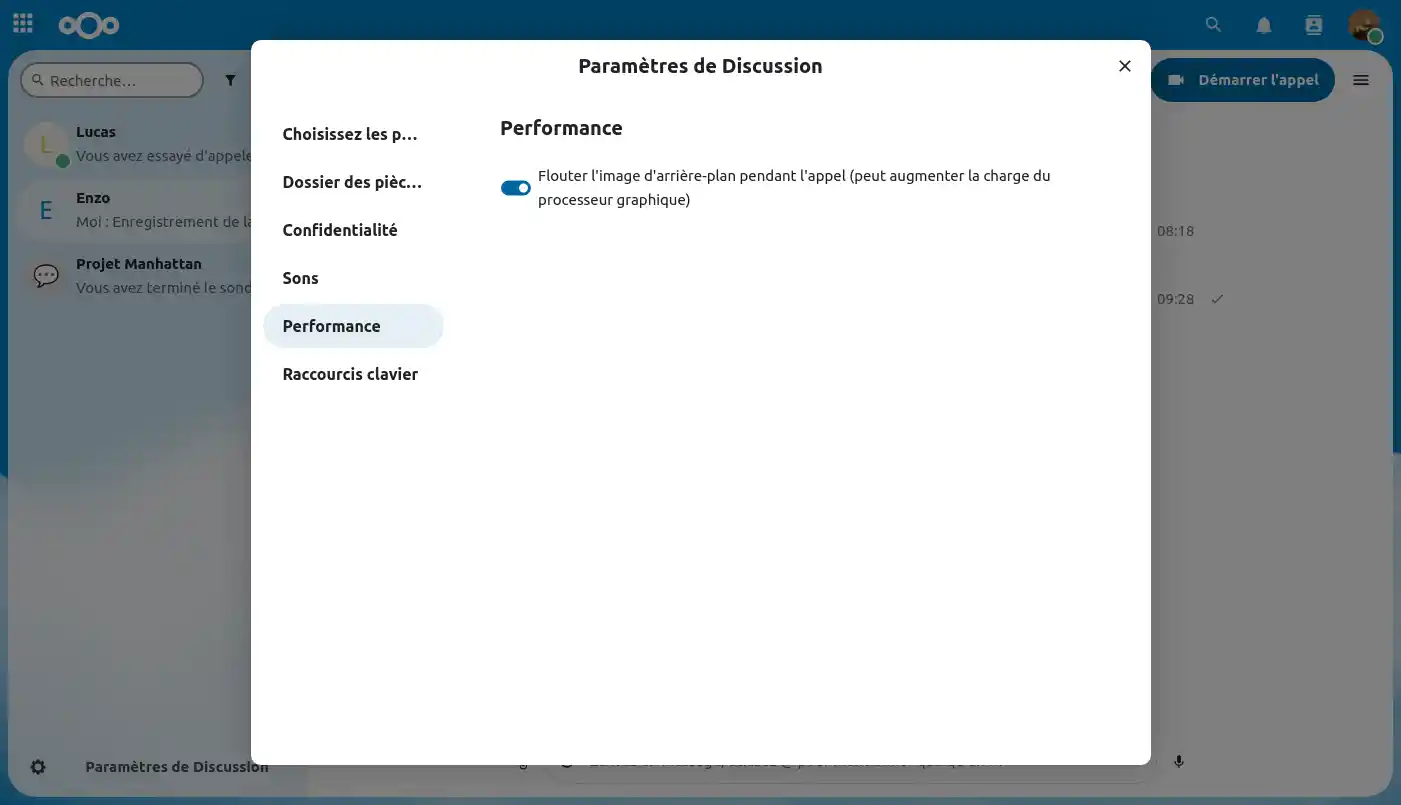
Here you have the option of enabling or disabling background blur during a call, as this feature can increase the load on your graphics processor during the call.
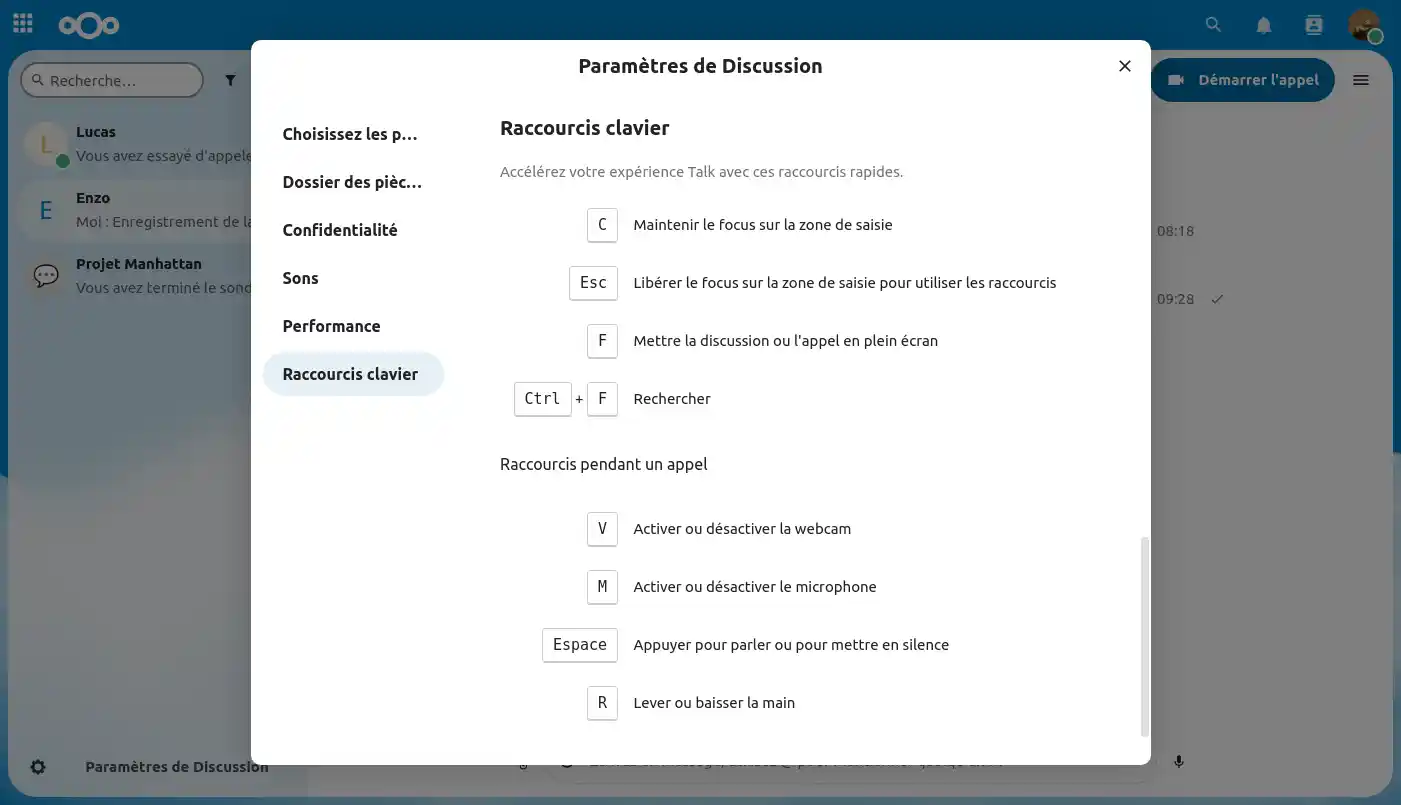
Finally, in this section you can customise various keyboard shortcuts for use during a text chat or video conference.
Now we're going to look at the different settings you can have on a private chat.
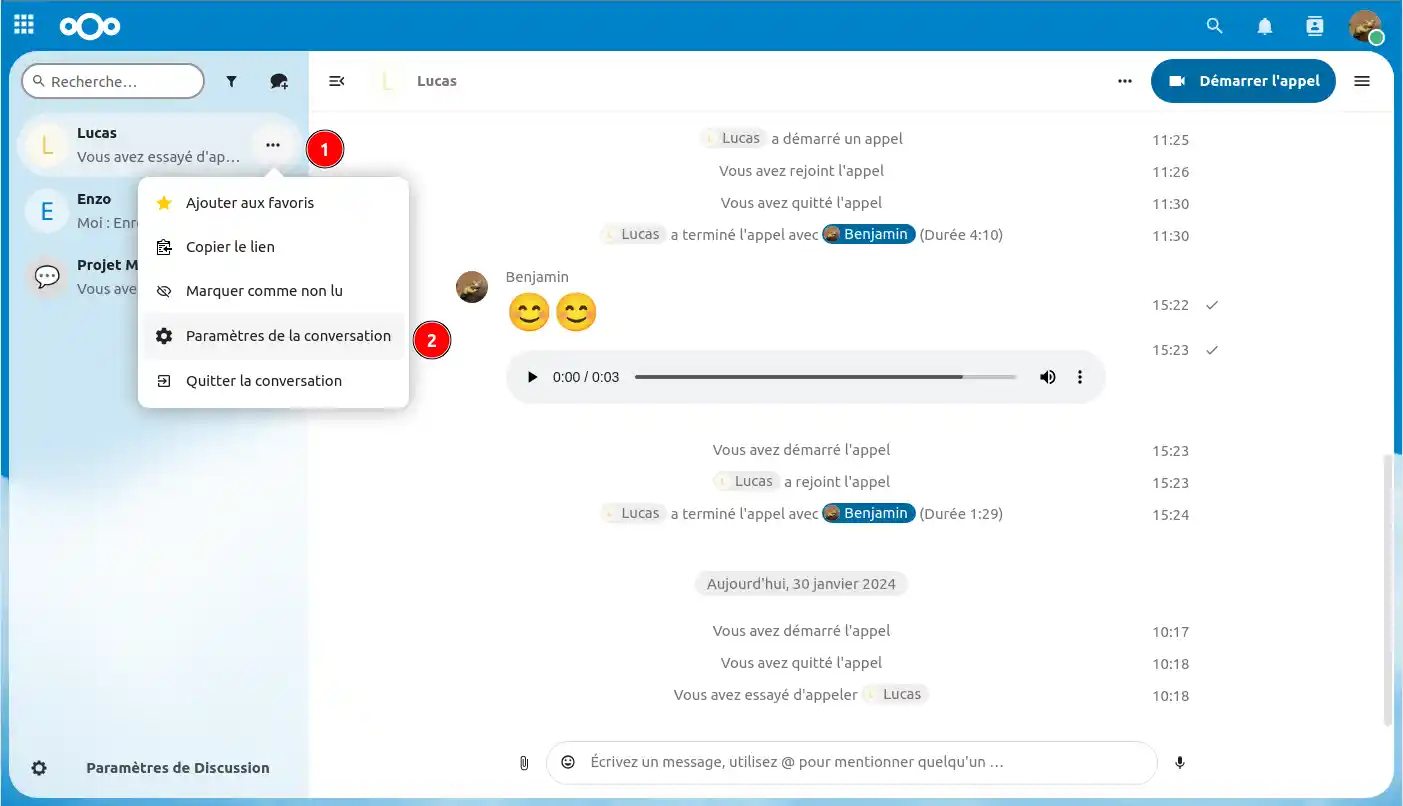
To get there, hover your mouse over a chat in your feed, click on the"three little dots"(1), and go to "Chat settings"(2).
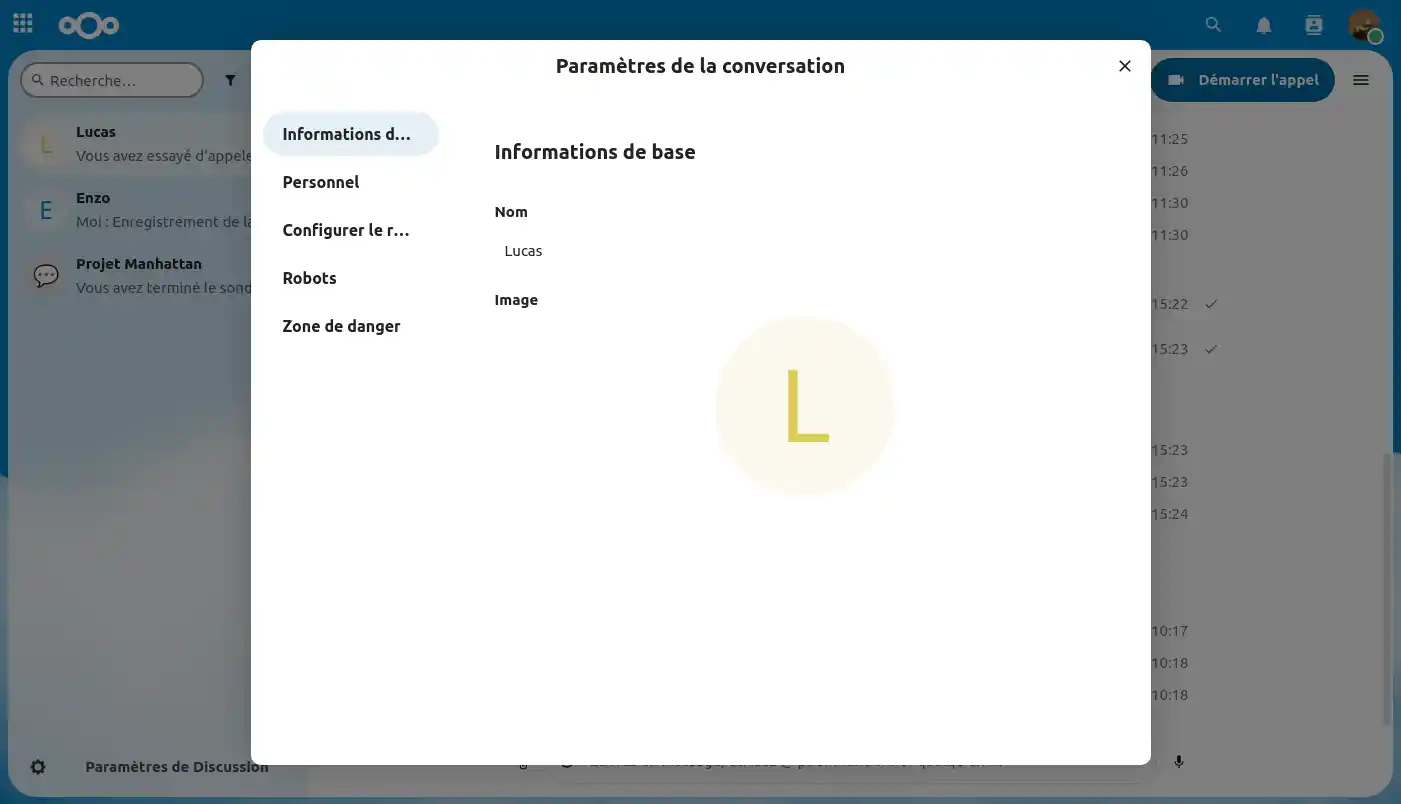
Once in the conversation settings, we have the basic information for a private chat, but here there's nothing to change, as it corresponds to the profile of the person you're talking to.
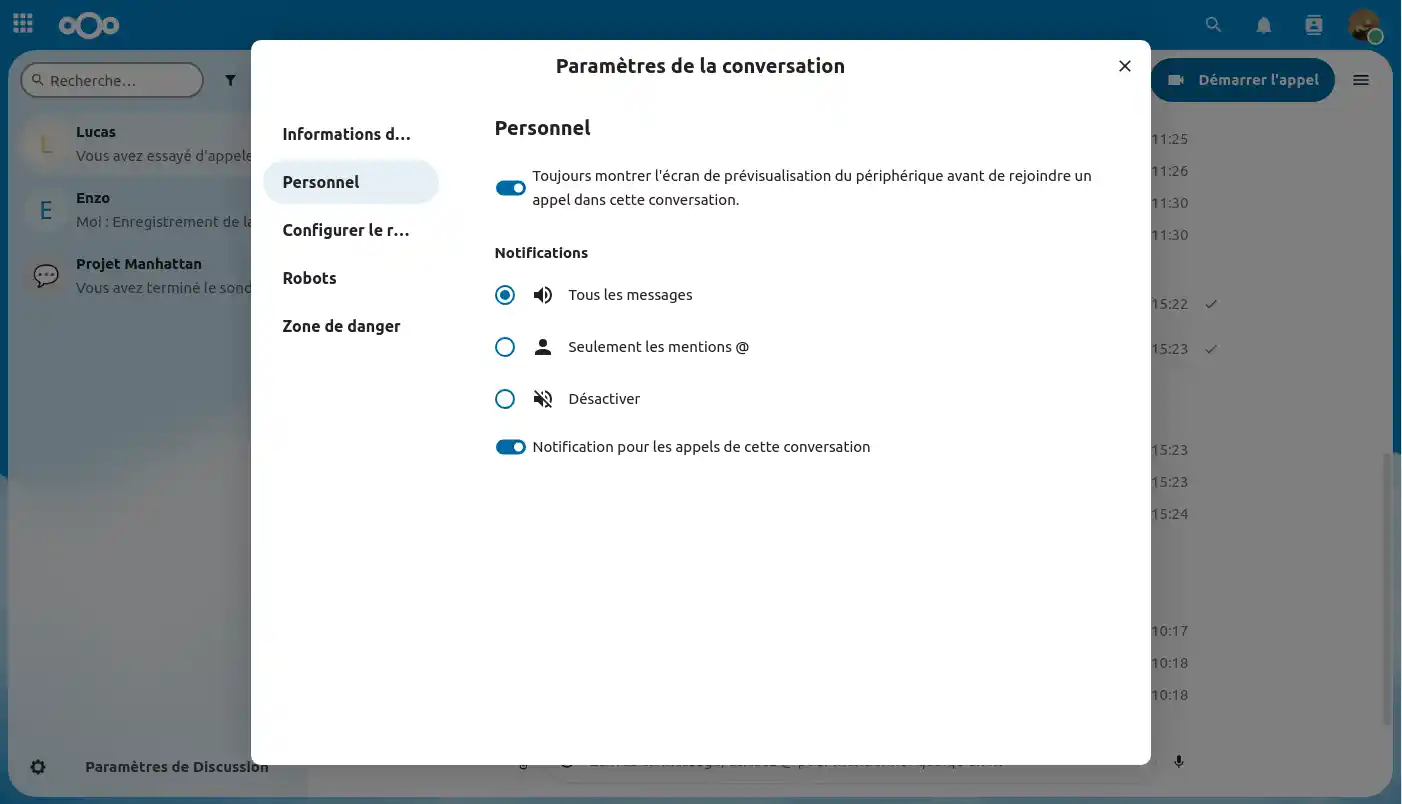
In the ' Personal' section, you can adjust settings that will only impact your user experience, without affecting the other participants in the conversation.
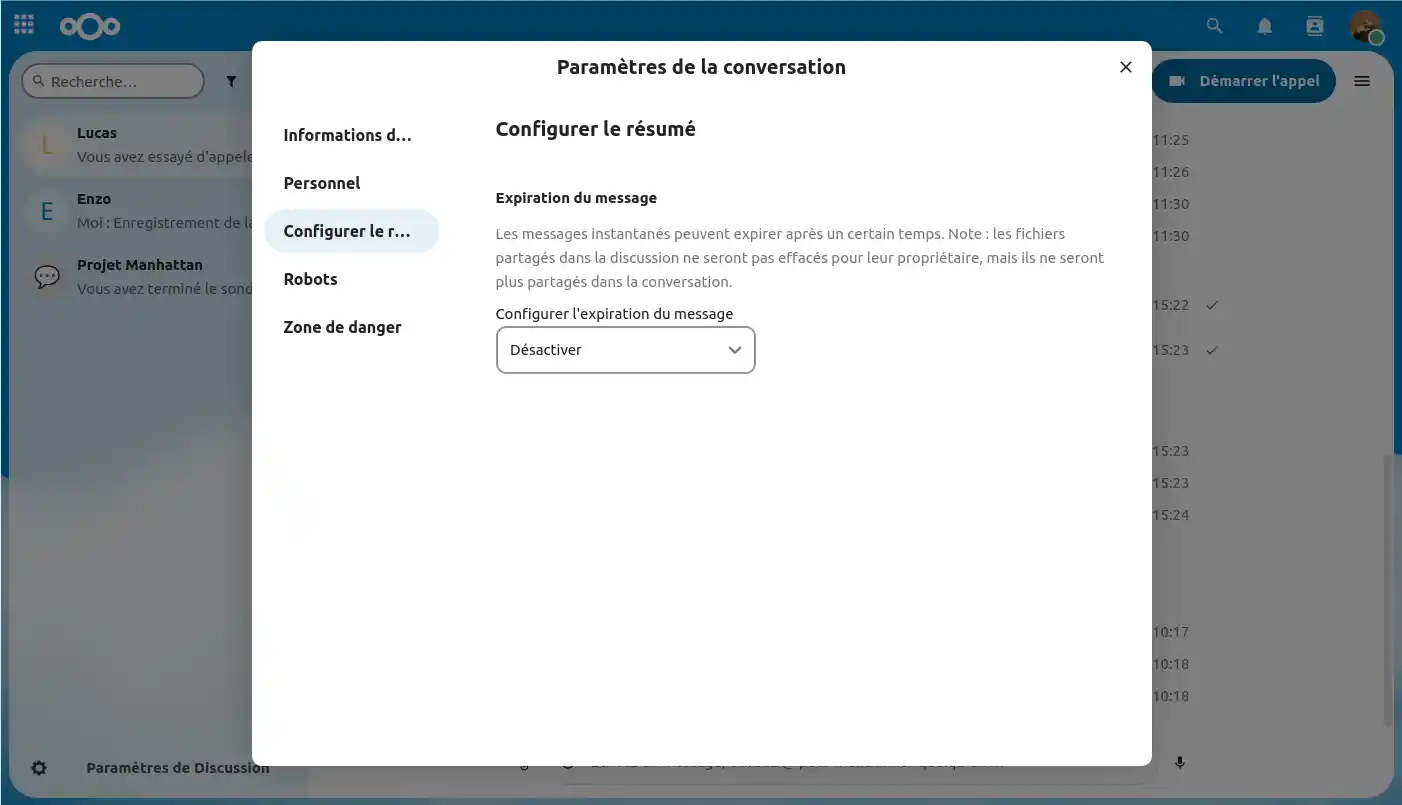
Here you can set an expiry time for messages. This function is particularly useful if you want to ensure that information shared is only available for a limited time.
Currently, on our online file storage services powered by Nextcloud, we do not yet offer a bot feature. However, this option will soon be available. It will allow you to automate certain tasks, use artificial intelligence...

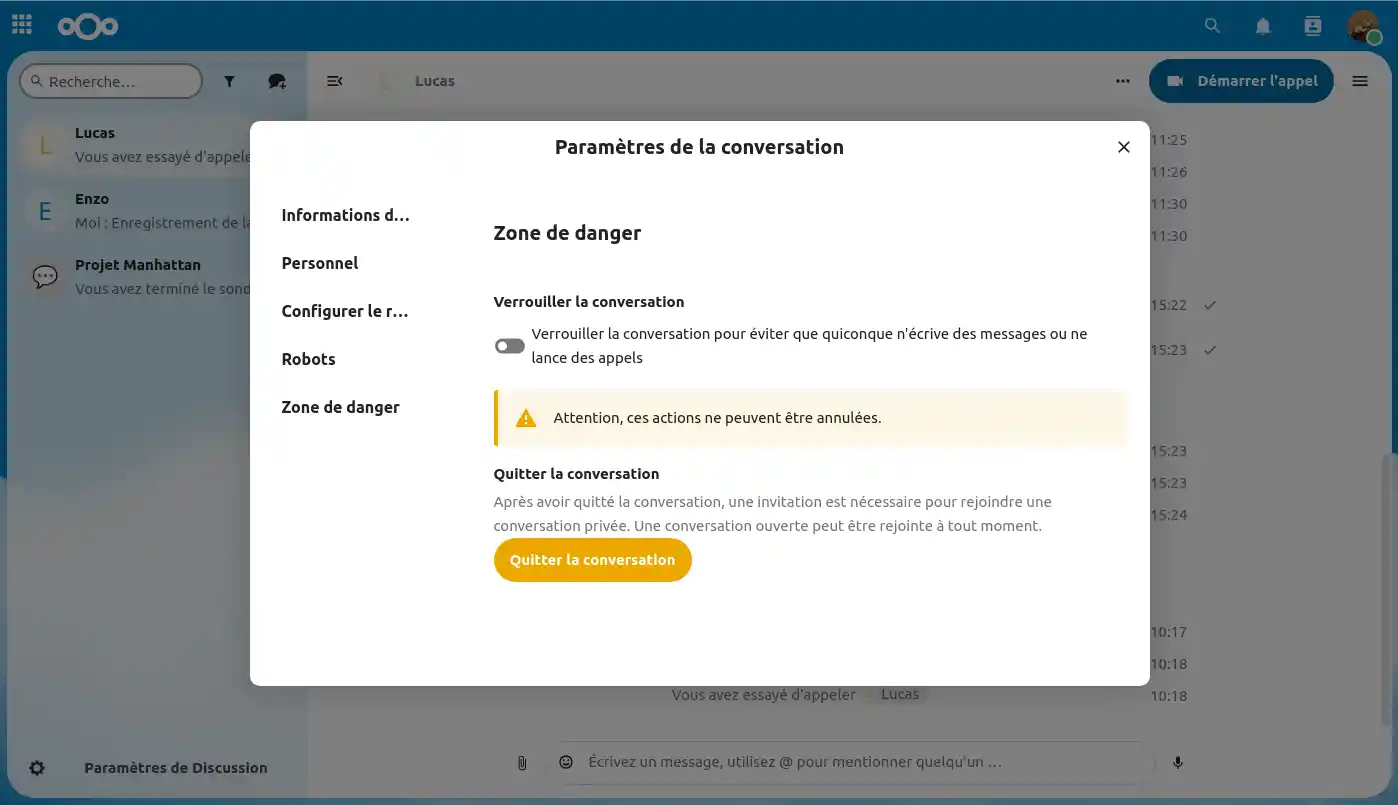
In the 'Danger Zone' section , you can lock the conversation, preventing anyone from writing or making a call, or leaving the conversation.
In this final section, we'll look at the different settings you can have on a group chat.
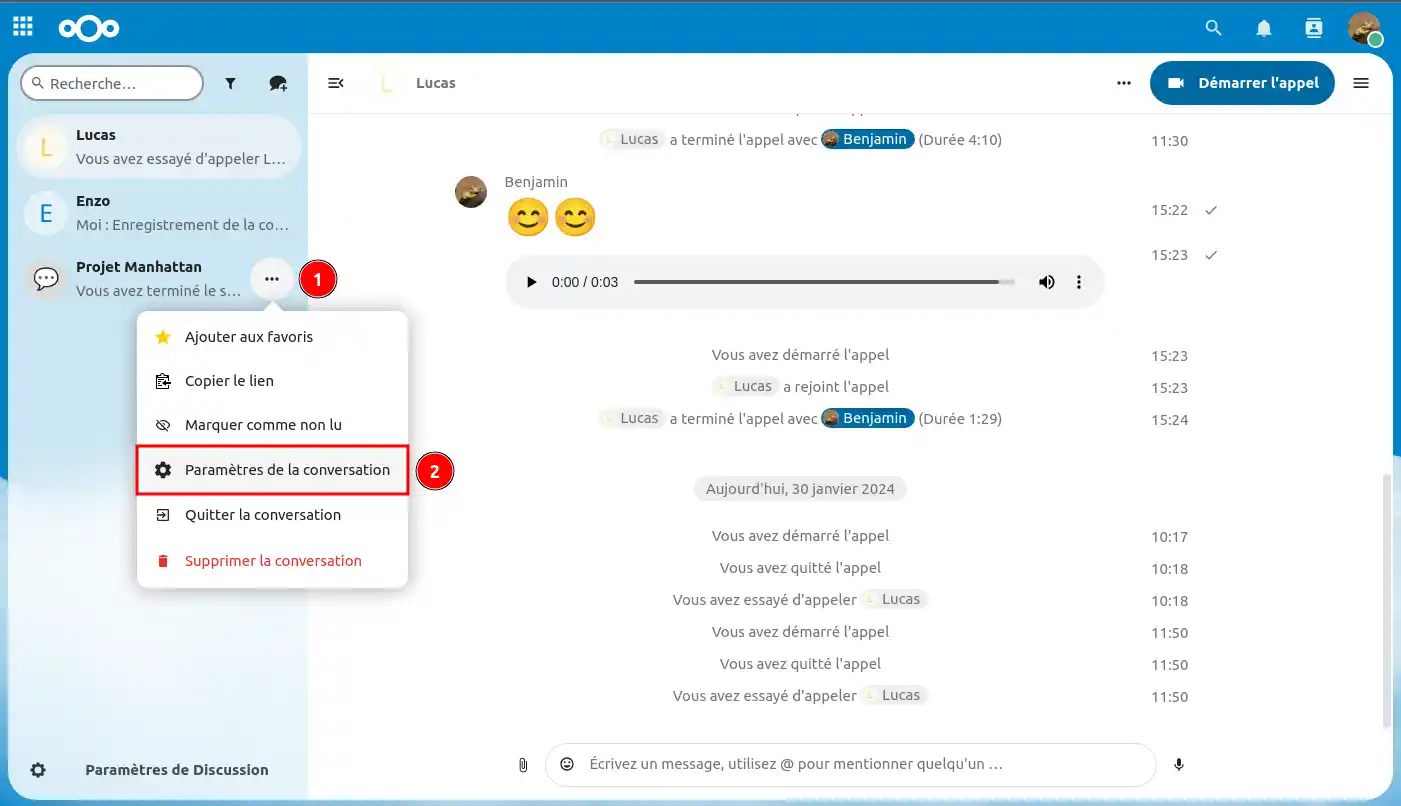
To get there, hover your mouse over a group chat in your feed, click on the"three little dots"(1), and go to "Chat settings"(2).
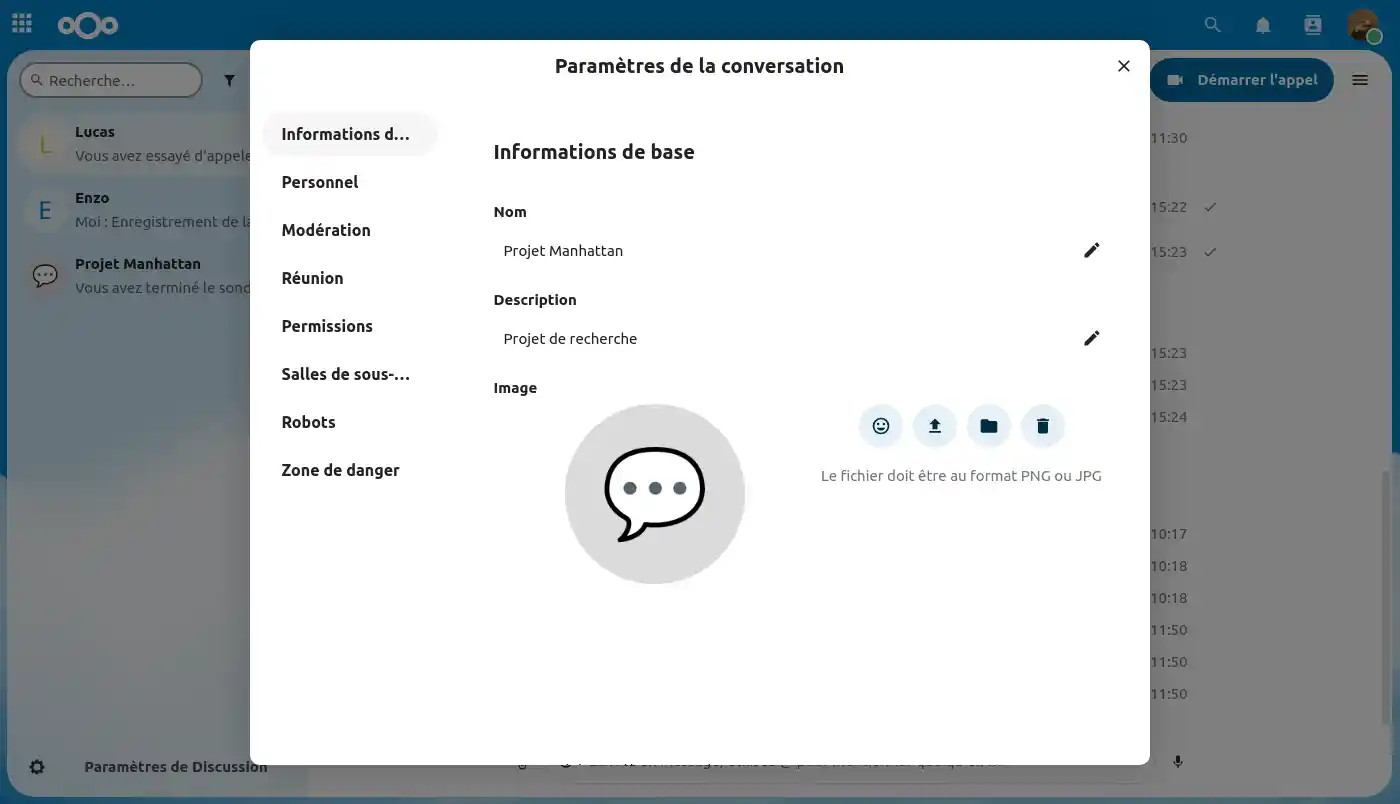
Once you have accessed the group conversation settings.
You can adjust various elements, including
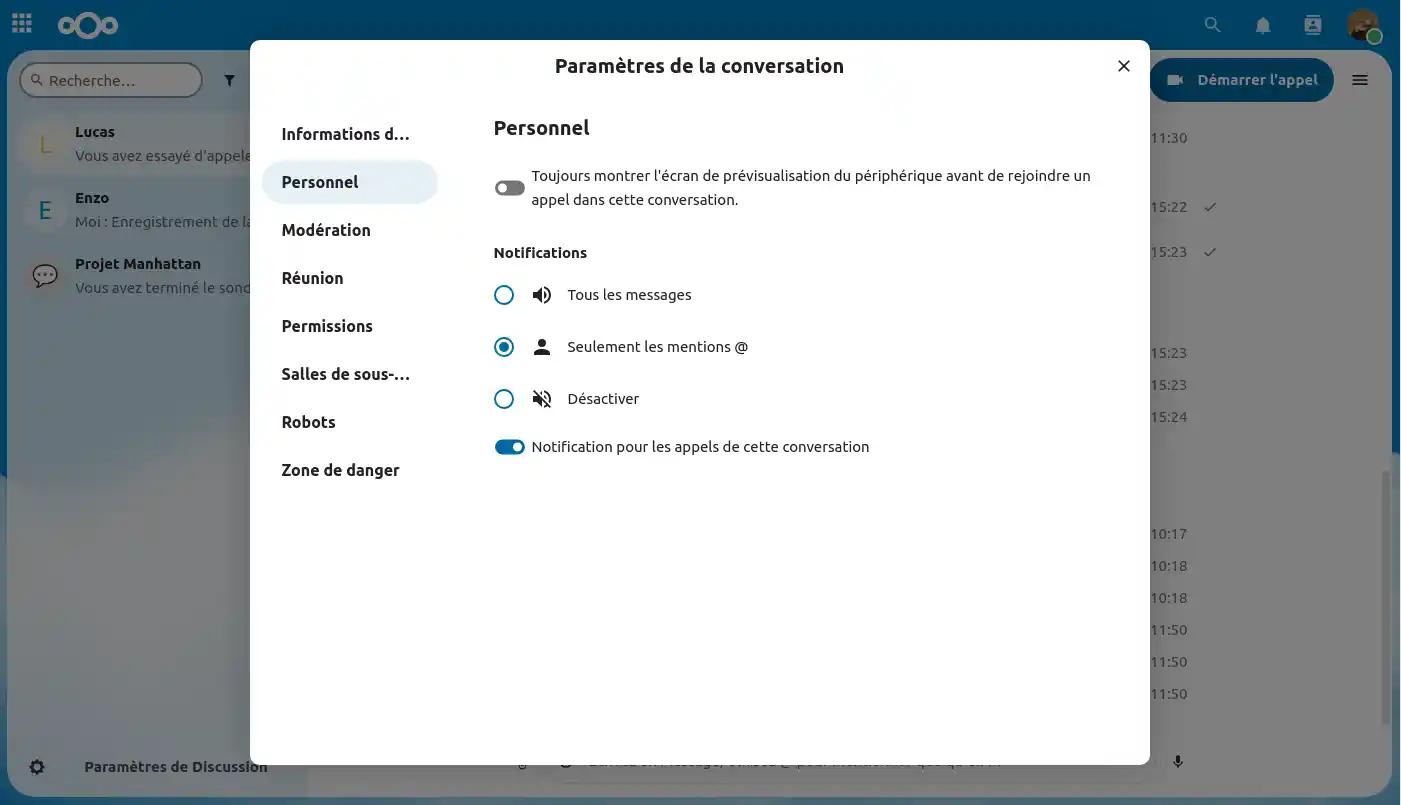
In the "Personal" category, you can customise settings that will only affect your own user experience, without influencing the other participants in the conversation.
Here you'll find some moderation settings for your group conversation:
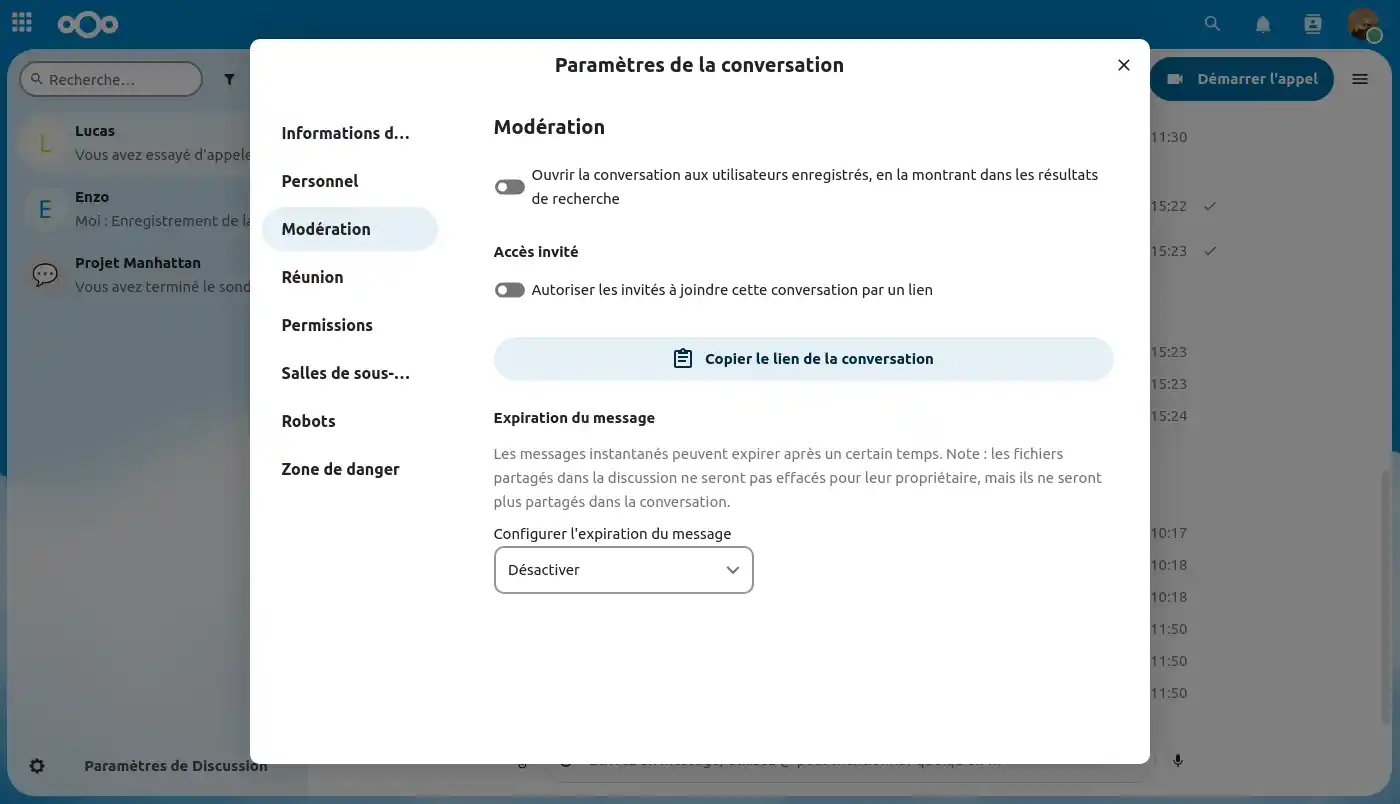
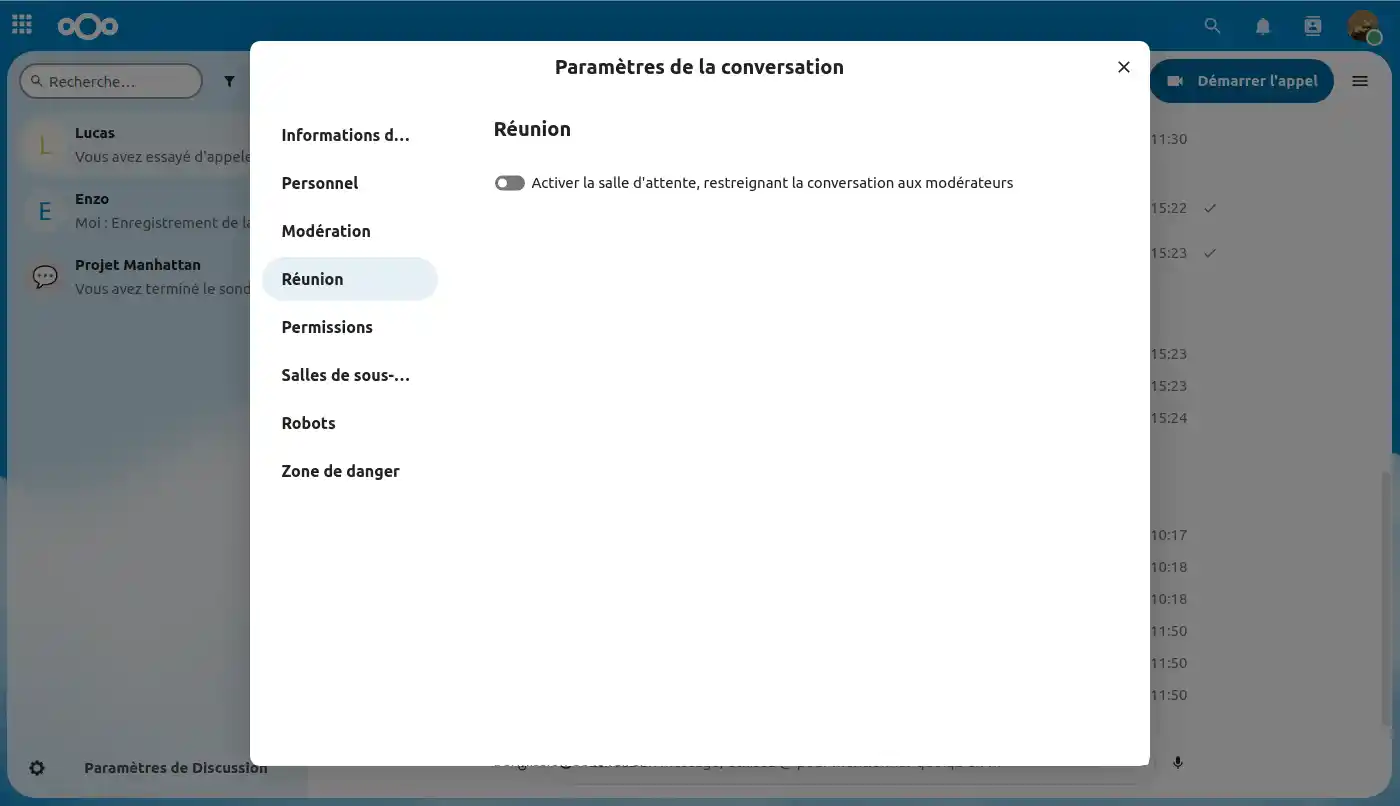
The waiting room lets you display a welcome message to participants before the call starts. This feature is useful, for example, for webinars with external participants.
Here you can manage the permissions that other users have on the conversation.
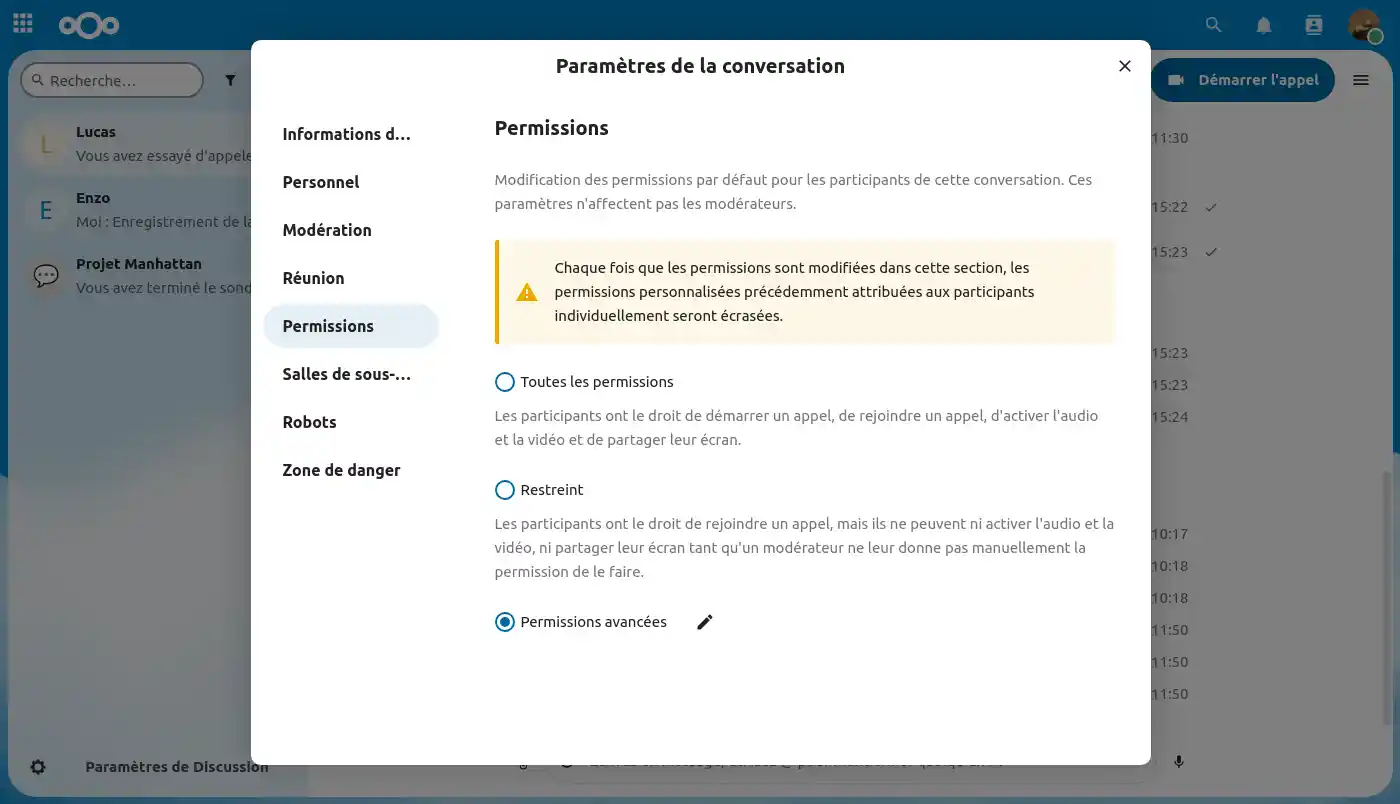
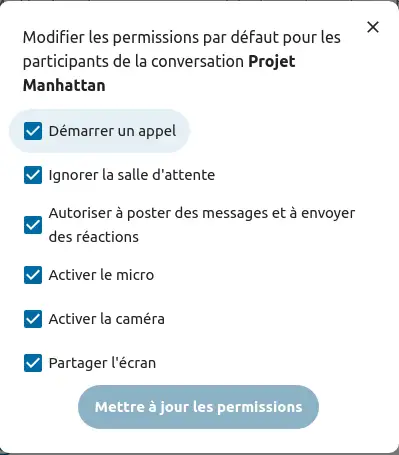
In "Advanced permissions" you have control over all the permissions that can or cannot be set.
Subgroup rooms allow you to divide a call into smaller groups for more targeted discussions. The call moderator can create several rooms and assign participants to each room.
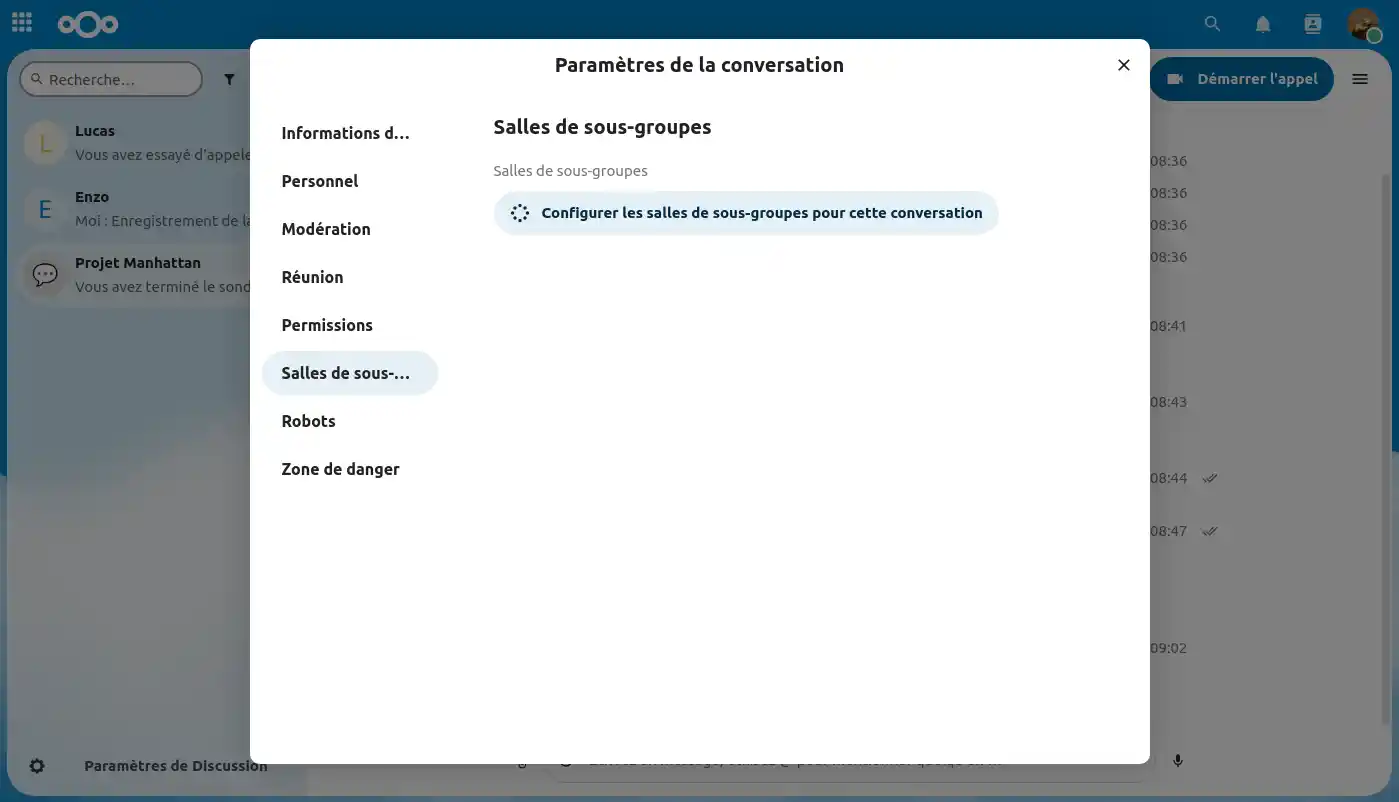
Currently, on our online file storage services powered by Nextcloud, we do not yet offer bot functionality. However, this option will soon be available. It will allow you to automate certain tasks, use artificial intelligence...

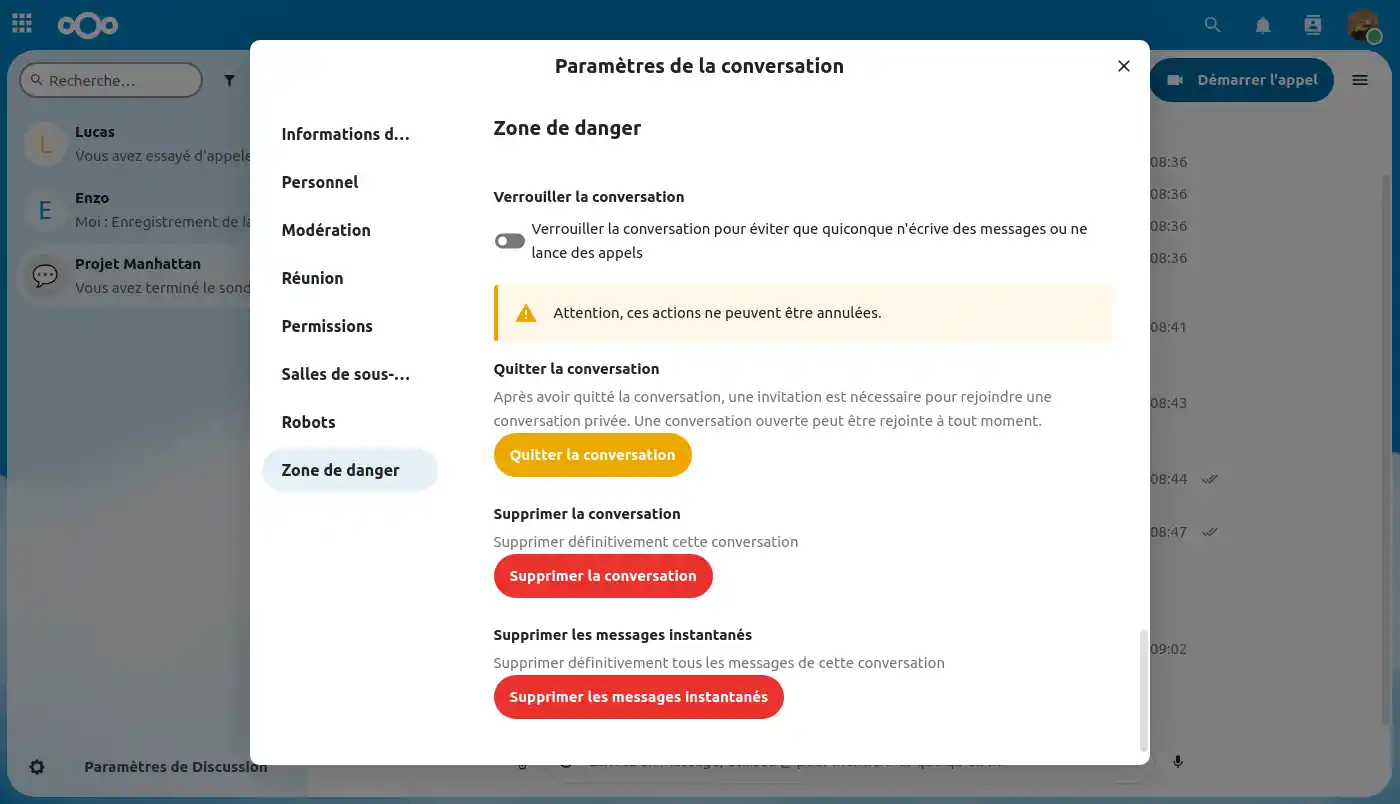
In the 'Danger Zone' section , you can lock the conversation, preventing anyone from writing or making a call, or leaving the conversation.
You can delete the conversation permanently for everyone, or delete all the messages in the group conversation.
You now know how to :
Thanks for reading! If you have any further questions or need assistance, please do not hesitate tocontact our support team, who will be happy to help. If you don't yet have an online storage package or would like to upgrade to a cloud storage package with advanced features, please consult this documentation to place your order, and find information about the Nextcloud and Nextcloud Pro packages here.
Rate this article :
This article was useful to you ?
Yes
No
9mn reading
How to designate a user as a Nextcloud Pro manager
11mn reading
OnlyOffice on Nextcloud: The Integrated Editor for Increased Productivity
14mn reading
Customise your Nextcloud cloud storage: your logo, your wallpaper,
9mn reading
Simplify Your Email Management with Webmail on Nextcloud