Rate this article :
3.3/5 | 3 opinion
This article was useful to you ?
Yes
No
Vous avez noté 0 étoile(s)
Sommaire
Procédure
Divi builder is included in ourWordpress web hosting packages. If you would like support for DIVI builder, you must subscribe to a licence directly on the Elegent theme Divi website.
LWS offers 3 premium plugins from Elegant Themes (Divi, Bloom and Monarch). These are regularly updated. Once you are an LWS customer, you will have free access to these plugins by choosing the 'Divi Builder' distribution when installing the Wordpress CMS with our Auto-Installer.
If you have a cPanel package or have already installed Wordpress with this distribution, but do not have access to all the themes or updates, please let us know by giving us the access details for the administration area of your Wordpress site so that a technician can update the licence.
Please note: you will need to take out an Elegant Themes licence to benefit from support. LWS does not provide support for these products.
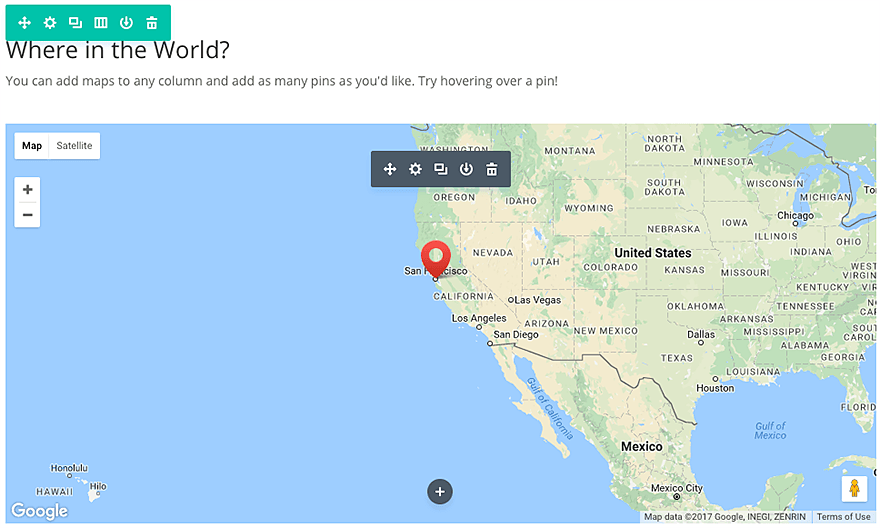
Map modules make it easy to embed custom Google Maps anywhere on your page. You can even add an unlimited number of pins to the map and set a custom viewport start location. The map modules are also available in a Full Width format, so don't forget to check that out too!
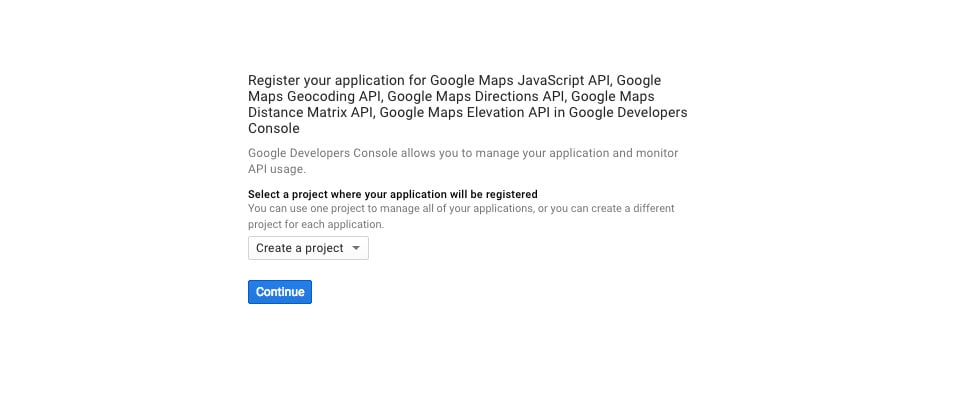
An API key is required to use the Maps module. To obtain an API key, log in to the Google Developers Console, which will guide you through the process, and automatically enable the Google Maps JavaScript API and all related services. The first thing you'll be asked to do is create a new project.
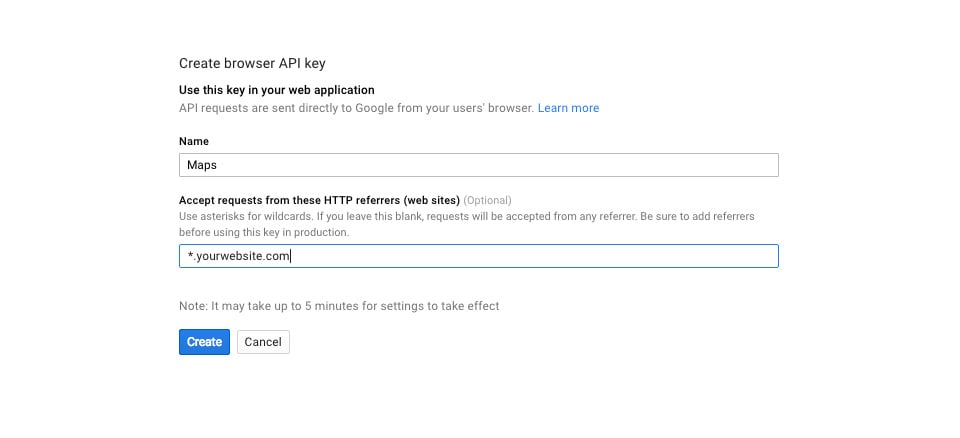
Next, you'll be asked to name your project. You can name the project anything you like. In this example, I've simply called it 'Maps'. You can also enter the domain name of your website (add an * in front of it if you allow access from www.domain.com and domain.com) to ensure that other websites are allowed access to your API key.
 Once you have created a named project, you will be presented with an API key that you can use.
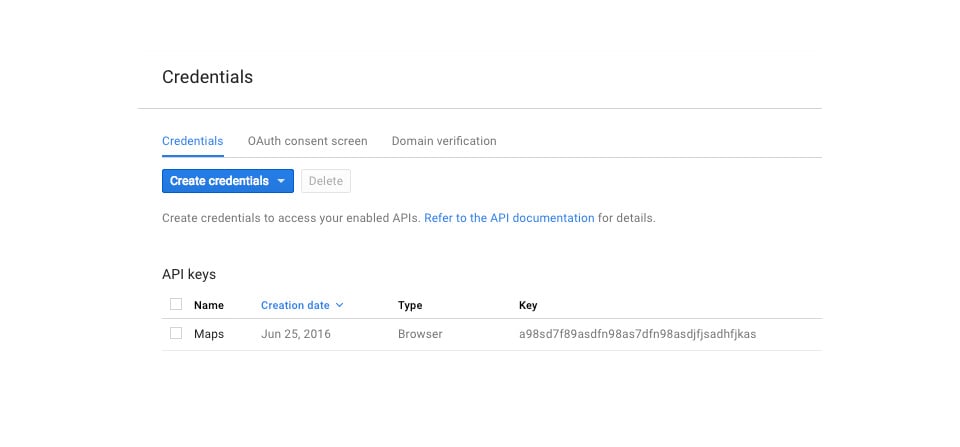
Once you have an API key, you need to copy and paste it into the theme options panel by navigating to : Divi >>> Theme Options >>> General Settings >>> Google Maps API Key
Before you can add a map module to your page, you'll first need to switch to the Divi Builder. Once the Divi theme has been installed on your website, you'll notice a Use Divi Builder button above the post editor every time you create a new page. Click this button to activate the Divi Builder, giving you access to all of its modules. Then click on the Use Visual Builder button to launch the builder in visual mode. You can also click the Use Visual Builder button while browsing your website at the front if you are logged into your WordPress dashboard.
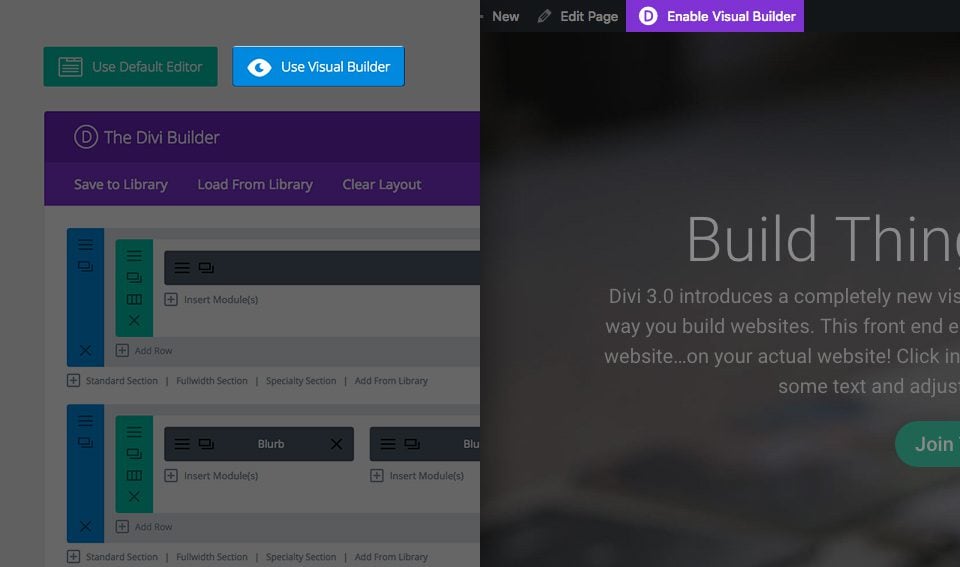
Once you have entered Visual Builder, you can click on the grey + button to add a new module to your page. New modules can only be added within rows. If you are starting a new page, don't forget to add a row to your page first.
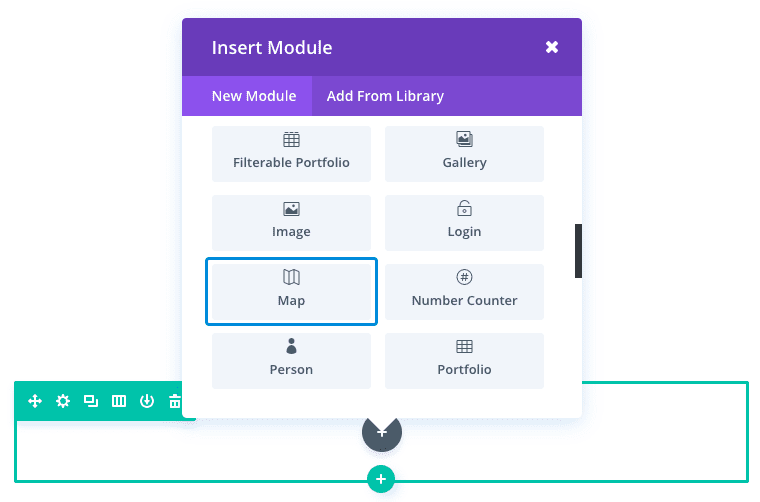
Locate the map module in the list of modules and click on it to add it to your page. The list of modules is searchable, which means you can also type the word "map" and then click the enter button to find and automatically add the map module! Once the module has been added, you will be greeted with a list of options for the module. These options are separated into three main groups: Content, Style and Advanced.
A map module is an excellent way of presenting your company's location on your contact page. And the ability to add multiple pins to your map to showcase different company sites and information is a useful and attractive feature.
For this example, I'm going to add a map module to show the business location and information by adding a custom pin to the map.
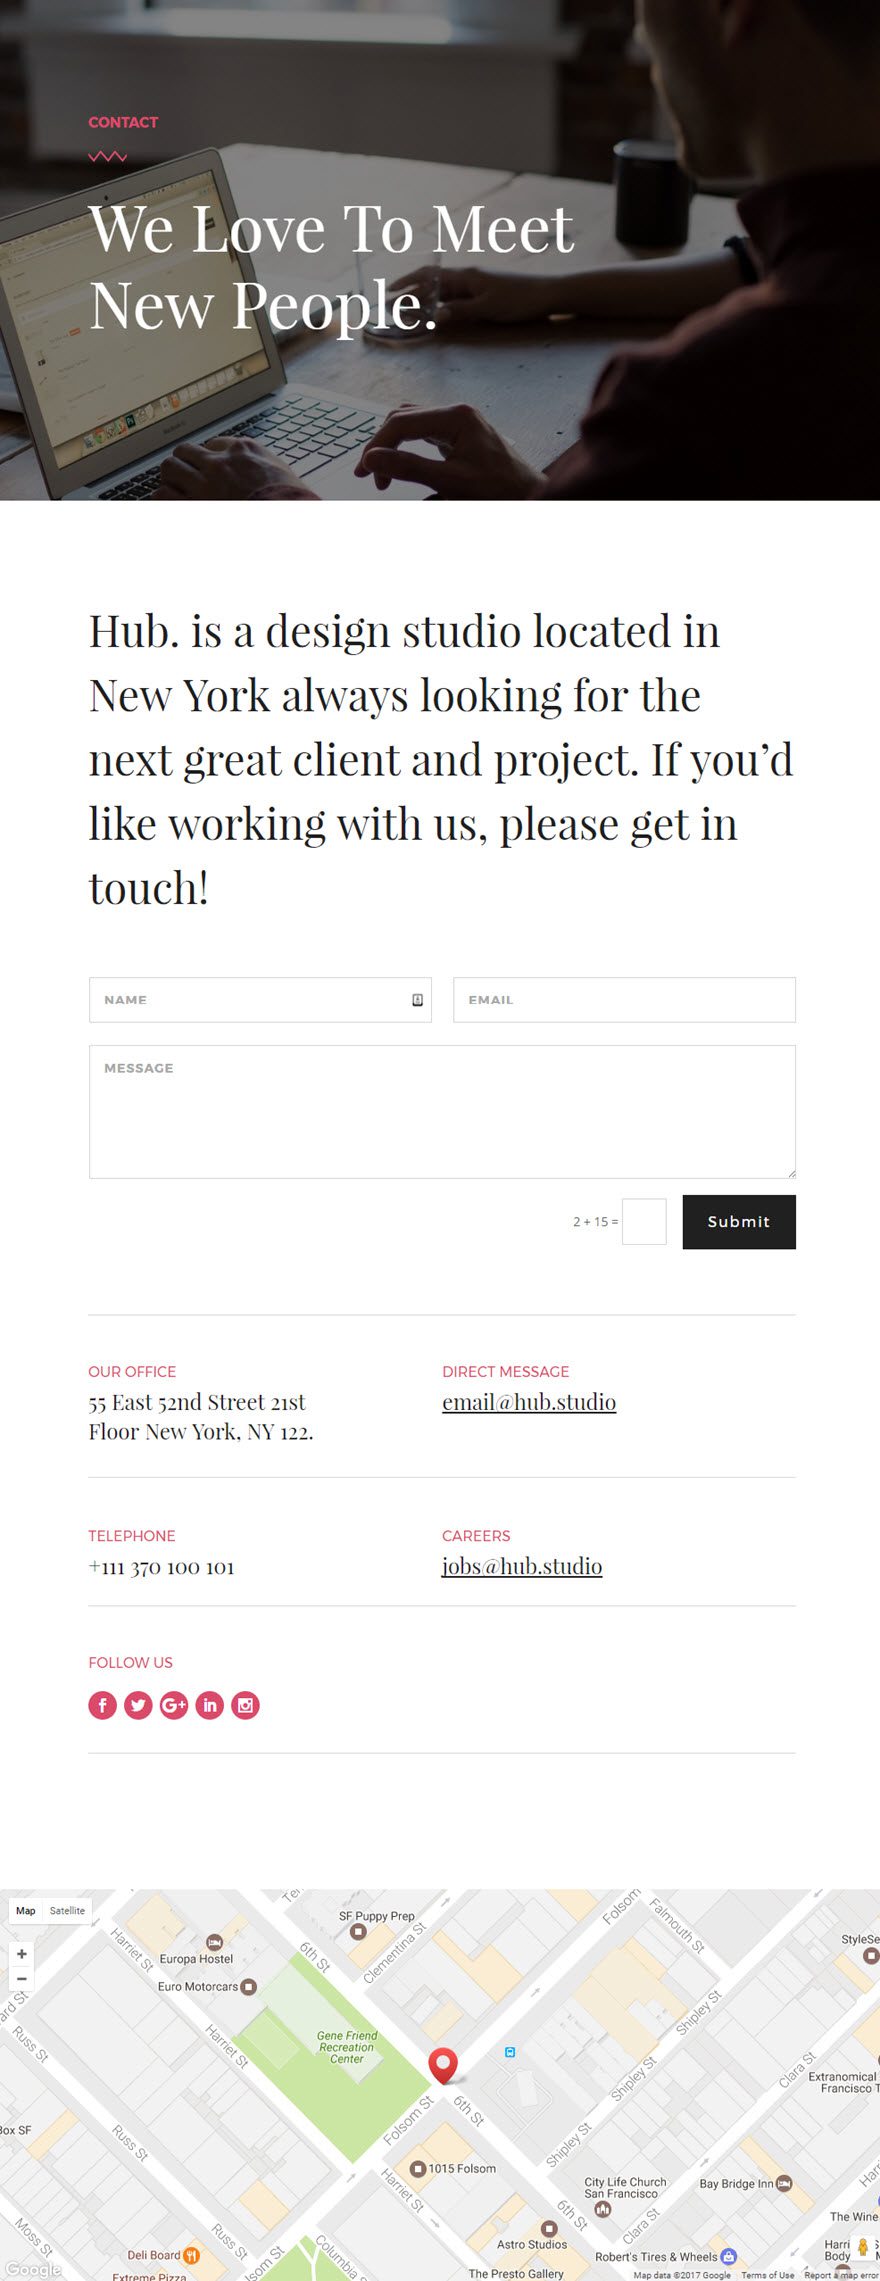
Important: Make sure a valid Google API key has been entered in the Divi theme Options panel. The map module will not work without it.
Using Visual Builder, add a standard section to the bottom of the contact page. Then insert the Map module into your new section. In the Content tab of the Card parameters, enter your company's address under the Card centre address option. The map centre address is for the central point of the map.
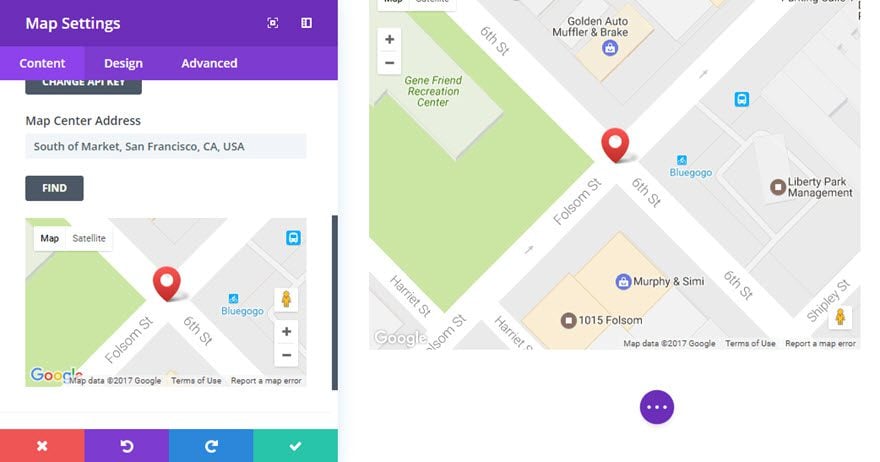
Then click + Add a new item to create your first pin.
Fill in the fields provided.
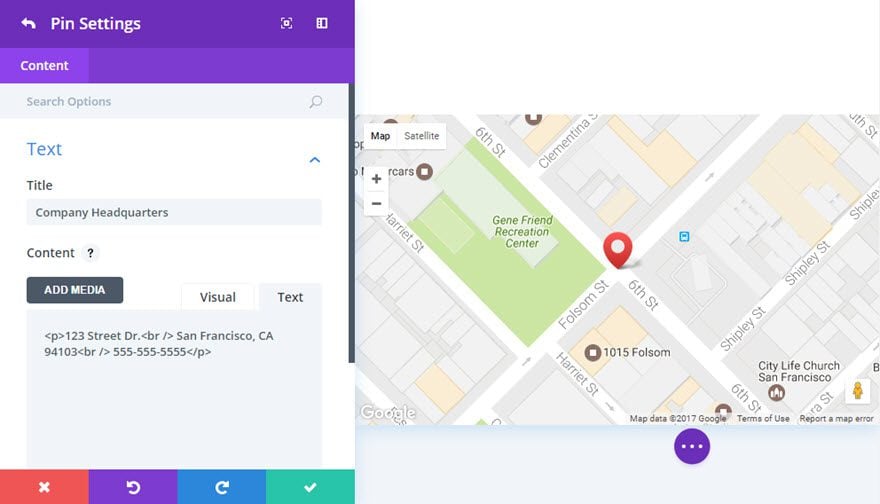
Congratulations! Now you have a dynamic map module at the bottom of the contact page with a clickable pin displaying company information.
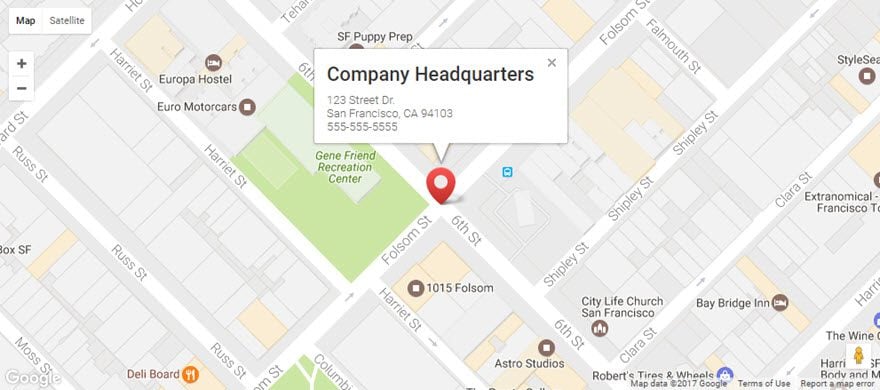
Locating your business is essential so that your customers have a clear idea of your location. This is another way of proving to them that you are accessible! What's more, location is now a major factor in search engine optimisation ;)
Don't hesitate to leave comments and ask any questions you may have on this subject so that we can get back to you :)
See you soon for a new tutorial!
> Consult our Elegant Themes Divi help section
Rate this article :
3.3/5 | 3 opinion
This article was useful to you ?
Yes
No
3mn reading
The Divi library
3mn reading
How do I install the Divi Builder plugin?
3mn reading
Introduction to the Divi Builder interface
3mn reading
Using the Divi Builder role editor