Rate this article :
5/5 | 1 opinion
This article was useful to you ?
Yes
No
Vous avez noté 0 étoile(s)
Sommaire
Procédure
An MX entry is an essential record for delivering emails to your email addresses. This record is used to indicate the incoming server to which your emails should be routed. Please note that if the MX entries are incorrect, you will not be able to receive emails.
An MX entry is composed as follows
10 mail.domaine.com
The various MX entries are connected in order of priority.
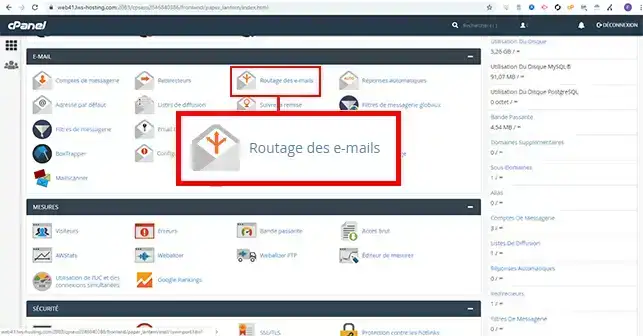
The"Email Routing" tool available in the"Email" section of your cPanel interface allows you to configure the type of email server you wish to use.
1. Once you have logged on to your cPanel interface, click on the"Email Routing" tab in the"Email" section.
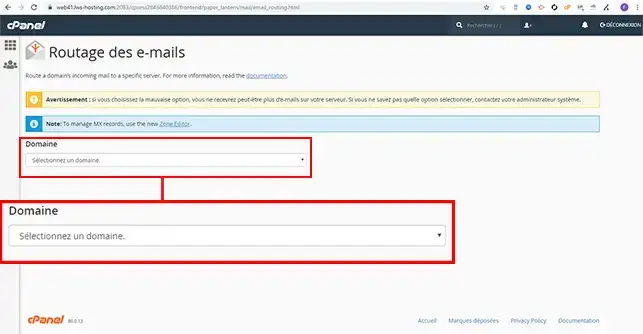
2. Select the domain name for which you wish to modify the MX entries.
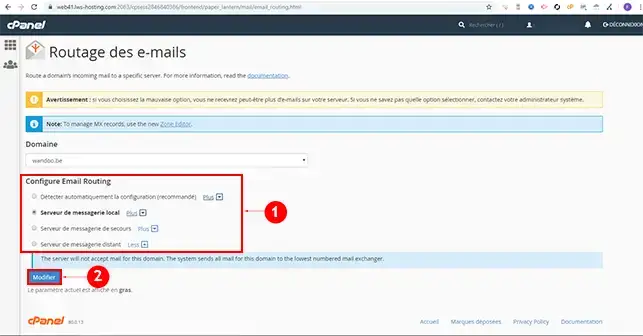
3. By default, the configuration is set to"detect configuration automatically". This is also the default setting recommended by cPanel. You have the following options:
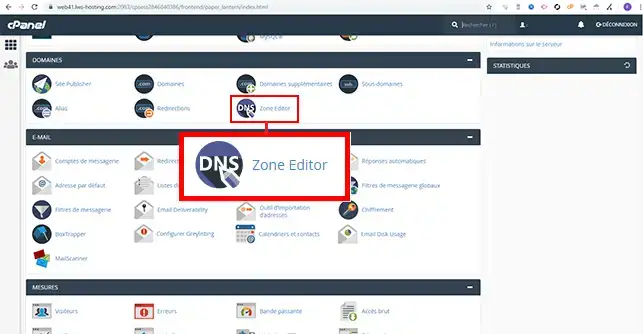
1. Once you have logged on to your cPanel interface, click on the"Zone Editor" tab in the"Domains" section.
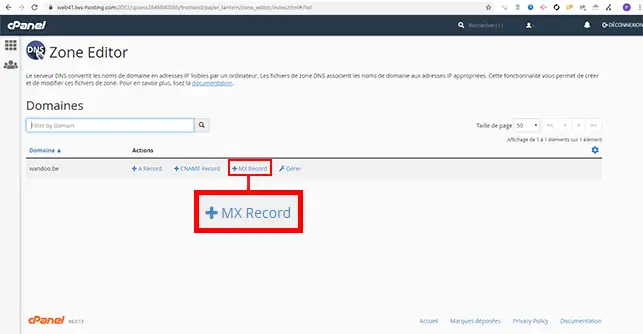
2. Click on the"MX Record" button behind the domain for which you want to add an MX record.
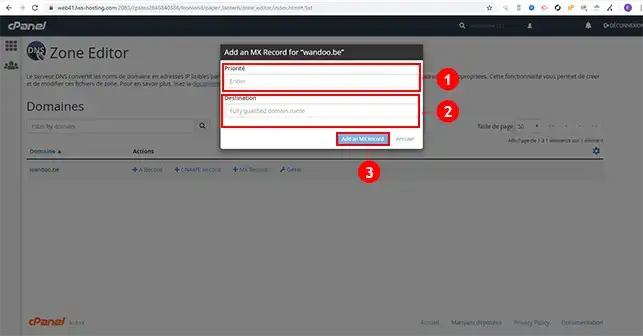
3. Complete the form as follows:
Then click on the "Add an MX Record" button.
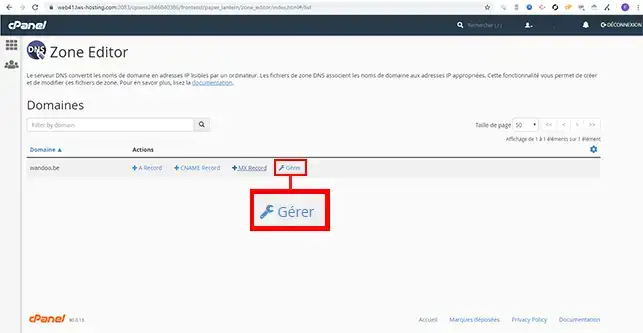
You can modify an MX record at any time by clicking on the"Manage" tab in the"Zone Editor" tool.
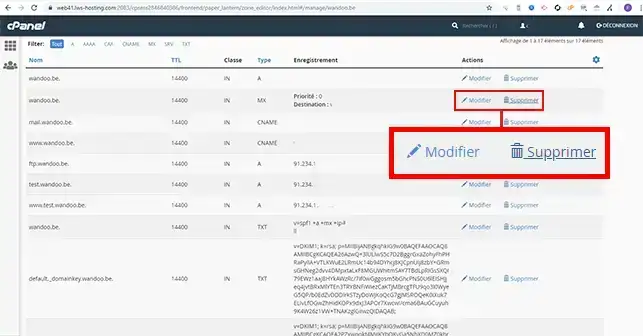
Behind the MX record concerned, you'll find a tab for modifying the Zone and another for deleting it.
You can now create, manage, modify and delete an MX entry in the DNS Zone of one of your domains linked to your cPanel web hosting. As mentioned above, the MX entry is mandatory in order to be able to receive emails on your different email addresses.
Don't hesitate to share your comments and questions.
Rate this article :
5/5 | 1 opinion
This article was useful to you ?
Yes
No
2mn reading
How do I create an additional domain in cPanel?
3mn reading
How to park a domain in cPanel (web redirection)
1mn reading
How do I create a sub-domain in cPanel?
4mn reading
How do I manipulate records in cPanel's DNS zone?