Rate this article :
This article was useful to you ?
Yes
No
Vous avez noté 0 étoile(s)
Sommaire
Procédure
Before we begin, it's important to remember a few important definitions that will help you better understand the rest of this article:
To install and use the LWS SMS plugin, you need to have the WooCommerce plugin installed and configured on your site, if you haven't already. To do this, you can follow this tutorial, which will explain how to create your shop.
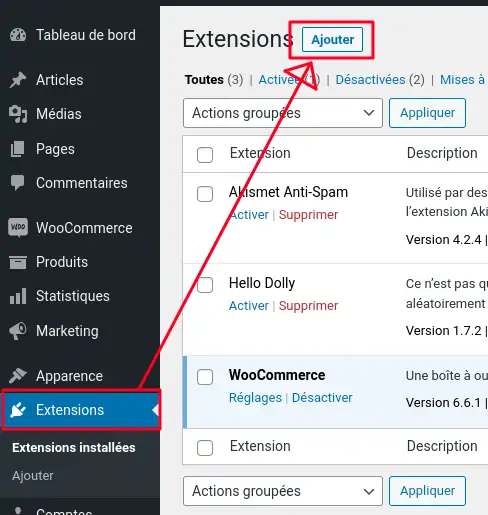
Now you need to download and install the plugin. To do this, go to the "Extensions" tab and then, on the page, click on the "Add" button.
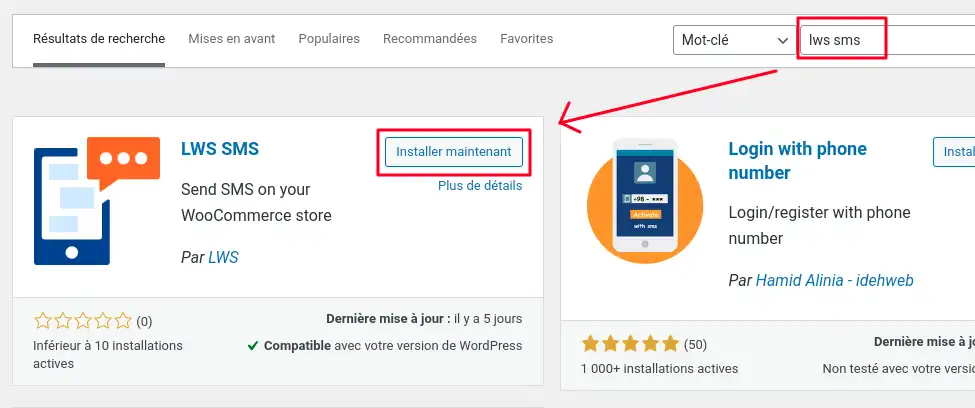
Here, search for "LWS SMS" in the search bar and click on "Install now" in the plugin box.
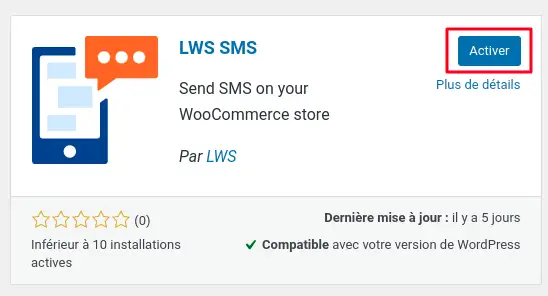
Wait a few moments for the plugin to install and then, when it appears, click "Activate".
If the 'LWS SMS' tab does not automatically appear in the vertical menu, refresh your page to make it appear. Your plugin installation is now complete.
Now that your plugin is installed, click on LWS SMS in the vertical menu, which will automatically redirect you to its Welcome page.
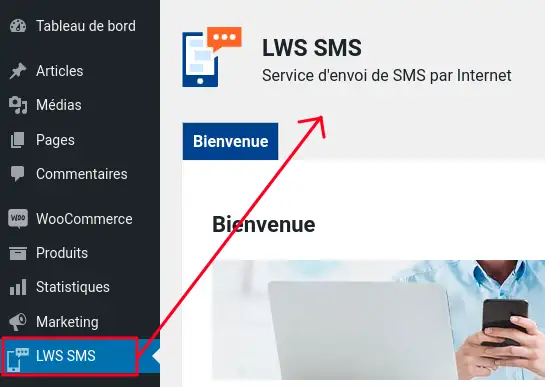
Here you'll find an explanation of the service and what it can do for your site, as well as a login box.
In this block, you are asked to enter your user name, which is sent to you after your first purchase of SMS credits, and your API key, which can be found on the SMS LWS site in the SMS Api category of the menu.

Now that you've logged in, you should notice that new tabs have appeared next to the Welcome tab; these tabs will allow you to navigate between the different pages of the plugin and configure it.
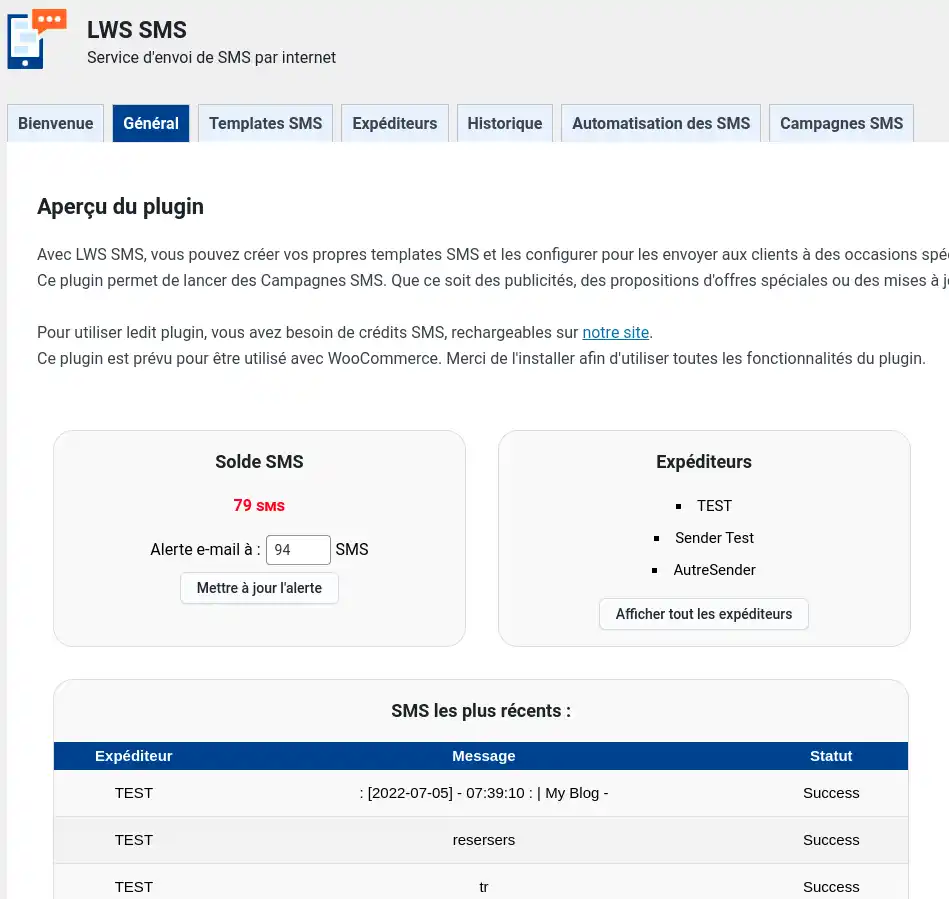
Firstly, in the General tab, you'll find your SMS balance (as well as the option to set up an email alert when your SMS balance drops below a threshold you've defined), an overview of your available sender IDs (you won't see anything if you don't have any) and an overview of the latest SMS messages you've sent (again, you won't see anything if you've never sent an SMS). This is the basic tab, so you can see the status of your SMS service in an instant, all in one place.
To start sending SMS messages, you first need a valid and active sender ID associated with your account. If you already have one, you can skip this step. If not, go to the Senders tab by clicking on the tab of the same name, enter a sender ID in the appropriate box and click on "Add a sender".

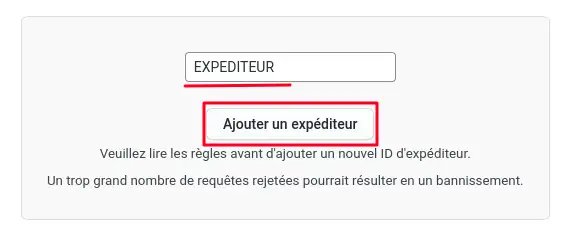
Make sure you follow the rules on the page before adding your sender ID: too many rejected requests could result in you being banned from the service, i.e. you will no longer be able to request or use sender IDs, thus preventing you from using the service.
Once your request has been sent, you will have to wait a few hours, especially if you make your request at the end of the day, for your ID to be validated, as an operator will manually check that it complies with the rules, and this may take some time.
If you already had a valid ID or your ID has been validated, you will see it appear in the table on the Senders tab.
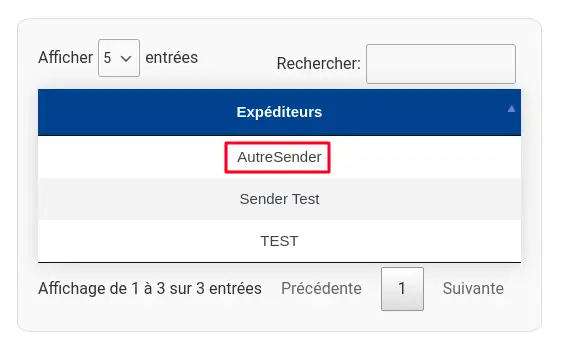
If your username has been rejected, check that it didn't break any rules and try again, or contact LWS customer service for more information if you think an error has been made.
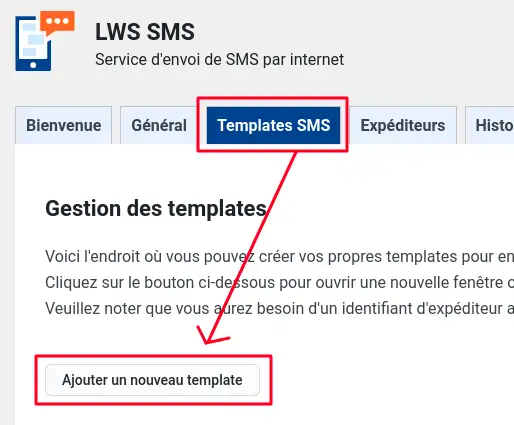
With this login, you'll now be able to send SMS messages to your customers (provided your SMS balance is sufficient, otherwise you'll have to top it up) using templates. To do this, go to the SMS Templates tab and click on "Add a new template" to open a pop-up window.
Here you will need to enter the name of your template, the identifier to be used and the message to be sent. In the message, you can use special tags (such as <%Nom%> or <%Date%>) to personalise your SMS messages and make them unique for each of your customers. Consult the help on the page to find out when to use each set of tags.
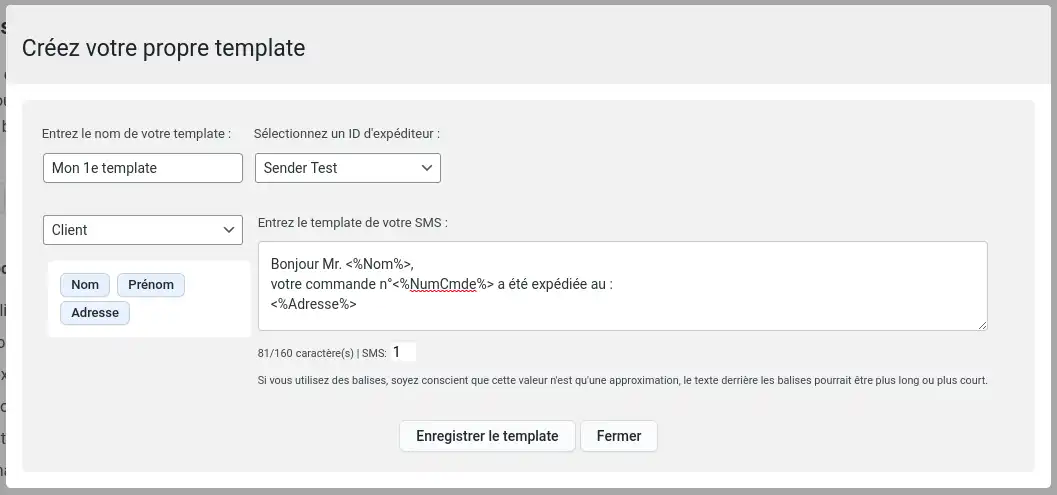
Once you have completed your template, click Save template to save it. Once you've done this, you'll see a table listing all your templates at the bottom of the page, with buttons allowing you to modify and delete your templates, as well as information about them, such as their name and the situations, which we'll look at next, for which the template is used.

Now that you have your first templates, you can start using all the plugin's features. To do this, go to the SMS Automation tab where you can, if you wish, enter your phone number in the corresponding box so that you can receive SMS messages yourself in certain situations.
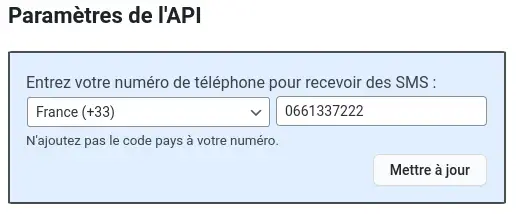
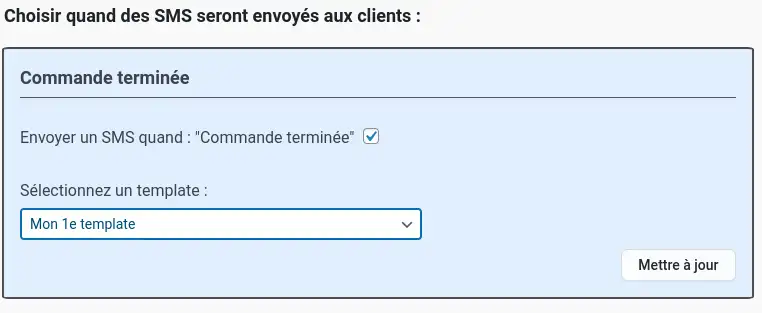
Alternatively, on this page you can tick the blocks you wish to activate and select the template to use for each of them. Click on the "Update" button in each block to save them.
The blocks in the left-hand column indicate when SMS messages will be sent to customers; for example, the "Order complete" block means that the customer of that order will receive an email when their order changes status to "complete" on WooCommerce, which generally corresponds to an order that has been dispatched.
The blocks in the right-hand column indicate when SMS messages will be sent to you; for example, the "Daily Report" block will send you an SMS message every day using the "Daily Reports" tags if you've added them to the template.
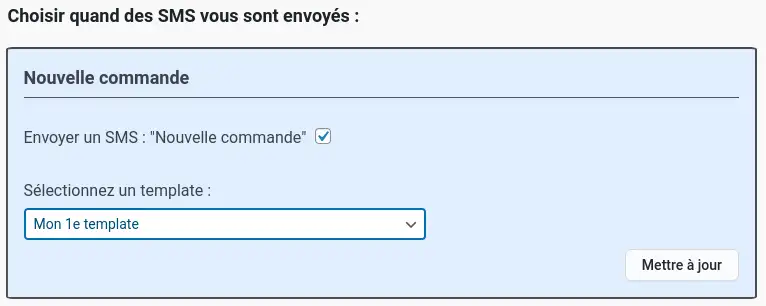
You can deactivate or modify a block at any time by unchecking the box or changing the field values before clicking on the Update button. Also, if you wish to delete or modify your telephone number, simply empty the field or modify the number and then update.
Your plugin is now operational, but there are still two other tabs that we haven't seen yet. The first, History, is, as the name suggests, a history of the last 5,000 SMS messages sent. You can sort the table and search for a specific SMS using the search bar, whether it's the content, the date, the recipient, etc.
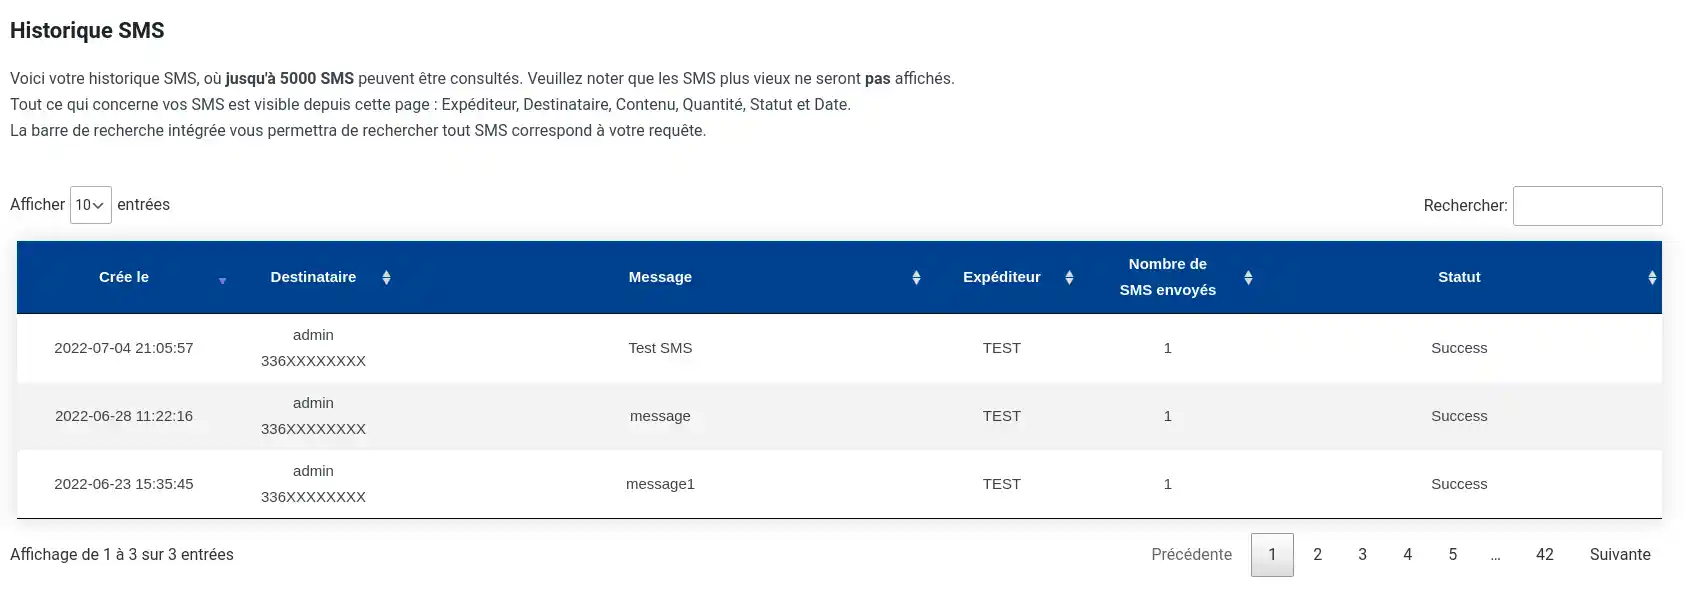
It's a useful tab for keeping an eye on all the SMS messages that are being sent and making sure there are no problems, such as an SMS that wasn't sent, or unwanted SMS messages.
The second tab is the SMS Campaigns tab, which allows you to send personalised SMS messages to all customers who have agreed to receive telephone advertising. You can send an SMS whenever you like, with no restrictions, as long as you have enough credits left to send it. Simply enter your message, choose a sender and send. It's also possible to use templates instead of writing your own message, and to use tags.
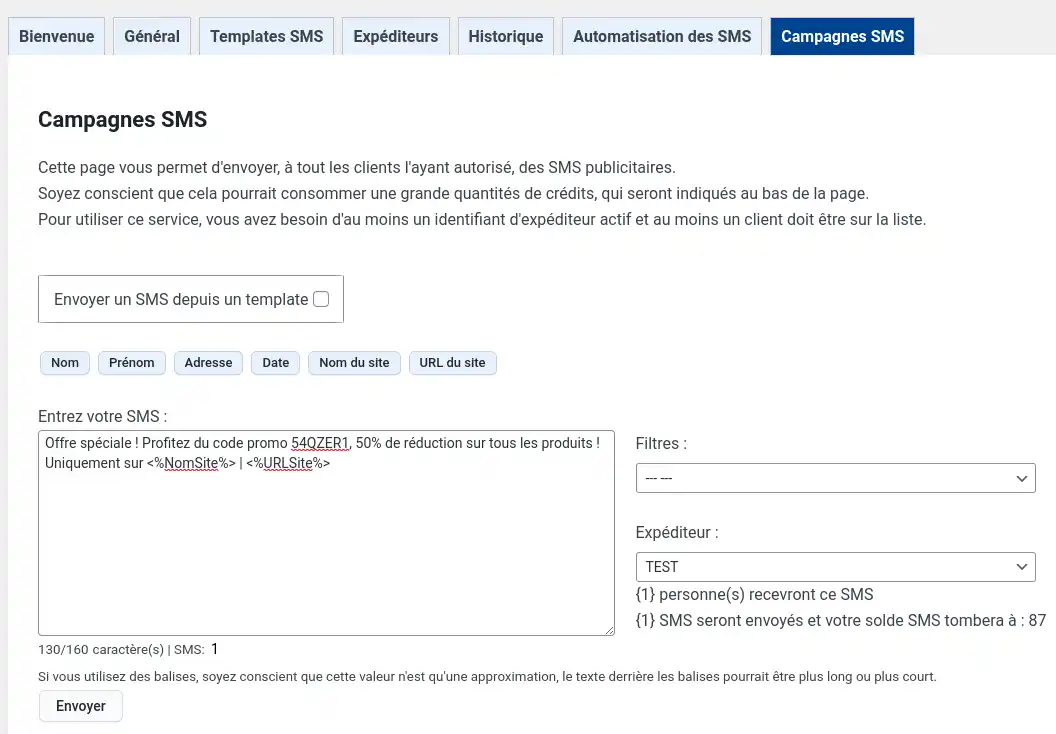
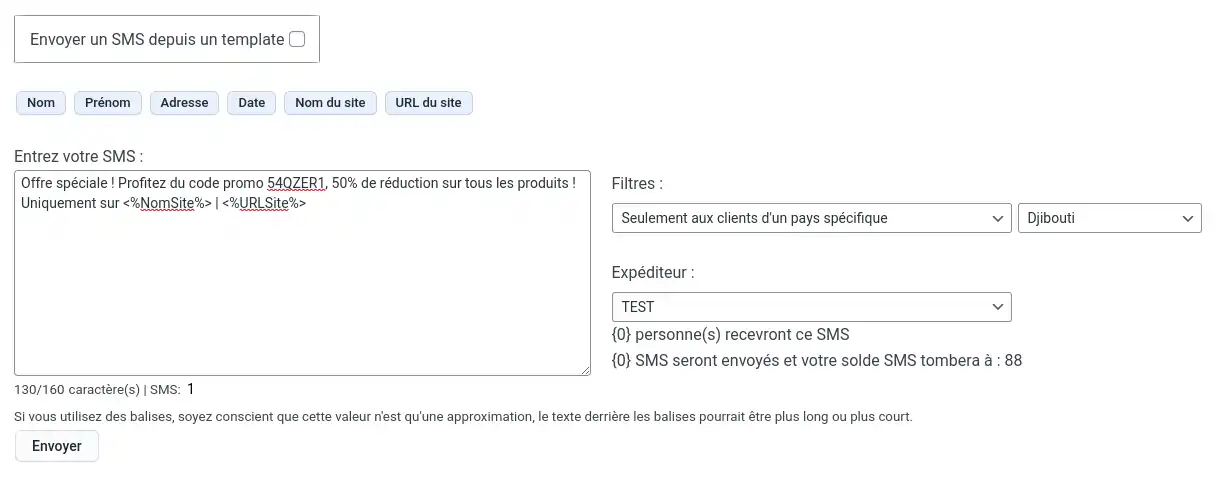
You can also filter your customers to send an SMS only to those in a specific country or to customers who have ordered from your site before, for example.
With this tutorial, you have everything you need to use the plugin as a site administrator and start sending SMS messages to your future customers. If you're not interested in the customer part, you can stop here. Otherwise, we'll now take a look at the features dedicated to them.
When, as a customer, you validate your shopping basket and proceed to checkout, you may be asked to create an account (this will depend on your WooCommerce settings).
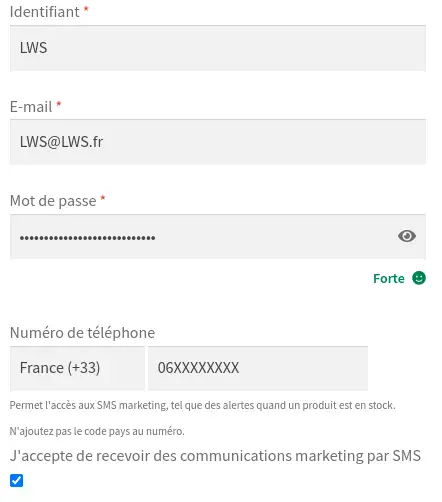
In this registration form, you will have the option of entering a telephone number and of accepting, or not, to receive advertising by SMS. If you choose to decline advertising, the phone number field will be optional. However, if you wish to receive advertising, the telephone number will be mandatory in order to validate the order. Accepting advertising automatically adds you to the list of customers targeted by the SMS campaigns seen earlier.
In addition to this form, you can create an account on a dedicated page, if this option is activated.
Once you have an account, you can go to the My Account page, where you will have access to the SMS settings in a dedicated menu, provided that you have entered a telephone number and that the shop has at least one SMS sending block activated.
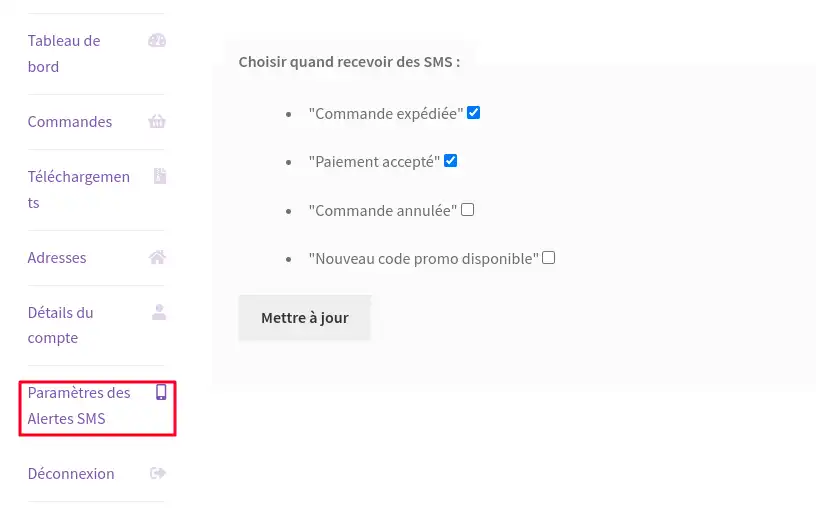
These settings allow you to activate or deactivate the sending of SMS messages in various situations, such as when a payment is validated, for example.
In your account details, you can again choose whether or not to accept SMS advertising and add a telephone number:
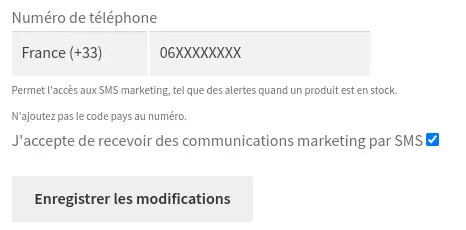
If necessary, you can configure your SMS settings. If you delete your phone number, you will lose this access.
If you need help configuring your WooCommerce online shop, take a look at this step-by-step video.
Rate this article :
This article was useful to you ?
Yes
No
2mn reading
How do I install the LWS affiliate plugin on WordPress?
0mn reading
How do I clean my WordPress site with LWS Cleaner?
0mn reading
Optimising images on WordPress with LWS Optimize