Rate this article :
3.9/5 | 7 opinion
This article was useful to you ?
Yes
No
Vous avez noté 0 étoile(s)
Sommaire
Procédure
A hosts file is used toassociate a host name or domain name with an IP address. Changes made to this file are taken into account immediately after the change. This file is available on all operating systems.
The Hosts file is designed to make your computer think that your domain name is pointing to a specific hosting. This will not cause your domain name or your website to malfunction on its current hosting. Only you will see the changes. Other visitors will see your website on its current hosting.
Setting up a configuration in the hosts file may require you to purge the browser cache files after each operation so that everything is fully functional and you can see your site at LWS or on its current hosting.
As your domain is not yet actually pointing to your LWS hosting, the SSL certificate cannot be installed and you will certainly have to ignore your browser's security warnings. Don't worry, once your domain redirects to our hosting, the certificate will be functional and your domain will be secured in HTTPS.
The settings line to be added to a Hosts file looks like this:
XXX.XXX.XXX.XXX domain.tld www.domaine.tld
XXX.XXX.XXX.XXX is the IP address of the web server for your LWS package, so you'll need to replace this with the real IP address of the LWS server.
domain.tld is a generic entry for your domain name, so replace it with your real domain name.
The purpose of this entry in the Hosts file is to tell your browser that the domain you have entered (with or without www) refers to the IP you have entered and not the usual IP.
To find out which IP to enter, please follow this documentation. Only the WEB service IP is required.
The hosts file is located on the following path:
C:\WINDOWS\system32\drivers\etc\hosts
The first thing to do is to open a text editor such as Notepad or Word, in administrator mode (right-click then run as administrator).
Once the text editor is open, go to File -> Open and navigate to the hosts file (C:\WINDOWS\system32\drivers\etc\hosts).
Then insert the line of the hosts you wish to add: for example: 4.39.504.987 monsite.com www.monsite.com
Once this has been done, your file should look like this:
 Copyright (c) 1993-1999 Microsoft Corp.# # This is an example of the HOSTS file used by Microsoft TCP/IP # for Windows.
# This file contains mappings from IP addresses to hostnames.
# Each entry must be on its own line. The IP address should be placed # in the first column, followed by the corresponding hostname. The # IP  address  and hostname must be separated by at least one space.
# # In addition, comments (such as this one) can be inserted on  their own # lines or after the computer name. They are indicated by the # symbol '#'.
# For example: # # 102.54.94.97 rhino.acme.com # source server # 38.25.63.10 x.acme.com # client host x 127.0.0.1 localhost4.39.504.987 monsite.com www.monsite.com
Then save the modification.
The change will take effect immediately.
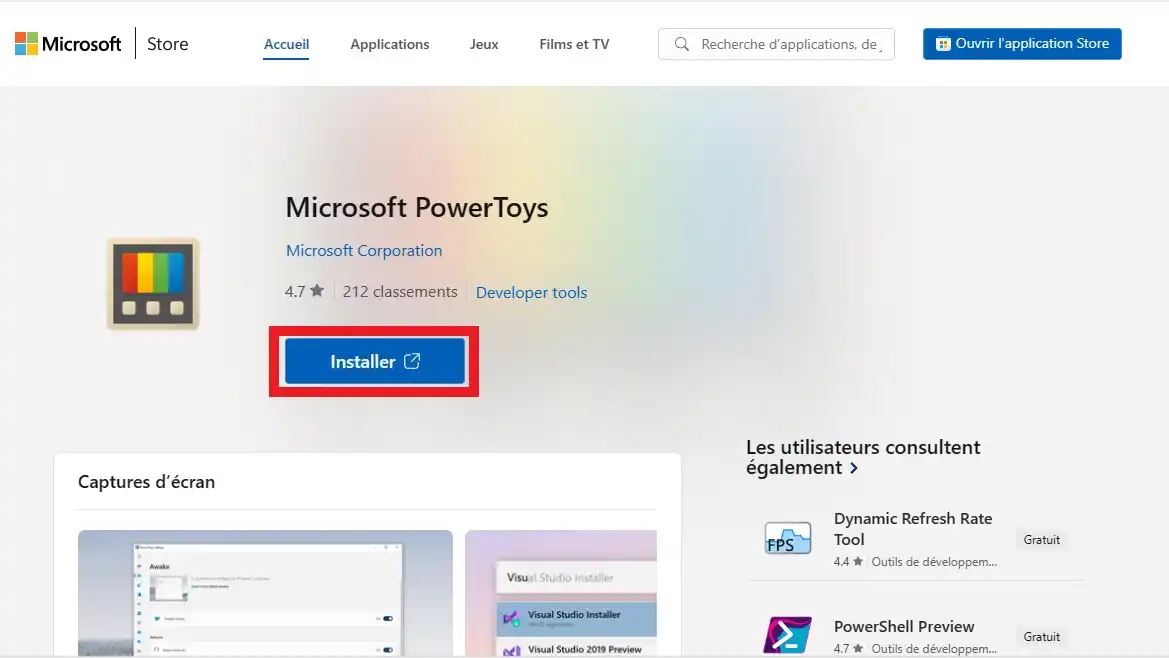
Go to the download page for the PowerToys utility published by Microsoft and available from their Store.
Then click on"Install".
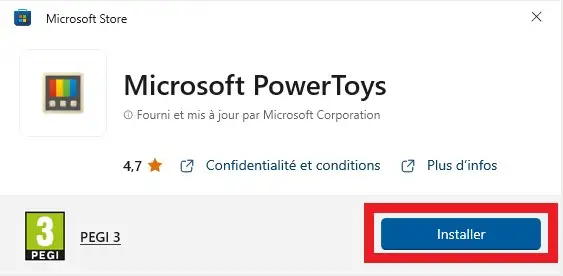
Click on the "Install" button in the window that appears next
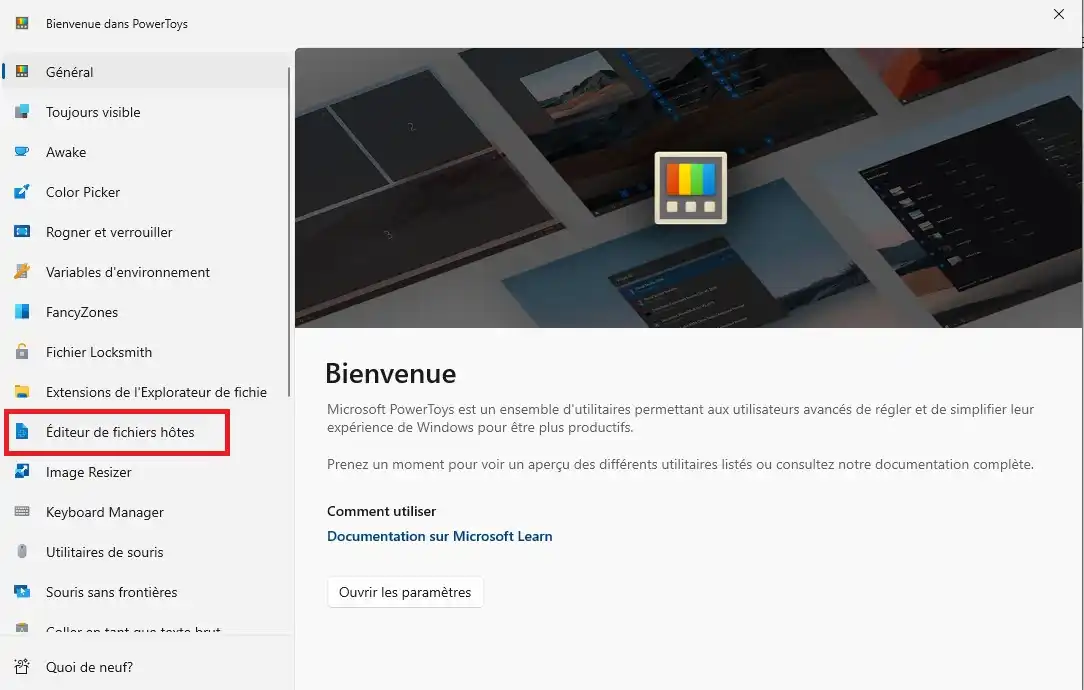
Once the application has been installed, open it and select"Host File Editor" from the left-hand menu.
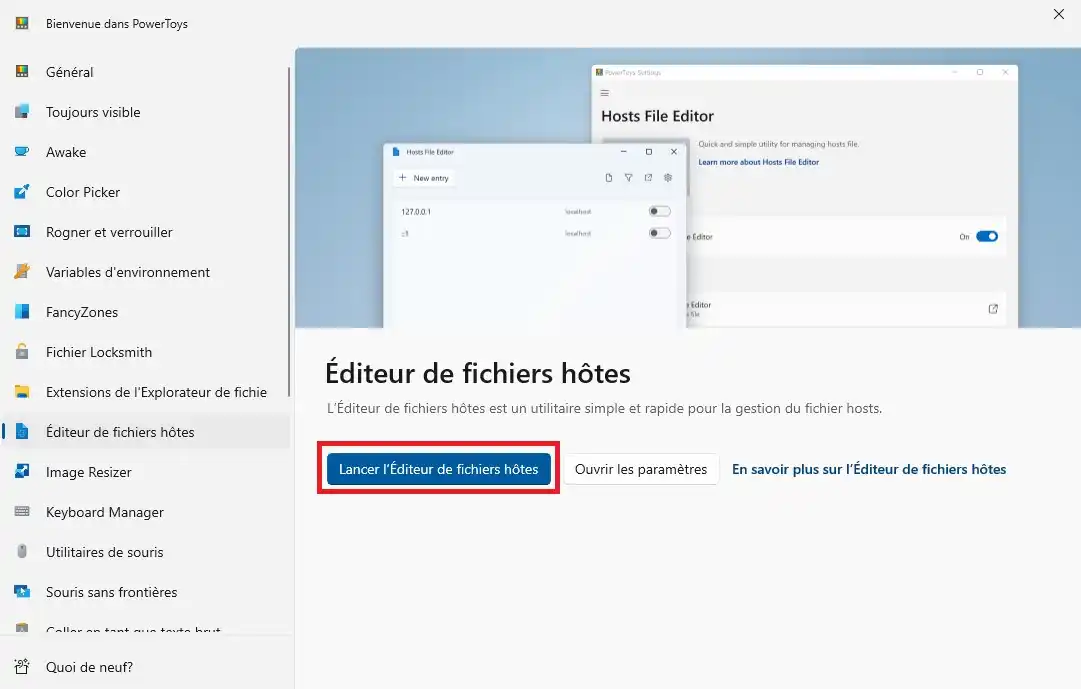
Then click on the"Launch Host File Editor" button.
A warning message will appear. You must accept this message to proceed.
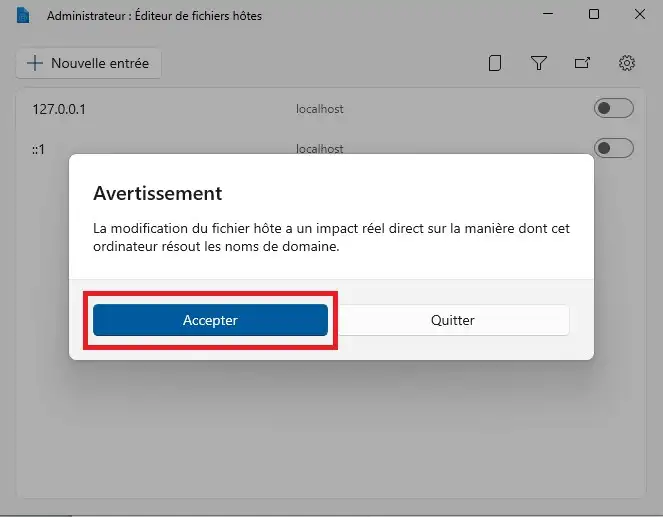
Then click on"+ New entry" ...

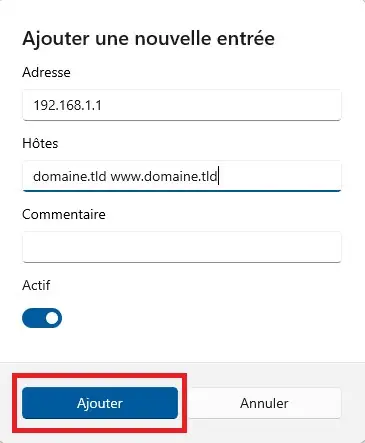
... and enter the required parameters before clicking on"Add".
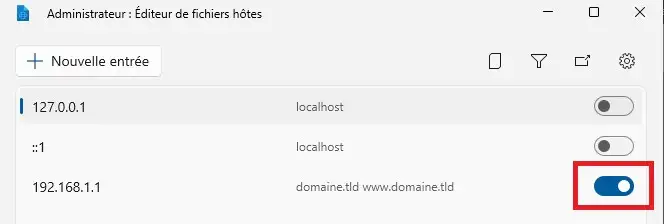
You will then just need to leave the option activated to view your site with LWS, or deactivate it to view it with your current host.
1. Open Terminal
Open theMAC search tool "Spotlight" using the command :
CMD + SPACE

2. Open the Hosts Mac file via the terminal
Once your terminal is open, type the following command line:
sudo pico /etc/hosts
then press ENTER
Enter your Mac session password.
/It will not appear in the terminal, so type your password in full and press ENTER.
3. Modify your Hosts file
Use the arrows on your keyboard to make the necessary changes to your hosts file.
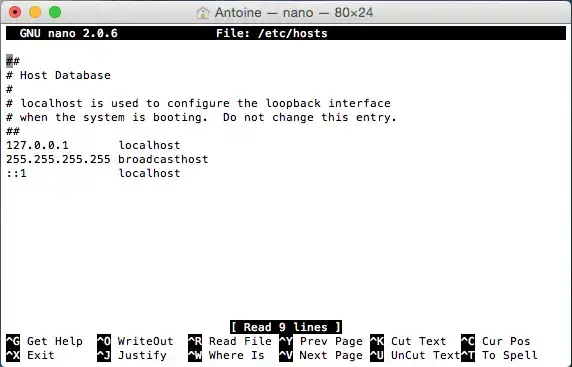
4. Save your changes
To save your changes and exit the application, use the following commands:
CTRL+O (^O) to save your changes, then click "ENTER".
CTRL+X (^X) to exit the hosts file. You can now close the terminal application.
All you have to do now is exit your terminal. The hosts file has now been modified on your Mac.
You can now modify a hosts file on Windows or Mac with LWS. You can modify and/or delete the Hosts file at any time.
Don't hesitate to share your comments and questions!
Rate this article :
3.9/5 | 7 opinion
This article was useful to you ?
Yes
No
0mn reading
Explicit TLS FTP connection
1mn reading
How to clear my google chrome browser cache
1mn reading
Site error during installation
1mn reading
Bonjour,
Je vous remercie pour votre message.
Je suis désolé que vous ne soyez pas en mesure de modifier votre fichier hosts correctement. Si vous souhaitez tenter une alternative, je vous invite à essayer ce site internet qui devrait répondre à vos besoins.
Suivez ces quelques étapes une fois sur le site internet :
Je vous remercie pour votre attention et reste à votre disposition pour toute autre question ou complément d'information.
Cordialement, L'équipe LWS