Rate this article :
5/5 | 2 opinion
This article was useful to you ?
Yes
No
Vous avez noté 0 étoile(s)
Sommaire
Procédure
1. Connect to your cPanel
2. Click on the"Backup" button in the"Files" section of your cPanel interface.

3. Click on the "Web Files" button.
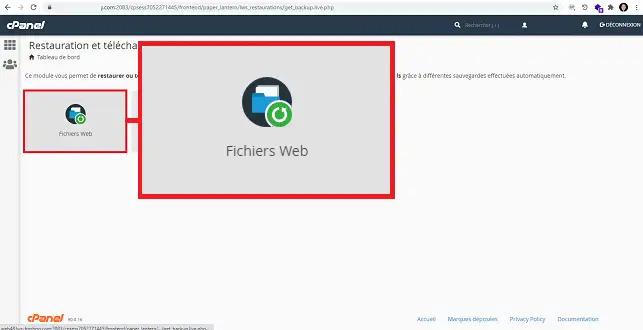
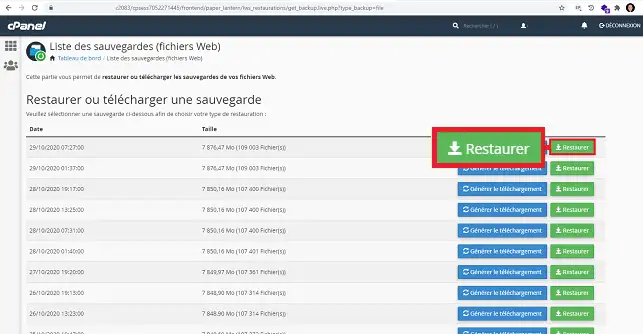
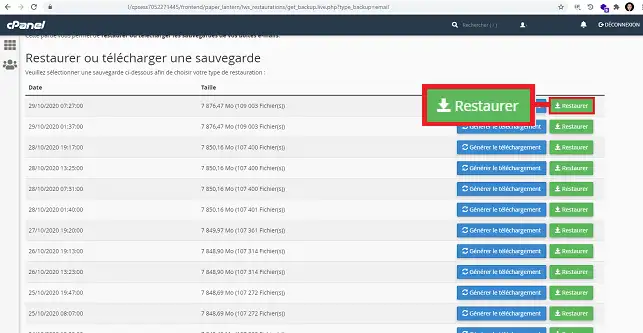
4. Click on the"Restore" button located behind the backup you wish to restore.
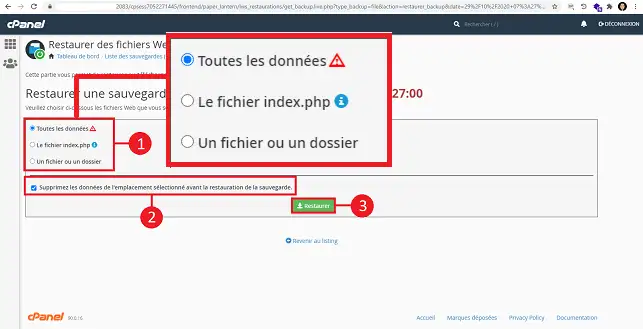
5. Fill in the form as follows:
To restore data, select the type of data to be restored. You can check/uncheck the"Delete data from selected location before restoring backup" box to delete all data. Finally, click on the"Restore" button.
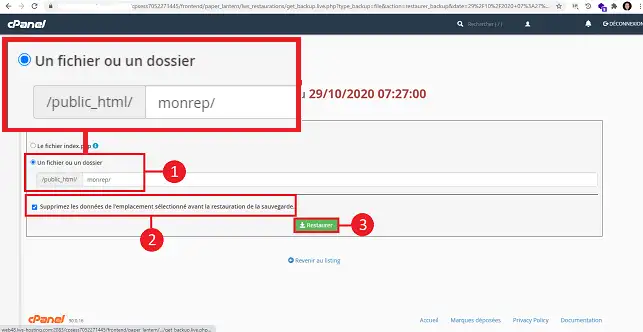
If you wish to restore a file or folder, select"a file or folder", specify the file or folder you wish to restore and click on the "Restore" button.
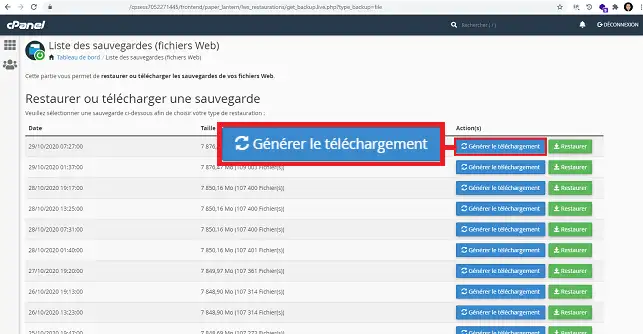
You can download a backup. To do this, to generate a backup of your site, click on the"Generate download" button located behind the backup concerned.
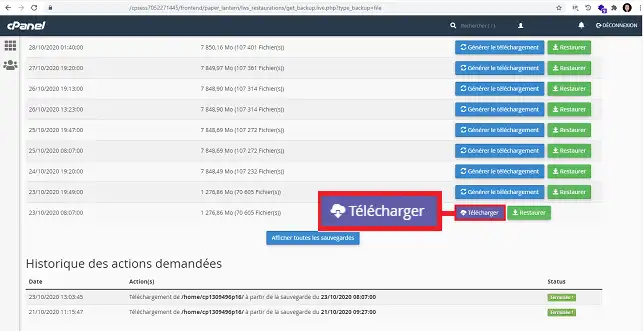
Once the backup has been generated, click on the "Download" button behind it.
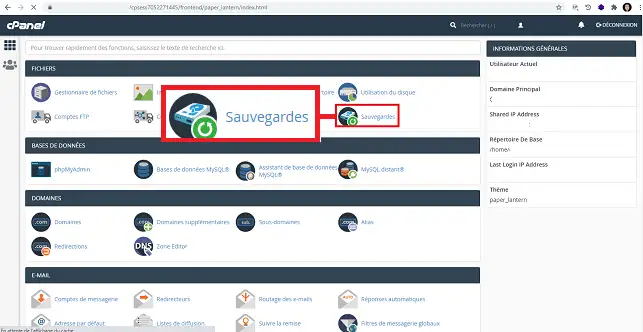
1. Once you are connected to your cPanel management interface, click on the"Backups" button in the files section.
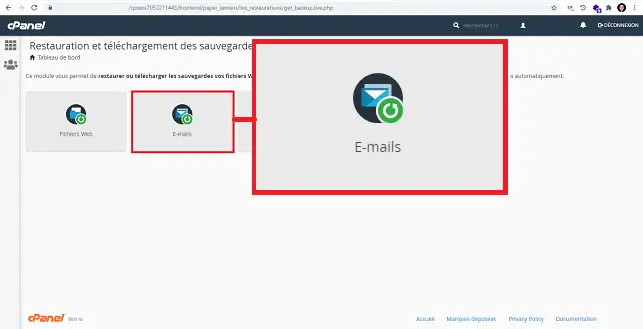
2. Click on the "E-mails" button to restore your emails.
3. Click on the "Restore" button behind the email backup in question.
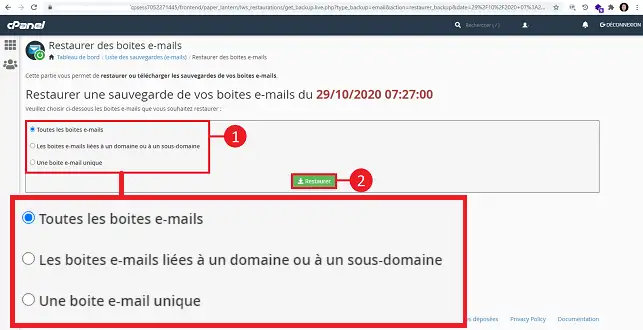
4. Fill in the form as follows:
Click on the"Restore" button to restore your data.
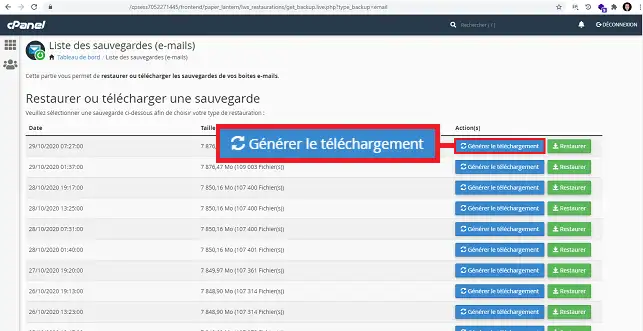
As with Web files, you can download a backup once you have generated it. To do this, click on the"Generate download" button behind the desired backup date.
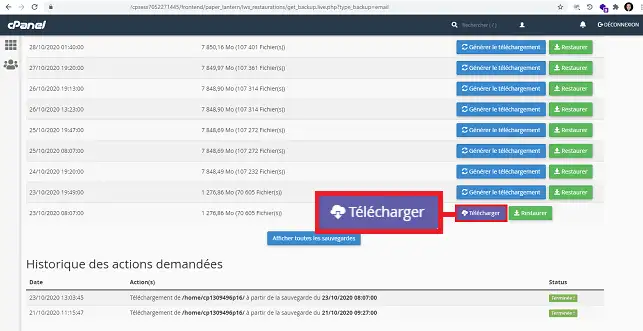
To download the generated file, click on the"Download" button once the backup has been generated.
1. Once you are connected to your cPanel interface, click on the"Backups" button in the"Files" section.
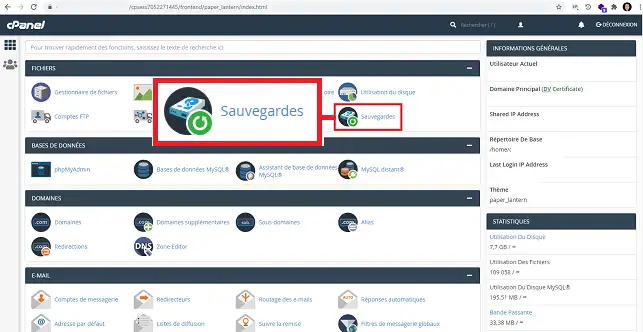
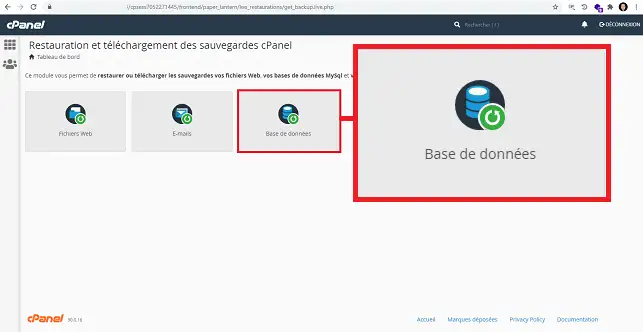
2. Click on the"Database" button
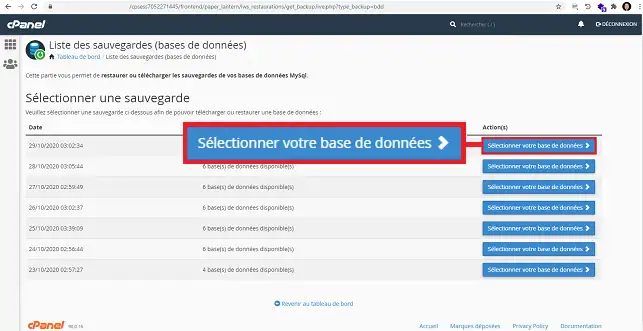
3. Choose the restoration date you want and click on the"Select your database" button behind it.
4. Select the database to be restored and click on the"Restore" button behind it.
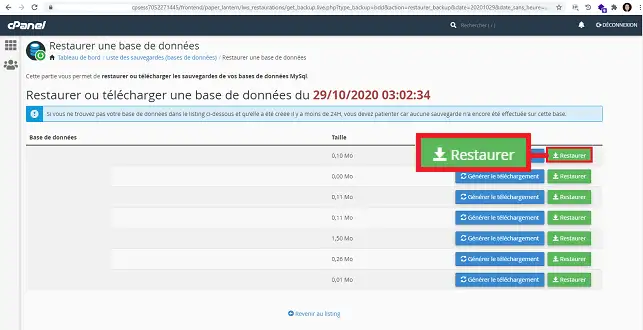
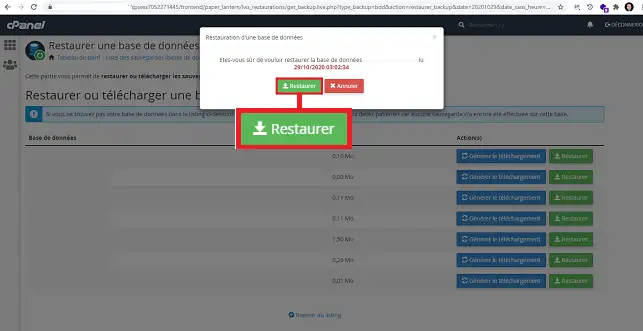
5. A new window will open asking you to confirm the restore date and the database you wish to restore. Click on the "Restore" button to confirm your choice.
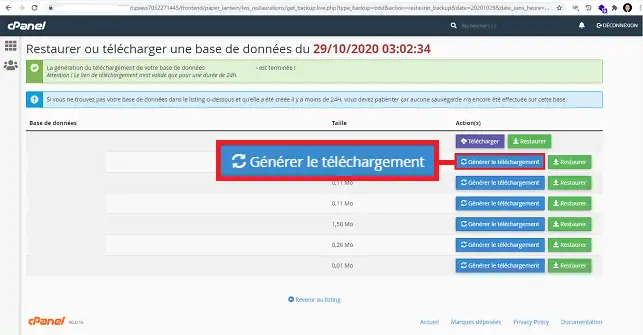
6. You can request the download of a MySQL backup. To do this, first click on the"Generate download" button.
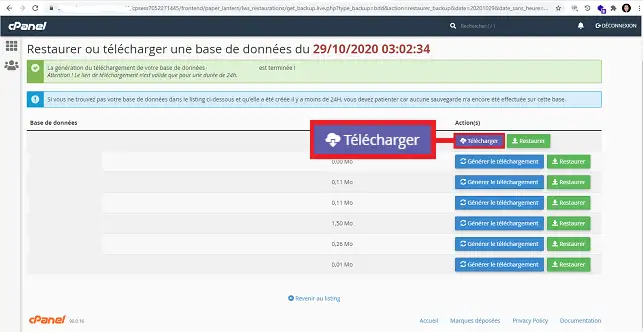
7. Once the backup has been generated, click on the"Download" button to download your database backup.
You now know how to :
We hope you have found this guide useful. Thank you for taking the time to read it! If you have any questions or feedback to share, please don't hesitate to leave a comment about our service. Your opinions are valuable to us and help us improve our tutorials.
Rate this article :
5/5 | 2 opinion
This article was useful to you ?
Yes
No
Bonjour,
Je vous remercie pour votre message et je comprends que cela puisse entrainer des perturbations sur vos services.
Malheureusement à l'heure actuelle la seule chose que je pourrais éventuellement vous conseiller est de lier votre service à Cloudflare afin de potentiellement limiter les risque d'attaque DDOS, l'idéal est également de contacter notre équipe de support technique afin que nous puissions observer l'étendu de l'attaque et potentiellement trouver une solution.
Je vous remercie pour votre attention et reste à votre disposition pour toute autre question ou complément d'information. Nous sommes là pour vous aider et vous accompagner dans toutes vos craintes.
Cordialement, L'équipe LWS