Rate this article :
This article was useful to you ?
Yes
No
Vous avez noté 0 étoile(s)
Sommaire
Procédure
WP Rocket is a powerful caching system that can dramatically improve the performance of a Wordpress site. Like all caching plugins, it can store pages that have already been loaded. This reduces page load times andimproves the speed of your site.
Here we'll look at how to install this module free of charge on our Wordpress site.
Before you can install WP Rocket on your Wordpress site, you first need to retrieve the module from the GPLDL site.
1. In order to download the module from their site, you will first need to create an account on this platform.
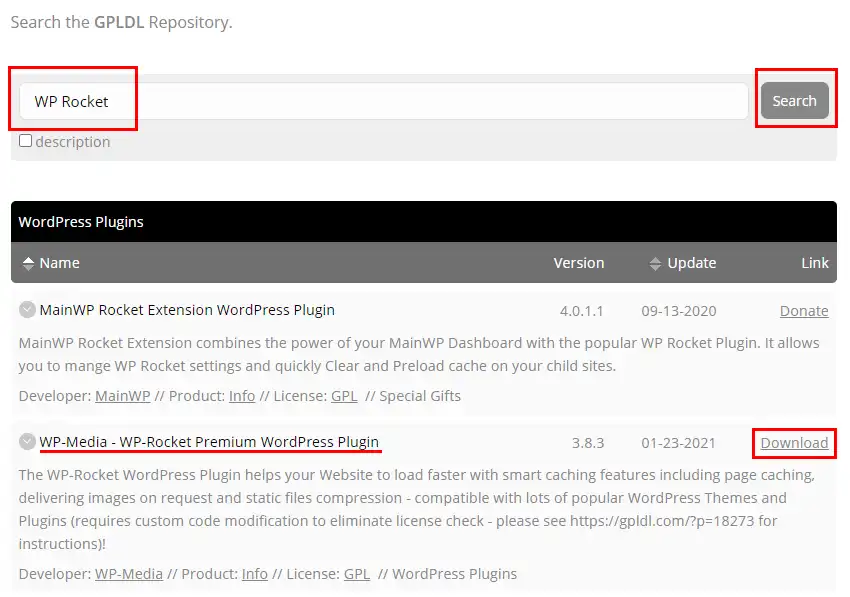
2. Once you have registered and logged in, go to the search page and in the search bar type WP Rocket and click on "Search".
3. Two versions will be offered, click on the Download button for the "WP-Media - WP-Rocket Premium WordPress Plugin" version to start downloading the module.

Now that you've downloaded the plugin, all you need to do is install it on your Wordpress site:
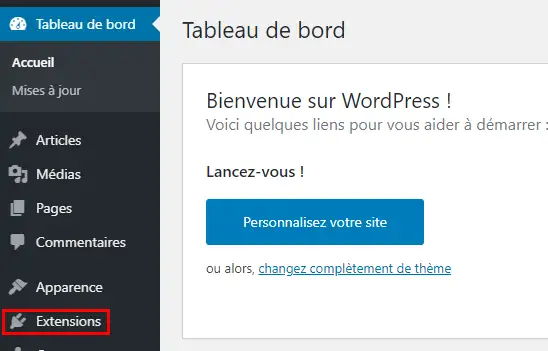
1. Connect to the administration of your Wordpress site
2. In the left-hand menu, click on Extension

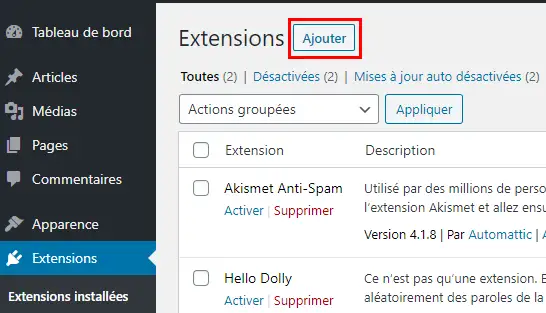
3. Then click on the "Add" button at the top of the page

4. Then click on the "Upload an extension" button and then on "Choose a file". Select the file you wish to download from the GPLDL site, then click on "Install now".

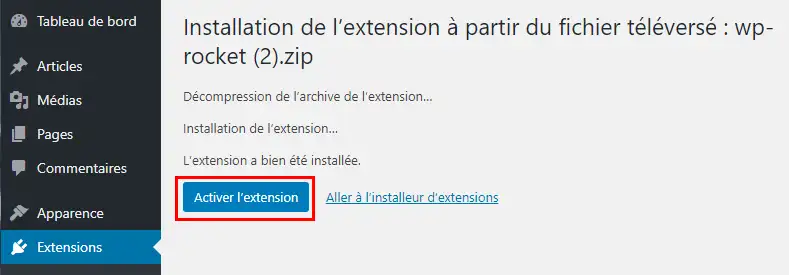
5. After a few seconds, the WP Rocket module is installed on your Wordpress site. All you have to do now is click on Activation to make it operational on your Wordpress site.

Rate this article :
This article was useful to you ?
Yes
No
1mn reading
How does Yoast SEO work?
4mn reading
How can you optimise your Wordpress site?
1mn reading
How do I use Gutenberg on Wordpress?
2mn reading
How do I disable the Gutenberg editor on Wordpress?