Rate this article :
This article was useful to you ?
Yes
No
Vous avez noté 0 étoile(s)
Sommaire
Procédure
LWS offers you 3 premium plugins from Elegant Themes (Divi, Bloom and Monarch). These are updated regularly. Once you are an LWS customer, you will have free access to these plugins by choosing the 'Divi Builder' distribution when installing the Wordpress CMS with our Auto-Installer.
If you have a cPanel package or have already installed Wordpress with this distribution, but do not have access to all the themes or updates, please let us know by giving us the access details for the administration area of your Wordpress site so that a technician can update the licence.
Please note: you will need to take out an Elegant Themes licence to benefit from support. LWS does not provide support for these products.
When you create an opt-in widget, Bloom will turn your newly created opt-in form into a widget that can be placed inside any widget-ready area on your website, such as your footer or sidebar. Simply place the "Bloom" widget in your widget area and select the opt-in widget you wish to display from the drop-down menu.
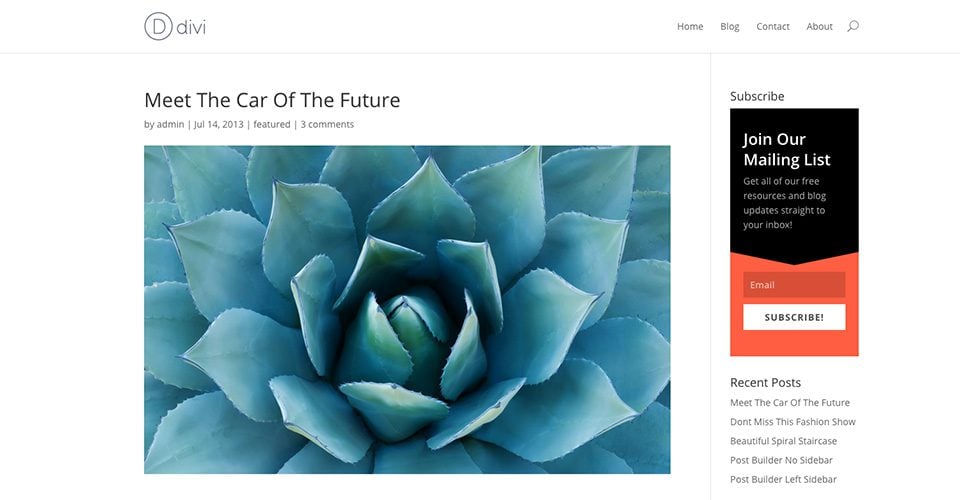
To create an opt-in form, click on the Bloom > Optins Forms link in your WordPress dashboard, or click on the"Home" icon in the Bloom settings page to open the main settings tab. Here you can manage opt-ins you've created in the past, as well as create new opt-ins. To create your first registration form, click on the"New Optin" button. This will reveal the 6 types of opt-in that Bloom supports.
Click on the"Widget" icon to start building your new opt-in. Once you have selected your opt-in type, you will be taken to the opt-in creation screen where you can adjust the various opt-in parameters. The construction of your opt-in is divided into three stages. In these three steps, you can 1) assign an e-mail account to your opt-in, 2) customise the design of your opt-in, and 3) add the widget to your website.
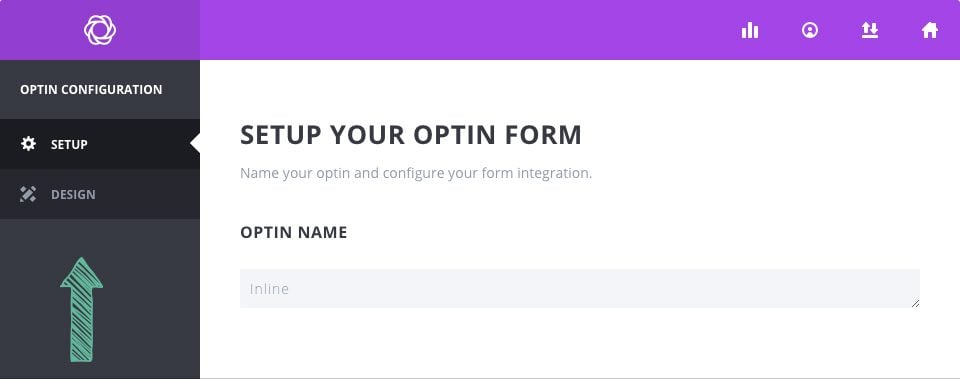
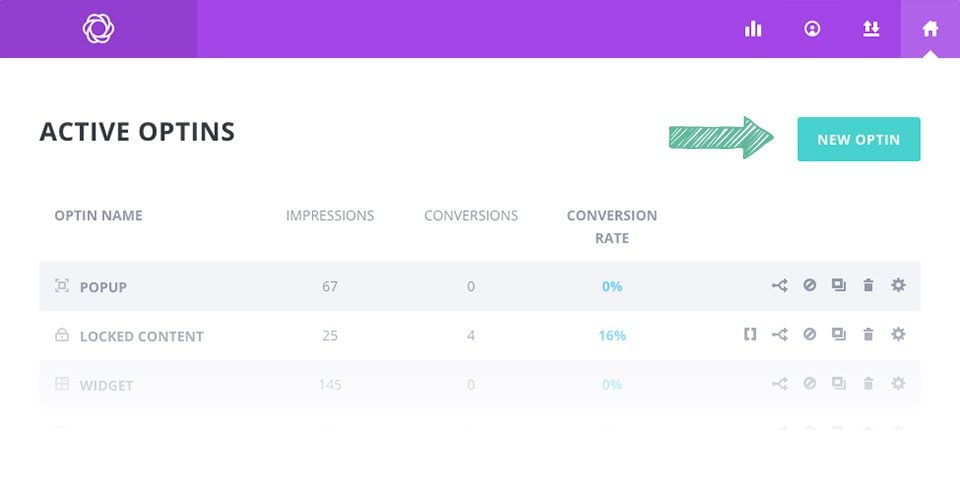
In the Configuration tab of the opt-in creation process, you can give your opt-in a name and assign an email account to the opt-in form. Before you can start collecting email addresses, you must first connect Bloom to your email marketing service, such as MailChimp or Constant Contact. If you haven't already added an account to Bloom, you can do so here. If you have already added an account to Bloom, you can select the account and the list of associates in the form integration settings on this page. For detailed information on how to add accounts to Bloom, as well as a full list of all the account types supported by Bloom, please refer to our detailed accounts tutorial.
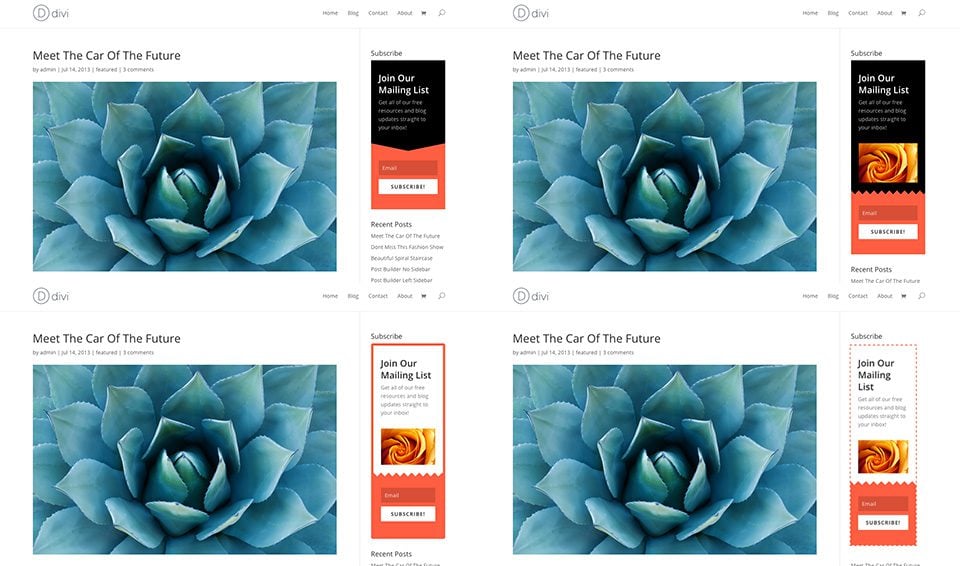
In the Design tab, you can customise the look and feel of your opt-in form. Bloom comes with tons of design settings, such as background colour, font colour, button colour, form colour, image and form placement, border styles and much more. In this tab, you can adjust all these settings and preview your form by clicking on the Preview button.
Using these settings, you can create a wide range of opt-in boxes and have them appear in different areas of your website (or across your entire website if you wish).
Once you've created and registered your new opt-in widget from the Bloom settings panel, it's time to add the widget to your website. You can manage your widgets from the Appearances > Widget menu in the WordPress dashboard. Once you navigate to this page, you'll notice a list of your widget-ready areas on the right, and a list of your available widgets on the left. These widgets can be dragged into any available area on the right.
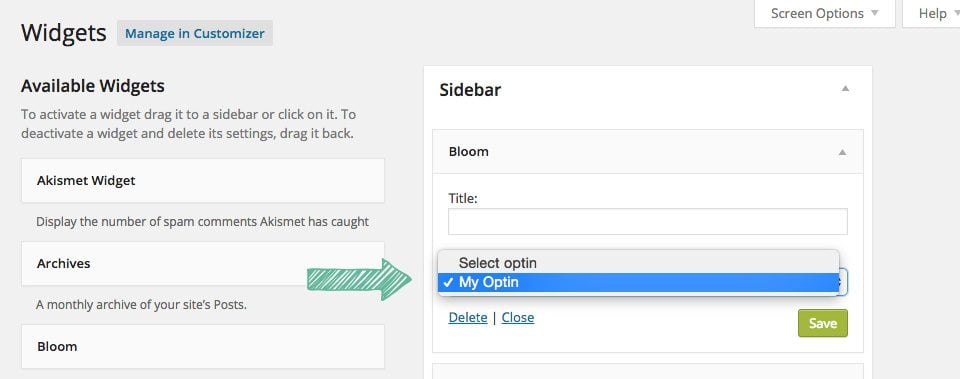
Find the 'Bloom' widget on the left, and drag it onto the widget area you want it to appear in. Once added, select your new opt-in from the drop-down menu.
You're done! The registration form has been added to your sidebar.
Thanks to widgets, you can now easily place an opt-in form in the sidebar or footer of your website.
Thank you for following our tutorial, and see you soon for the next one!
Using the personalisation settings for your registration form
Adding an email account in Bloom
> Consult our Bloom plugin help section
Rate this article :
This article was useful to you ?
Yes
No
3mn reading
How do I install the WordPress Bloom plugin?
4mn reading
Bloom plugin features at a glance
4mn reading
Adding an email account to Bloom
4mn reading
Using Bloom's Opt-in pop-up