Rate this article :
This article was useful to you ?
Yes
No
Vous avez noté 0 étoile(s)
Procédure
SiteBuilder Pro provides you with various elements to create your website. All the elements are located in the toolbar of your software. You can modify, delete and configure each element to suit your needs.
The most commonly used elements are
Each installed element has a'Parameter' tab that allows you to edit it easily.
When you add a new element to your website, it is often necessary to modify the content or the form.
1. To do this, log in to your website administration.
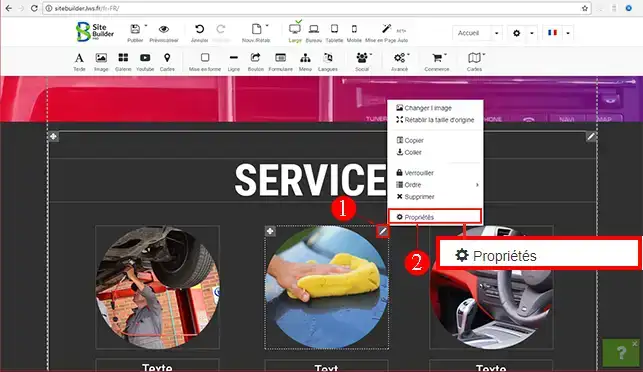
2. Click on the stylus at the top right of the element you want to modify and then on"Properties".

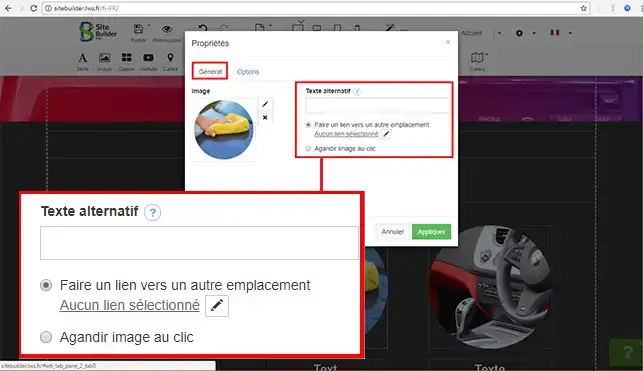
3. Each element you set up with SiteBuilder Pro has a"Settings" tab. This tab is used to edit the module.

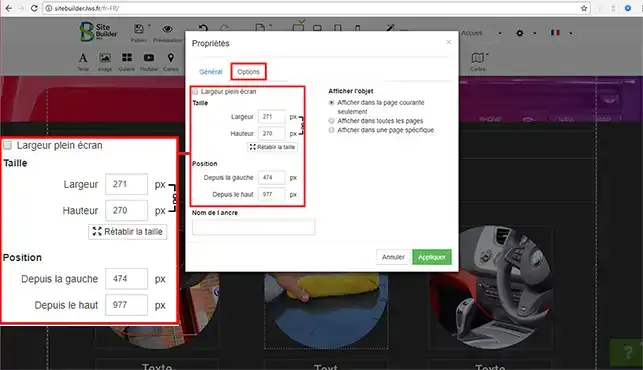
4. The"Options" tab available on each element allows you to change the placement of your module on your page (from the left and from the top of the page). You can change the size of each element in the same place.

Some elements, such asadding a contact form and Youtube videos, may haveother tabs allowing you to configure the extension according to the needs of the module.
You are now able to edit an element on your website created with SiteBuilder Pro from LWS. Don't forget that after each modification, you need to publish your website again in order to update it. It is important to make a backup before making any major changes to your website.
Don't hesitate to share your comments and questions!
Rate this article :
This article was useful to you ?
Yes
No
2mn reading
How do I insert a new element in SiteBuilder Pro?
1mn reading
How do I insert an image gallery in SiteBuilder Pro?
1mn reading
How do I insert comments in SiteBuilder Pro?
0mn reading
How do I insert a Flash video into SiteBuilder Pro?