Rate this article :
5/5 | 1 opinion
This article was useful to you ?
Yes
No
Vous avez noté 0 étoile(s)
Sommaire
Procédure
The purpose of this documentation is to explain how to install and use NextCloud on Windows to back up data on its storage space.
You can then activate synchronisation.
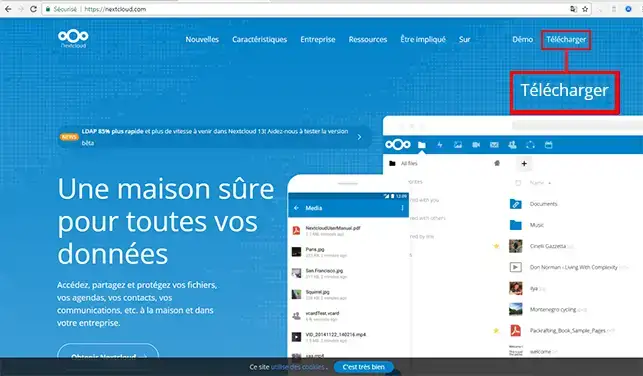
1. Once your order has been placed and delivered, go to the NextCloud website to download the software. Click on the"Download" tab at the top right of your browser.
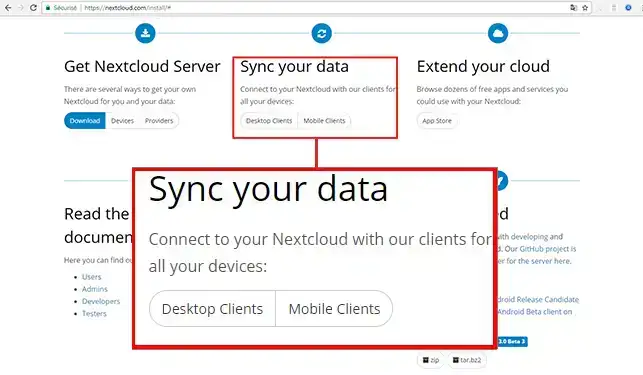
2. Then click on the"Desktop Clients" tab in the"Sync your data" section.
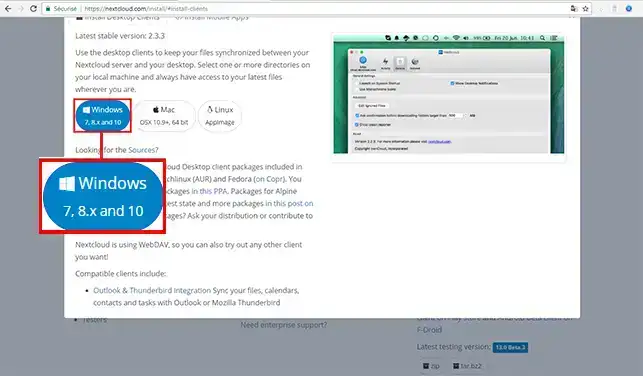
3. Click on the "Windows" button to download the application to your computer.
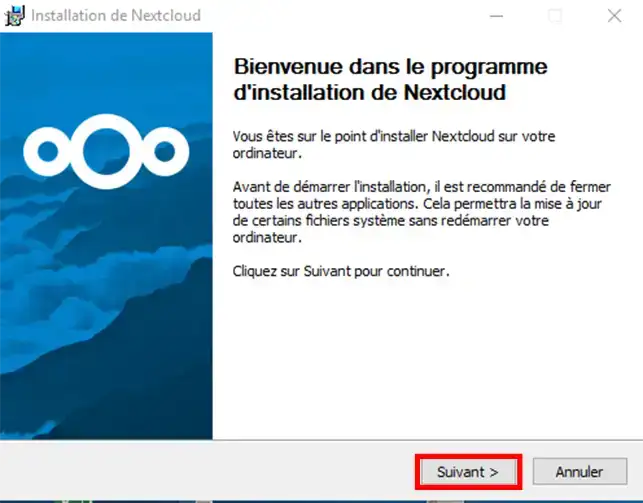
1. Open the file you have just downloaded on Windows to start installing it, then click"Next".
2. Click "Next" again to continue the installation. There is no need to change the"Installation type".
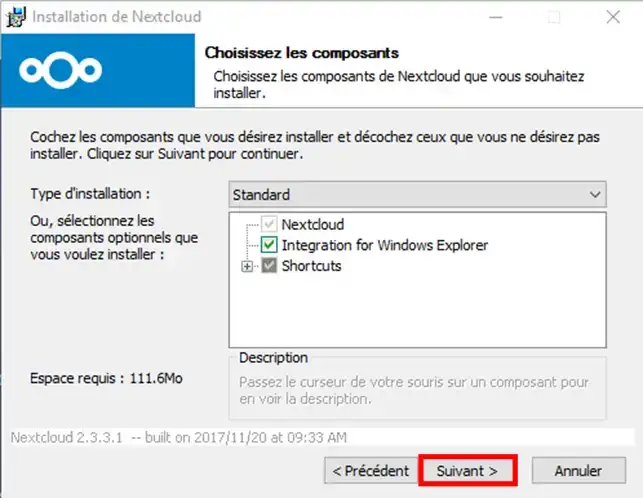
3. Once the installation is complete, click on the"Next" button, tick the"Launch NextCloud" box if this is not ticked, then click on the"Close" button.
1. When you activated the service, you received an email containing the connection details for the NextCloud application server. Enter the URL you received from LWS in the"Server address" box, then click on the"Next" button.
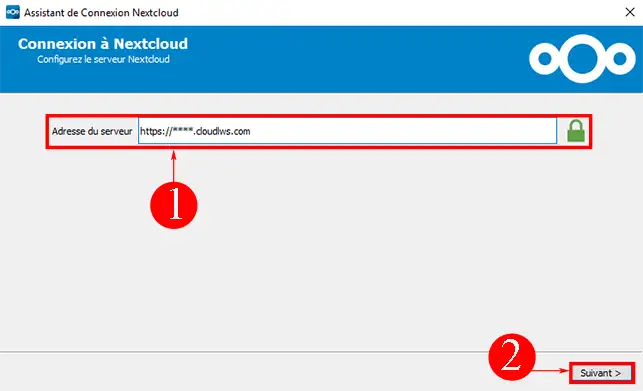
2. Enter your user name and the password you received by email and click on the "Next" button.
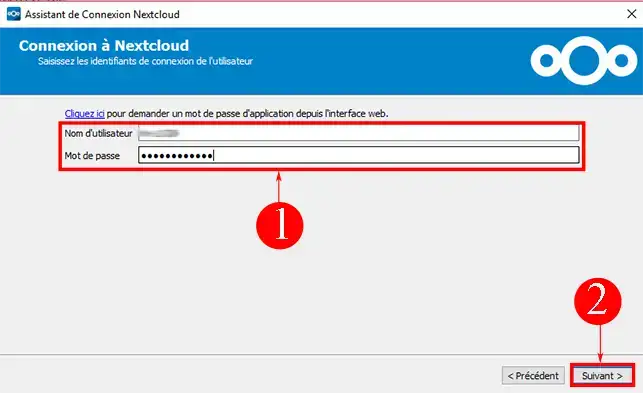
3. You can choose to synchronise all the contents of your storage space or just part of it. Configuration lets you define the directory you want to synchronise between your computer and your storage space. By default, a folder called"NextCloud" will be created on your computer. Click on the"Connect" button once you have made your choice.
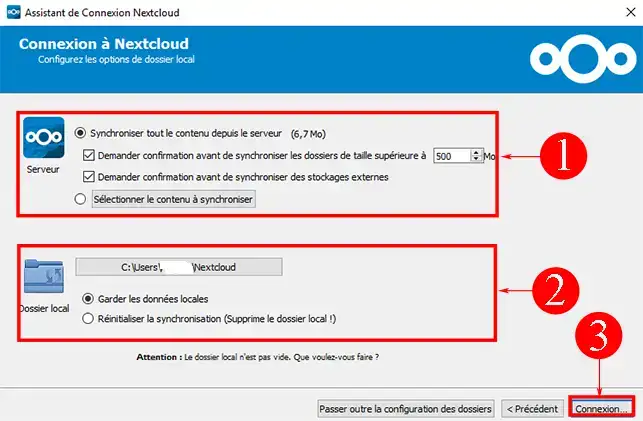
4. You can now open NextCloud using your web browser or access the synchronised folder directly on your computer. To access the local folder, simply click on the"Open local folder" button.
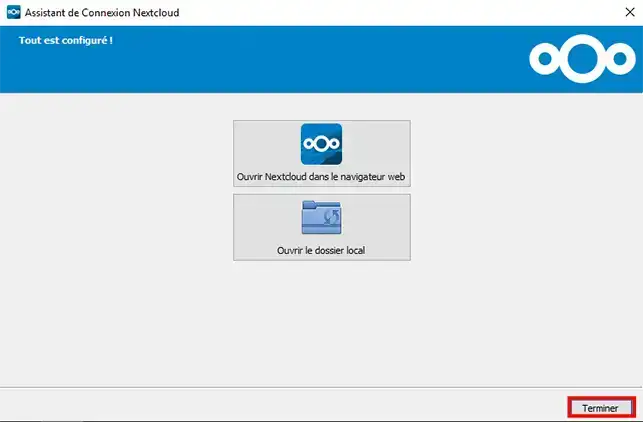
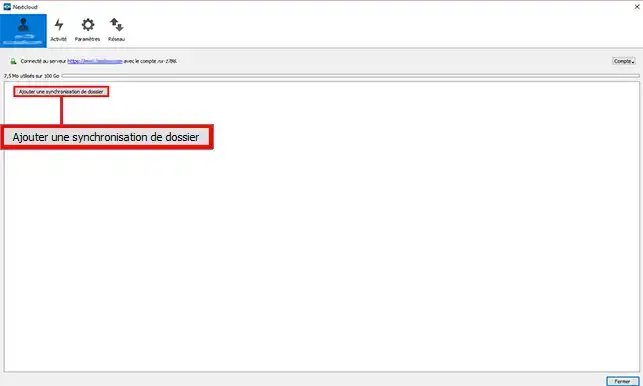
1. Open the NextCloud application on Windows by clicking on the program icon. As soon as it opens, you can add a folder synchronisation. To do this, click on the"Add a synchronisation" button at the top left of your screen.
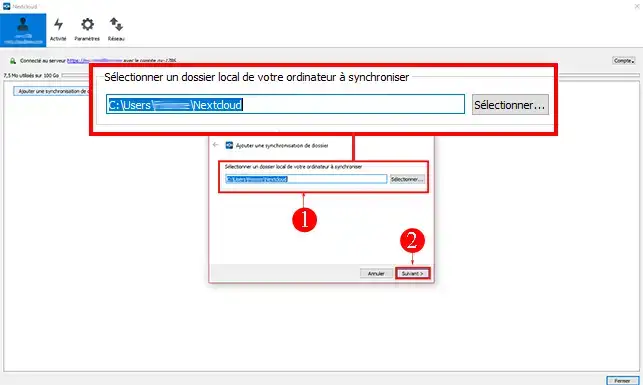
2. Select the file you want to synchronise, then click"Next".
3. Then select the remote folder you want to synchronise with the folder you have just selected. Click "Next" as soon as you have made your choice.
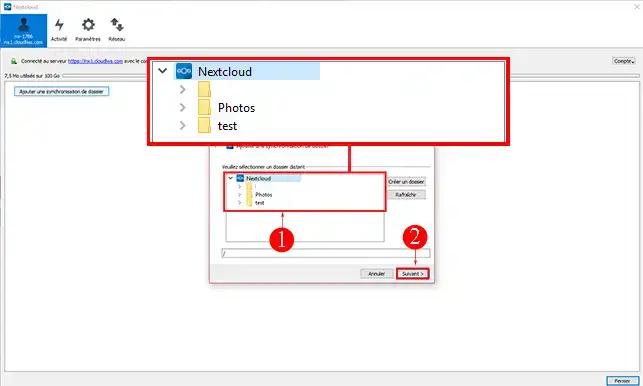
4. You cancancel the synchronisation of a sub-folder by unchecking the box in front of the sub-folder concerned. Click on the"Add a synchronisation" button once you have made your choice.
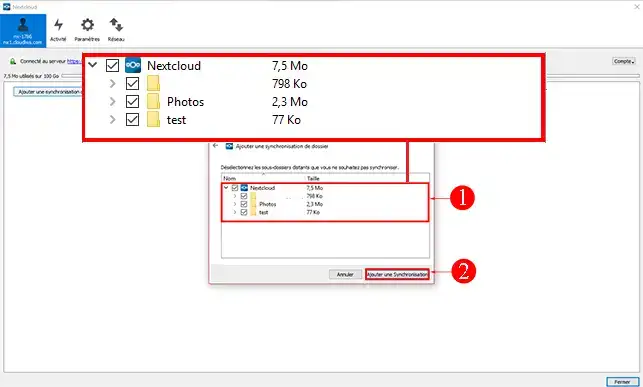
Once synchronisation has taken place, you can delete, modify and/or move a file within the local folder that you have synchronised with your storage space. Synchronisation will update your storage space in real time with the documents in your local folder.
NextCloud can also be installed on:
You now know how to use Nextcloud on WIndows. If you have any further questions or need assistance, don't hesitate tocontact our support team, who will be happy to help. If you don't yet have an online storage package or would like to upgrade to a cloud storage package with advanced features, please consult this documentation to place your order, and find information about Nextcloud and Nextcloud Pro packages here.
Rate this article :
5/5 | 1 opinion
This article was useful to you ?
Yes
No
0mn reading
Using NextCloud on mobiles and tablets
0mn reading
How do I use NextCloud on Android?
0mn reading
How do I use NextCloud on Linux?
0mn reading
How do I use NextCloud on a Mac?