Rate this article :
5/5 | 1 opinion
This article was useful to you ?
Yes
No
Vous avez noté 0 étoile(s)
Sommaire
Procédure
In this documentation, we are going to configure your mailbox created from ISPConfig or HestiaCP on your mail client.
An email client is software on your PC that allows you to view and send emails without using an online email client (webmail). Here are some well-known email clients: Outlook, Thunderbird, Courrier (Windows 10).
Whatever email client you use, you'll find the login details useful. Here they are:
In the rest of this documentation, it will be assumed that the test@exemple.com mailbox has already been created on your ISPConfig or HestiaCP panel. If this is not the case, visit the following documentation: How do I create an email address on a dedicated VPS server?
1. In Outlook, click on " File ".

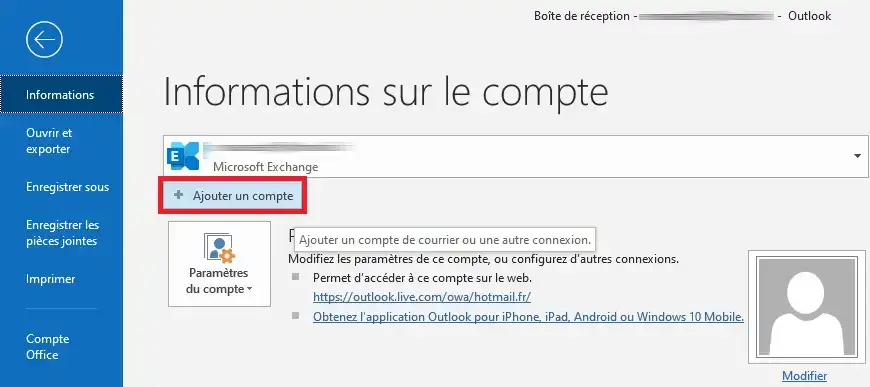
2. Click on " Add an account ".
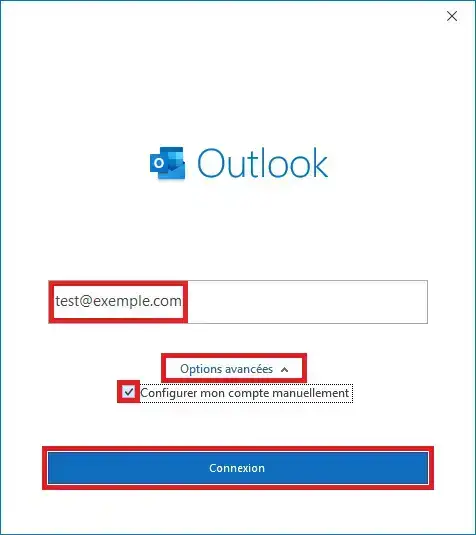
3. A new window appears. In the empty field, enter the email address to be configured, in our example " test@exemple.com". Then click on " Advanced options " and tick the box corresponding to " Configure my account manually ". Finally, click on " Connection ".
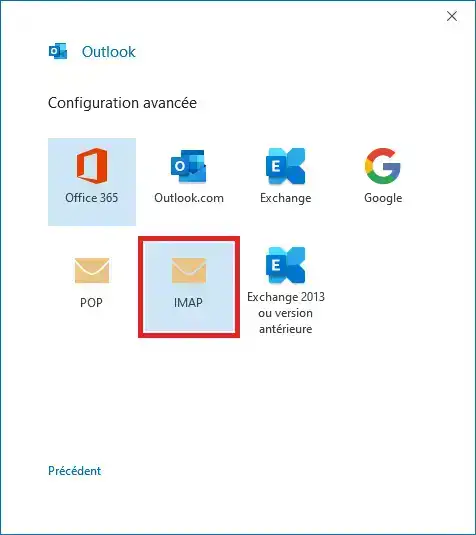
4. A new page will be displayed to choose the protocol to use. Choose " IMAP ".
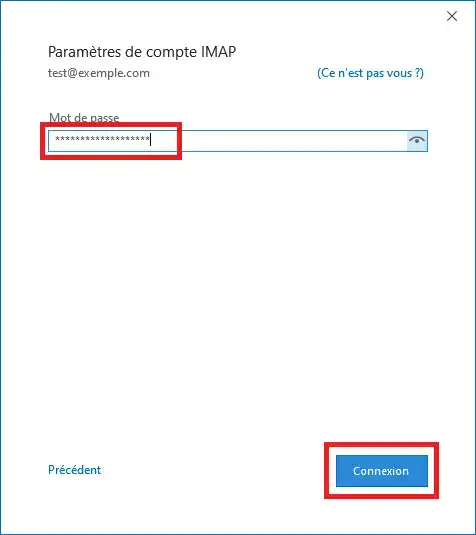
5. Now specify the password for the mailbox and click on " Connect ".
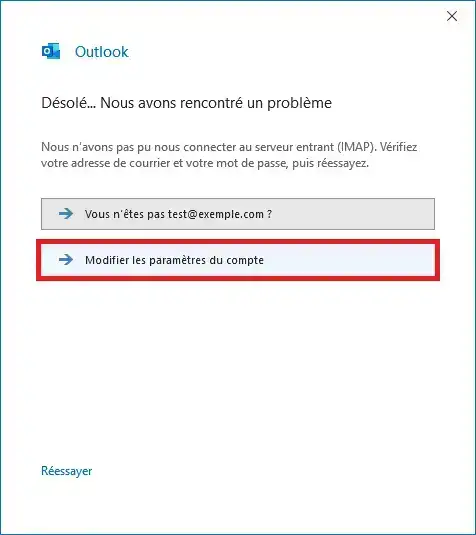
6. Outlook will attempt to connect. In most cases, this attempt will fail, as the VPS server does not have an autoconfig/autodiscovery mechanism. This won't be a problem, we'll configure the account manually by clicking on " Change account settings ".
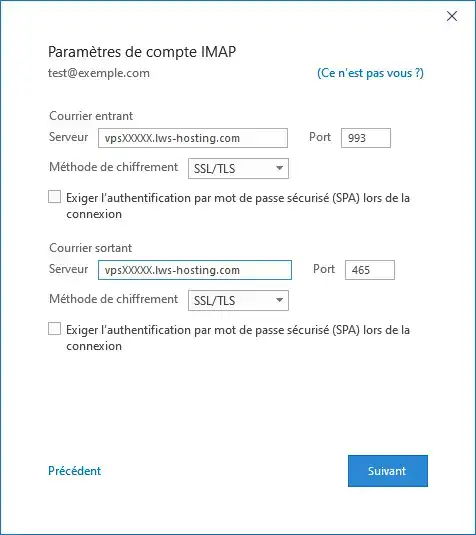
7. Fill in the connection information:
Then click on " Next ".
8. Outlook will ask you for your password again. Fill in the field provided and click on " Connect ".

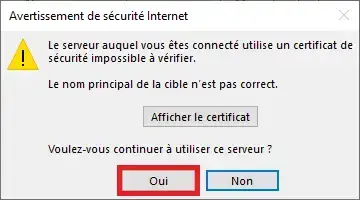
9. Outlook will display a warning about the SSL certificate for the email service, which is a self-signed SSL certificate. You can make a security exception for this, which will in no way affect the security of your VPS and/or your computer. Click " Yes ".
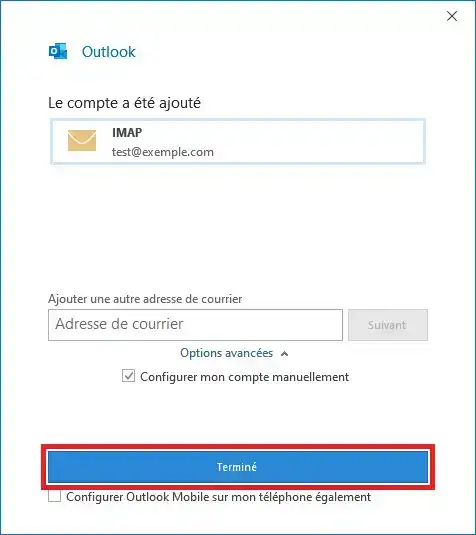
10. Finally, the configuration is complete. Click " Done "to close the Outlook configuration dialog box.
1. In Mail, click on the " Settings " icon (in the shape of a gearwheel, at the bottom of the left-hand column of the application) so that the " Settings " column appears on the right-hand side of the application. Then click on " Manage accounts ".
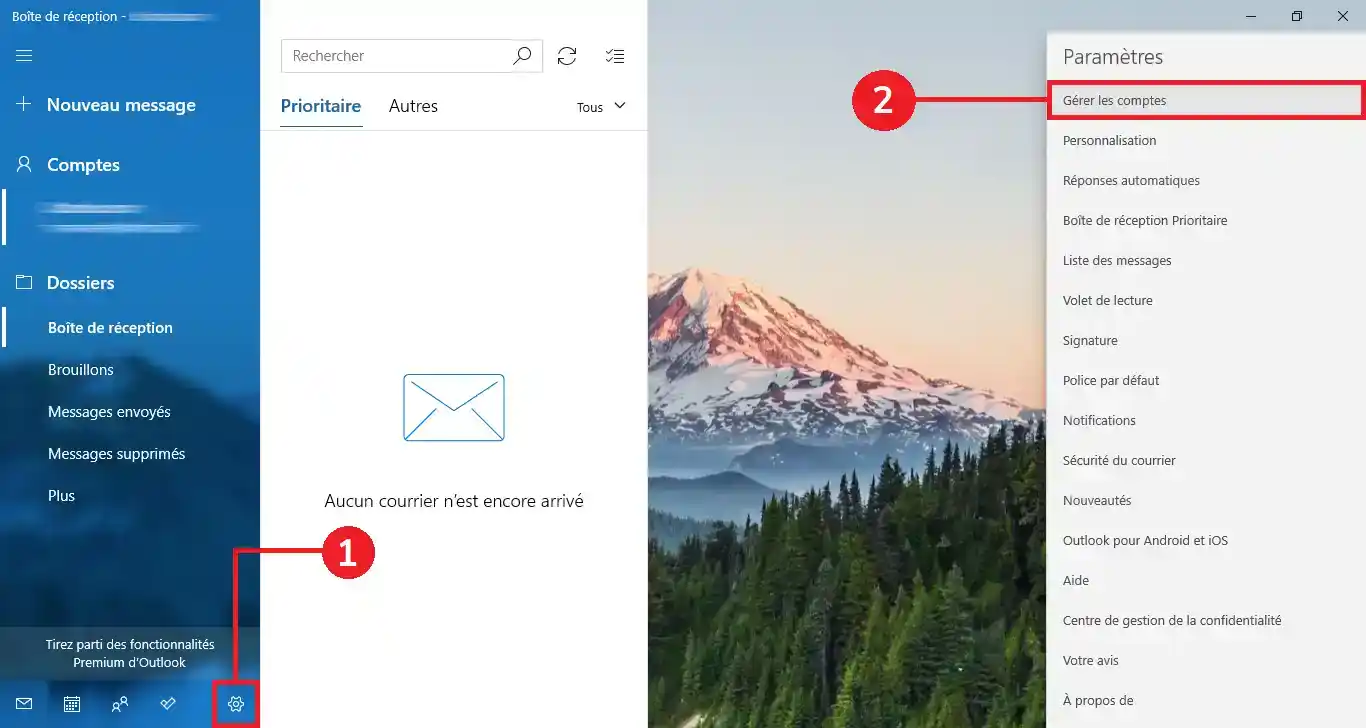
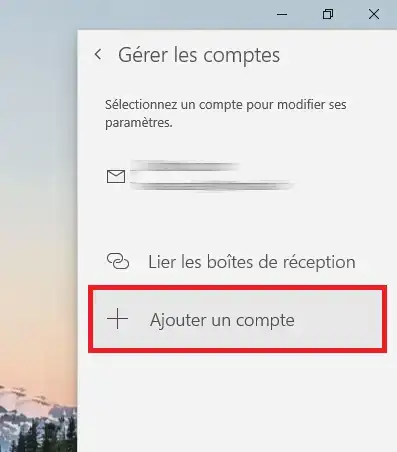
2. Then click on " Add an account ".
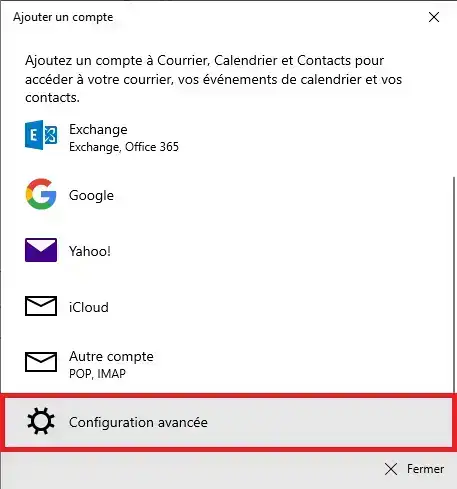
3. In the list, select " Advanced configuration ".
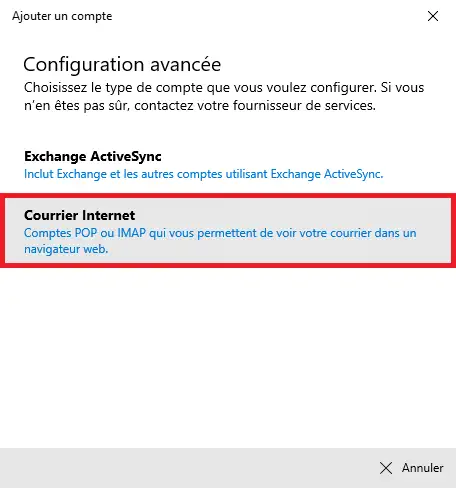
4. Click on " Internet Mail ".
5. You will now need to fill in the form as shown in the screenshot below:
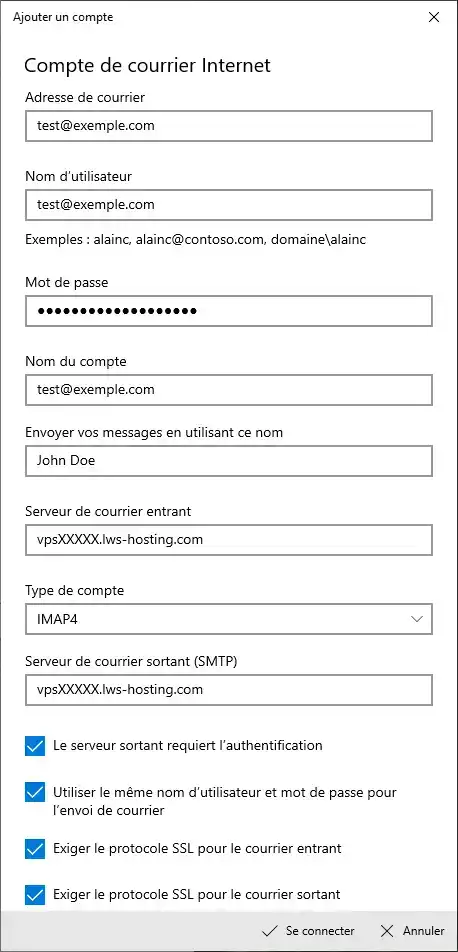
6. Finally, click on " Connect ".
In Mozilla Thunderbird, click on the ![]() menu and then on " New ".
menu and then on " New ".
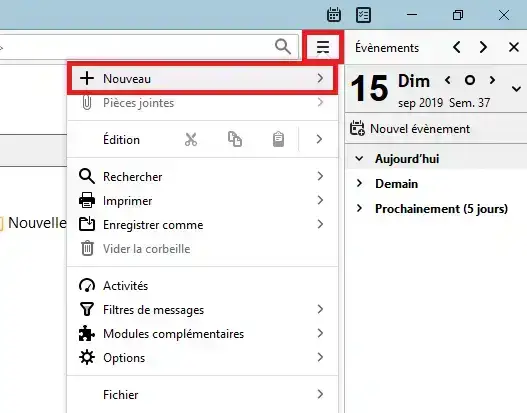
Then click on " Existing mail account ...".
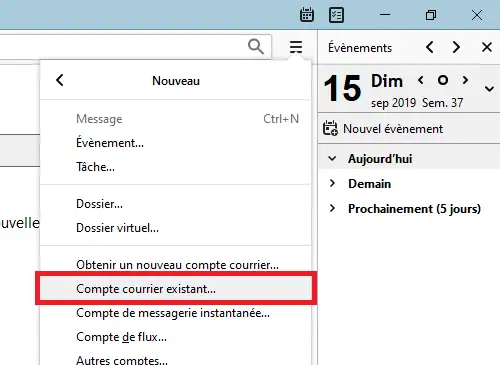
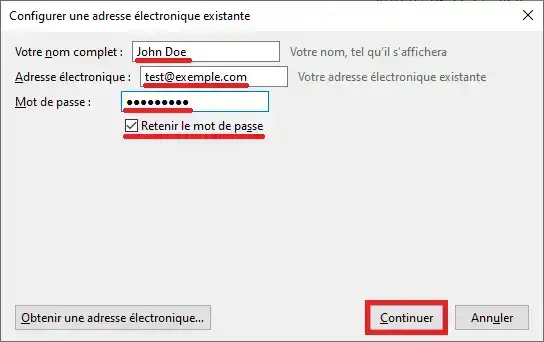
A new form window will open. Let's fill it in:
To confirm, click " Continue ".
Thunderbird will try to configure it automatically. However, to ensure that the correct configurations are used, we will still choose a manual configuration by clicking on the " Manual configuration " button:
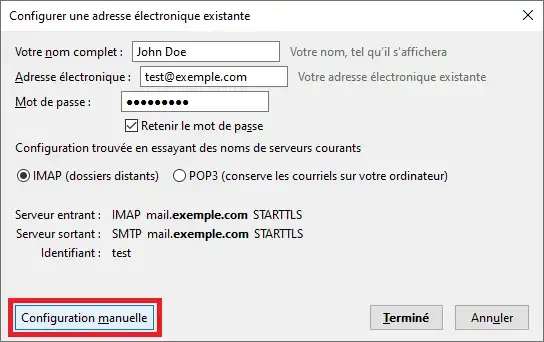
Now let's specify the connection information:
Finally, click on " Done ":
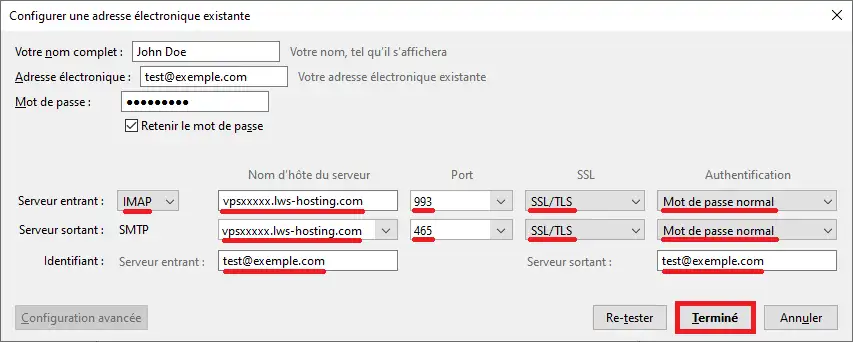
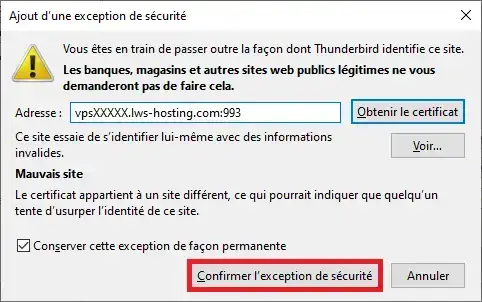
In some cases, you may need to manually approve the SSL certificate for your VPS server, as the SSL certificate installed by default on the email service is a self-signed SSL certificate. This will not affect the security of your VPS or your PC.
To do this, click on " Confirm security exception ":
Here's how to configure your Android Gmail application to use the mailbox on your VPS.
In your Gmail application, click on your profile menu:

Then click on " Add another account ":

A list of email services will appear. Select " Other ":
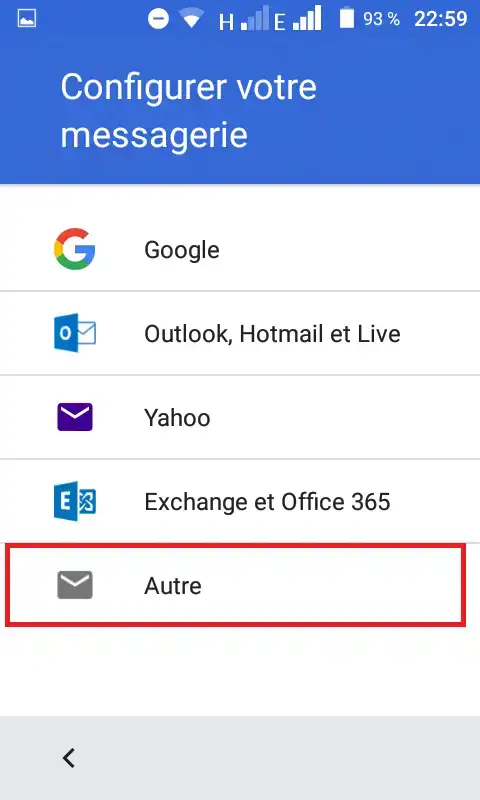
Enter your mailbox created on ISPConfig or HestiaCP and select manual configuration:
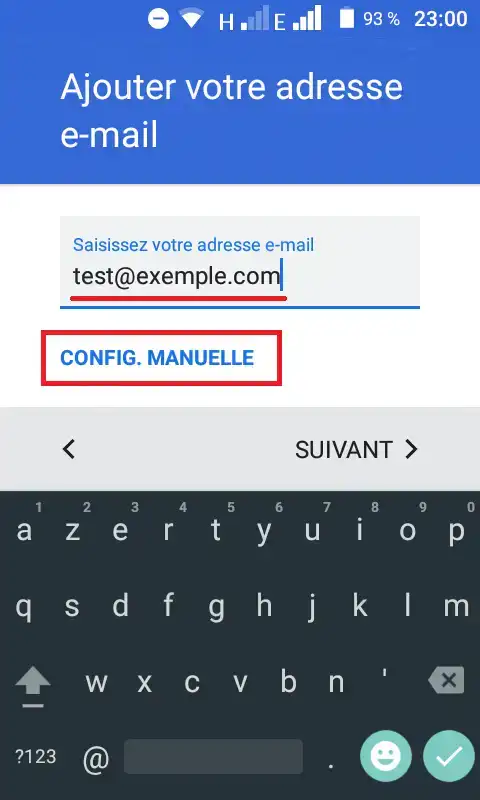
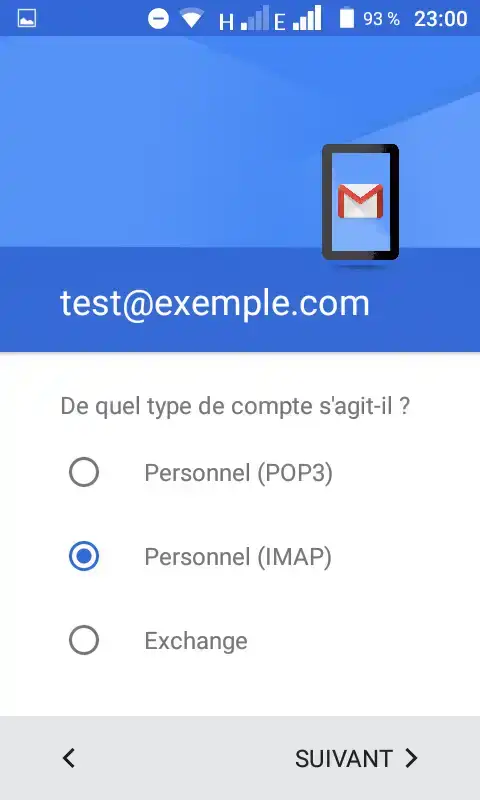
Select " Personal (IMAP) " as the mailbox type and press Next :
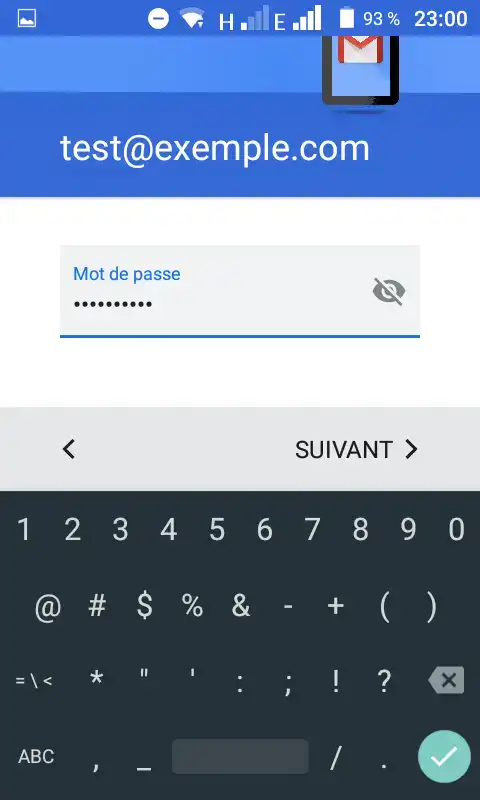
Enter the password and press Next:
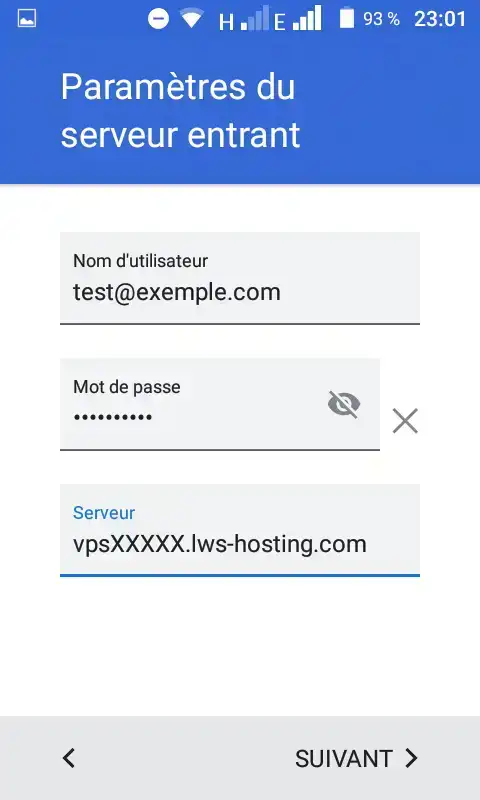
Enter the hostname of the incoming server (vpsXXXXX.lws-hosting.com) and press Next :
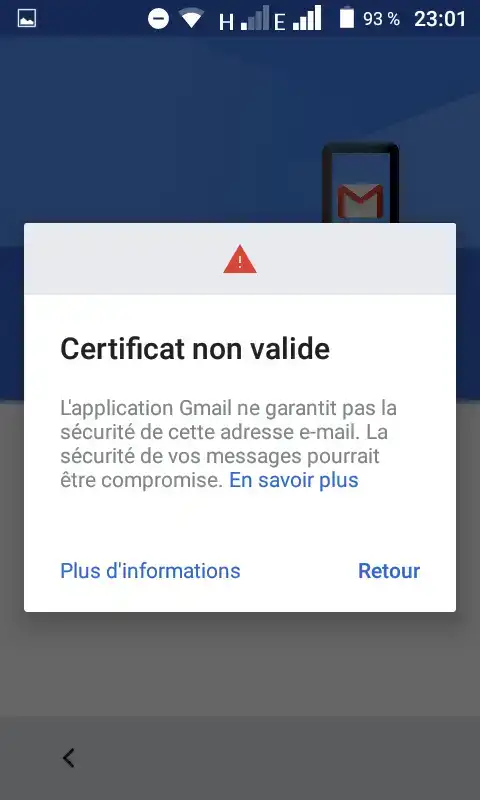
The Gmail application will attempt to connect to the server in question. In some cases, the server's SSL certificate is not approved by Gmail. Click on ' More information ':
Certificate information will appear:
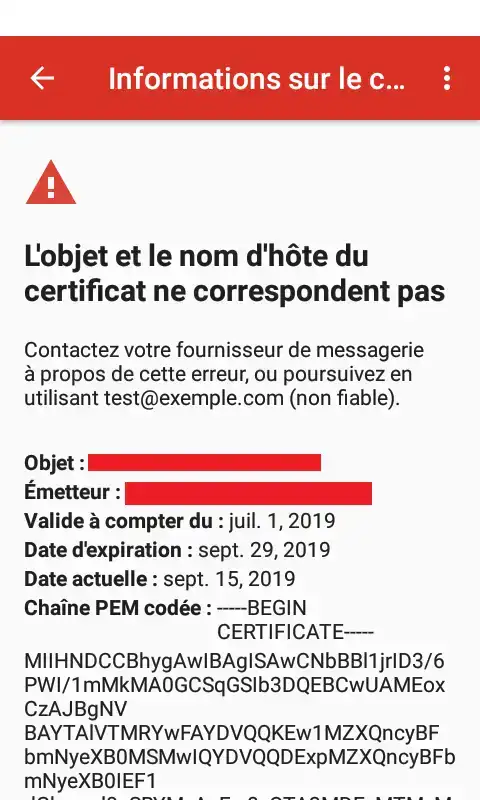
At the end of the page, there's a " Continue anyway " button.Press it. This will not affect the security of your VPS or your PC:

Next, enter the SMTP server details:
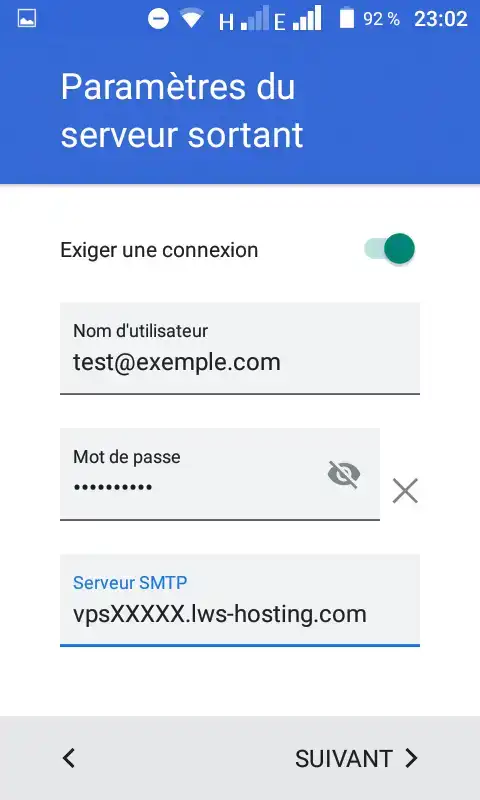
The same scenario will apply to SSL certificates. Just accept the self-signed SSL certificate, exactly like the one for the IMAP service.
To discover high-performance, ready-to-use hosting solutions, check out our turnkey VPS server offers equipped with HestiaCP. Click here 👉 Discover our HestiaCP offers.
Rate this article :
5/5 | 1 opinion
This article was useful to you ?
Yes
No
1mn reading
How do I create an email address on a dedicated VPS server?
5mn reading
Optimise the way you send your emails
2mn reading
How do I create a DKIM key on ispconfig?
0mn reading
How to change the VPS/ISPCONFIG email password