Rate this article :
5/5 | 2 opinion
This article was useful to you ?
Yes
No
Vous avez noté 0 étoile(s)
Sommaire
Procédure
Laravel is an open-source web framework written in PHP that allows you to develop web applications quickly, efficiently and in a structured way. It was created by Taylor Otwell in 2011 and has since become one of the most popular and widely used PHP frameworks.
Laravel is based on the MVC (Model-View-Controller) model, which separates the presentation logic from the application. It includes many useful features, such as authentication, session management, routing, database migration and much more. It also has an elegant and expressive syntax, which allows developers to code faster and more pleasantly.
Laravel also has a large community of developers who regularly contribute to its development, ensuring complete and up-to-date documentation, as well as numerous resources and tools available online to help developers solve problems or find answers to their questions.
Laravel is aimed at anyone or any company who wants to develop web applications in PHP quickly, efficiently and in a structured way. This could include beginners or experienced developers, small or large companies, start-ups, freelancers or development agencies.
Because of its clear and expressive syntax, its large community of active developers and its many built-in features, Laravel is a popular choice for developing web applications of all sizes and complexities. It is also a common choice for creating cloud-based or Internet of Things projects, as well as for developing mobile applications via APIs.
In short, Laravel is for anyone or any company that wants to develop modern, scalable and maintainable PHP web applications in an efficient and structured way. However, a minimum knowledge of PHP Objects and the use of Frameworks is recommended to feel comfortable developing with Laravel.
Installing Laravel on your hosting is very easy via the LWS Autoinstaller.
To do this, please follow this procedure:
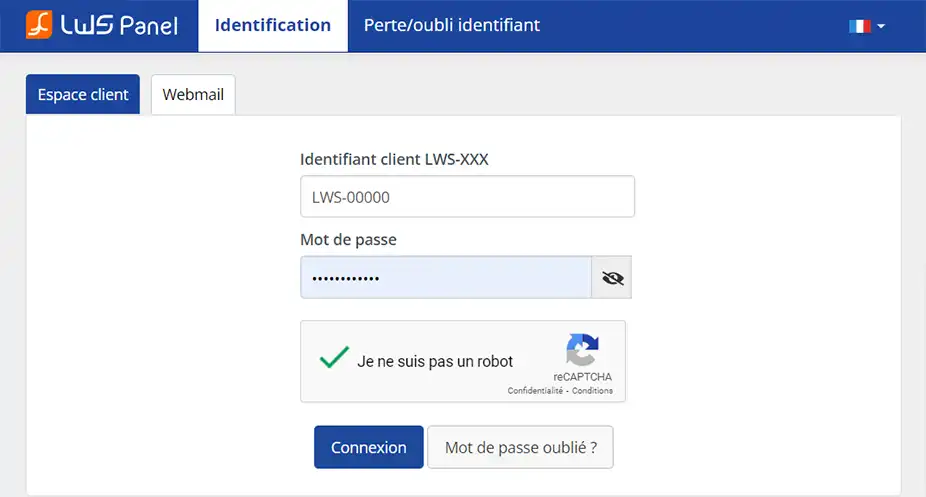
1. Log in to your LWS Panel customer area.
2. You are now on the page that lists your hostings & domains.
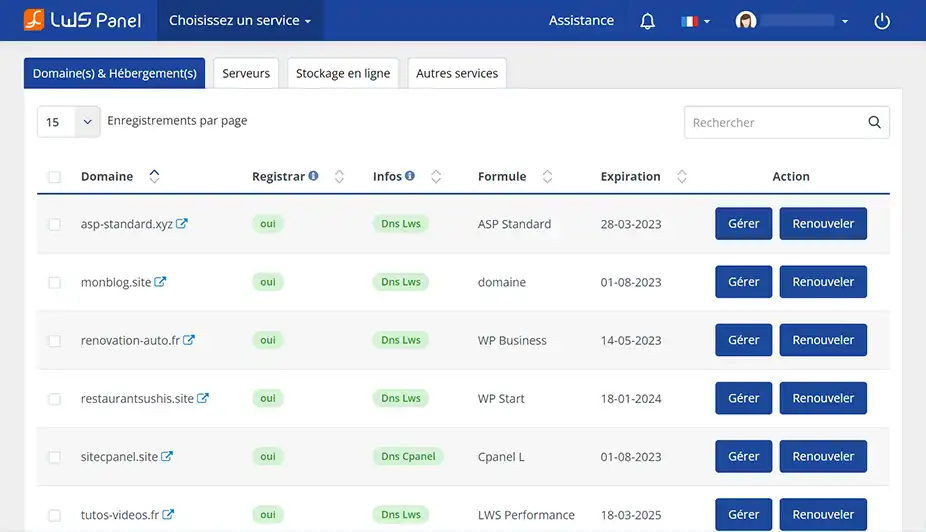
3. Go to your hosting management via the Manage button

4. In the Software category, click on the Auto-installer button

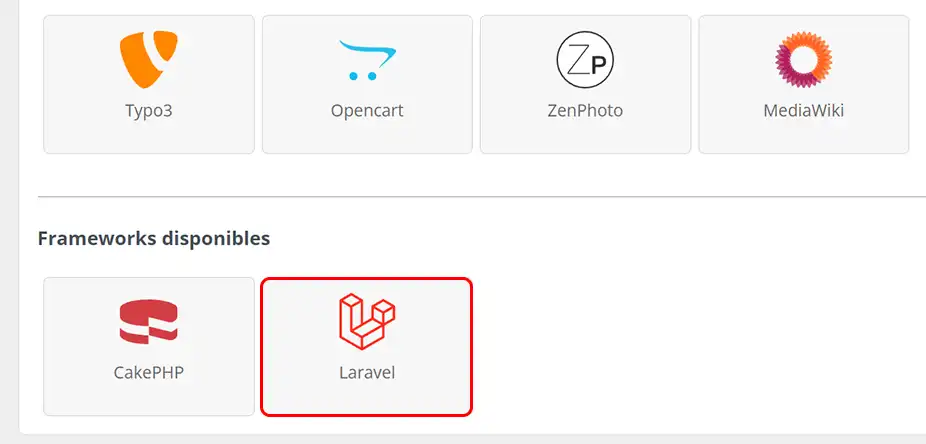
5. In the listing at the bottom of the page under Available Frameworks, click on Laravel.
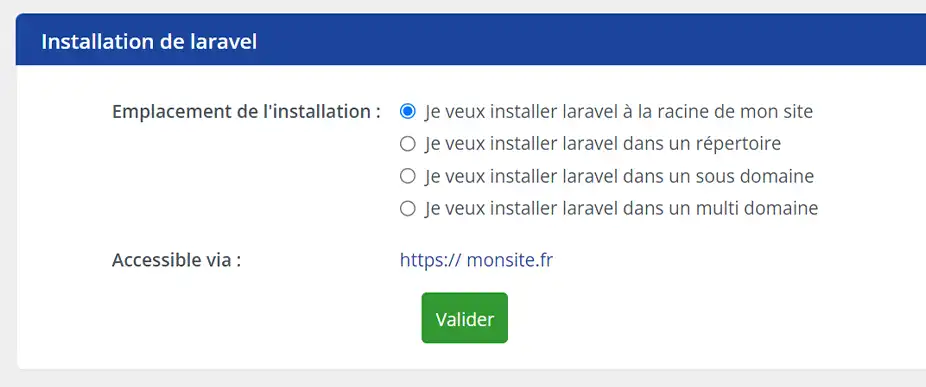
6. Select where you want to install your Laravel site and click OK.
7. Laravel is now installed on your hosting.
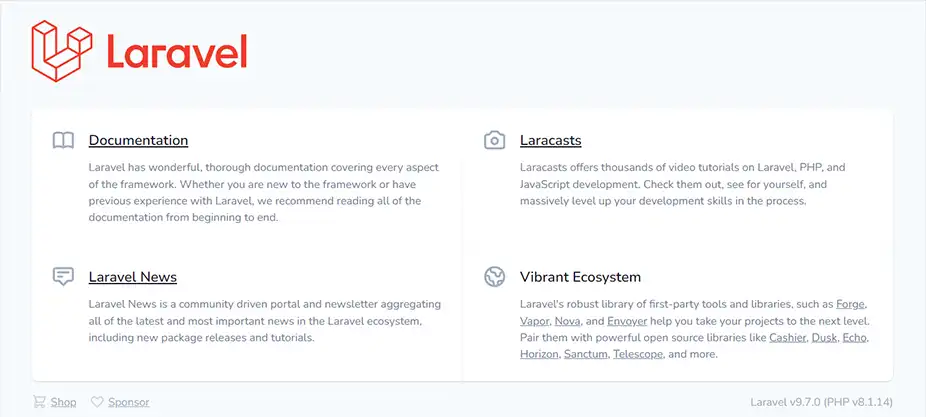
Now that your Laravel site has been installed, we will look at some of the elements that can be configured.
1. Creating an .htaccess
The first thing to set up is the .htaccess file at the root of your site. The heart of Laravel is located in the /public folder, so you'll need to redirect your site to this folder.
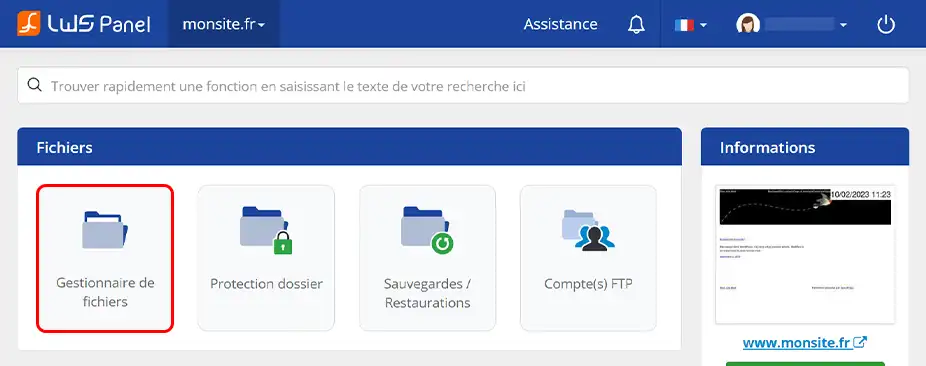
To do this, go back to managing your service on the LWS client panel, go to the Files category and click on the File Manager button.
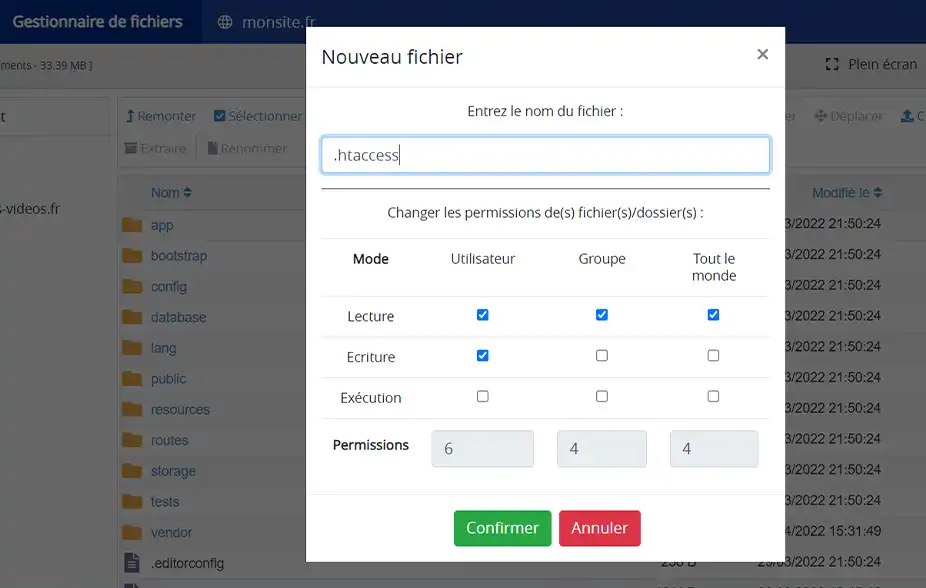
Then click on the + file link at the top of the page and in the modal, enter .htaccess as the name and confirm.
Search for the file you have just created and click on it to go to the file editor. Copy and paste the contents below into this file, then click Save:
/*RewriteEngine On RewriteRule ^(.*)$ public/ [L]
2. Modifying environment variables
In this section, we're going to look at some configurations that don't necessarily need to be changed, but that will depend on your specific needs. Still in the file manager, at the root of your site, you'll find a file called .env, which contains a number of configuration items such as database connection information. In the case of a Laravel installation using our Auto-installer, the database will already be configured, so you won't need to intervene at this level.
On the other hand, suppose you want to send emails from your site, you can configure this via an email address that you've created on your service beforehand, which is what we're going to see. I'm assuming that you know how to create an email address on your service, if not you can always follow this documentation.
So we're going to open the .env file and configure this part of the code as shown below:
/* Leave SMTP */ MAIL_MAILER=smtp /* Enter the server of your mail address, for example for me mail61.lwspanel.com */ MAIL_HOST=mail61.lwspanel.com /* The port will always be 465 */ MAIL_PORT=465 /* Enter your e-mail address */ MAIL_USERNAME=contact@nomdedomaine.com /* Enter your mailbox password */ MAIL_PASSWORD=gHUè-&Jk45 /* Make sure you enter ssl here */ MAIL_ENCRYPTION=ssl /* Corresponds to the address that will be displayed as the sender */ MAIL_FROM_ADDRESS="contact@nomdedomaine.com" /* Corresponds to the name that will appear next to the sender's email address*/ /* Corresponds to the name that will be displayed next to the sender's email address*/ MAIL_ENCRYPTION=ssl /* Corresponds to the address that will be displayed as the sender the sender's email address*/ /* Here ${APP_Name} will be the name you gave to your site earlier in this file */ /* You can put other things in between the "" if you wish */ MAIL_FROM_NAME="${APP_NAME}""".
Then save your changes using the button at the top right. I don't recommend making any other changes, as the rest is already well configured.
Now that our Laravel site is correctly configured, we're going to move on to the stage of creating our first pages. Before we start coding, it's important to understand how a framework works, and Laravel in particular, as well as its architecture. To put it simply, it's essential to understand the use of views, controllers, models and routes. This will enable you to better organise your code and separate the different responsibilities of your application.
The view In a Laravel project, a 'view' is a visual representation of the data you wish to display to the user. In other words, it is the part of your web application that is responsible for presenting the information. In Laravel, views are often written using the Blade template engine. With Blade, you can include PHP variables in your HTML, use loops and conditions to generate repetitive elements, and even extend basic layouts to reuse them on several pages. On Laravel, views are placed in the resources/views folder and files have the .blade.php extension.
The controller In a framework like Laravel, a controller is a class that acts as an interface between the user and the application. When a user makes a request, the controller retrieves the necessary data from the model, performs the necessary processing and sends the appropriate response to the view for display. In other words, the controller is a key element in the MVC (Model-View-Controller) architecture of a framework. It separates the concerns of the application by dividing responsibilities between the different components. The model manages the data, the view handles the display and the controller manages the business logic. This separation makes it easier to maintain the application, by allowing changes to be made to one component without affecting the others. The controller therefore improves the readability, flexibility and modularity of your code. On Laravel, controllers are placed in the app/Http/Controllers folder.
The model: In a Laravel project, a 'model' is a class that represents a table in your database. It is through models that you can interact with your application's database. To understand what a model is, let's take the example of a user management application. If you have a 'users' table in your database, you could create a 'User' model representing this table. This model would be associated with the 'users' table and would contain methods for accessing, creating, updating or deleting users in the database. On laravel, models are placed in the app/Models folder.
The route: In a Laravel project, a 'route' is a way of defining how your web application should respond to a user request for a specific URL. For example, if the visitor requests the URL domainname.co.uk/, the route will interpret this and redirect the visitor to the correct page, in this case the home page. The routes are configured in the routes/web.php file.
Now that we've seen the architecture of Laravel, we can move on to setting up our first pages.
For our example, we're going to create a page that displays a list of users. We'll assume that you have a 'users' table in your database, with three fictitious users for our example. Here are the steps to follow to set up this page:
1. Creating the Model
Now we need to create a model to access the data in our database, and in particular the 'users' table. This can easily be done using our service's Web terminal via the LWS Client Panel. To access the Web terminal, go to your service management and click on "SSH Terminal" in the "Software" section. Using this command line interface, you can quickly create your template.

Type this command line :
php artisan make:model User -m
Your model file for the "users" table has been successfully created on your site. This means that you can now access the data in the "users" table using this model in your Laravel code.
2. Creating a controller
We also need to create the controller that will retrieve the list of users in a variable, then redirect the request to the appropriate view. For the sake of clarity, we're going to name this file "UserController.php", to indicate that this controller is in charge of user management. This file should be created in the app/Http/Controllers folder and will look like this:
/* Controller: app/Http/Controllers/UserController.php */ $users ]); } }
3. Creating the view
Now that the model and controller have been created, we can move on to creating the view.
In our case, since we're going to be working on users, we'll create a 'user' folder in the view directory, in which we'll create our first page, which will be the index. The full path of the view will therefore be "resources/views/user/listing.blade.php", and it will have the following content:
/* Page: ressources/views/user/listing.blade.php */
/*Creation of the list using the ul and li tags */
/* We browse the list of users contained in the $users variable given by the controller */ @foreach($users as $user) /* We display the name of the user by indicating the name of the corresponding column in the database */
{{$user->name}}@endforeach 4. Creating the route
Now that we've created the view, the controller and the model, we simply need to tell Laravel that we want to display the "listing" page of users at the URL "mondomaine.fr/user".
To do this, we need to create a route, which maps a given URL to a specific controller and method. Routes are defined in the "web.php" file, located in the "routes" folder.
/* Routes : routes/web.php */
We've completed all the steps needed to set up a simple user list page that extracts data from our database. However, this is just a very simple example of what Laravel can do in terms of creating pages. There are many other features and methods that we haven't yet explored. To find out more about Laravel, we recommend reading the official Laravel documentation.
To take things a step further, we're going to look at how to add libraries or packages to Laravel. Although Laravel already offers several tools, it can be useful to add additional functionality using packages to avoid developing functionality that already exists. We're going to use the SSH terminal of our service on the LWS Client Panel again.
Let's take the debug bar as an example. As a CakePHP user, I particularly appreciate this feature when I'm in development mode. As this functionality isn't available as standard on Laravel, I'd like to add it to my site. After searching the internet, I discovered the Laravel Debugbar tool on GitHub, which I'm going to install. To do this, simply follow the instructions provided on the tool's page and enter the following command in the Web Terminal:
composer require barryvdh/laravel-debugbar --dev
So I'm going to go to my Customer Area and manage my service.
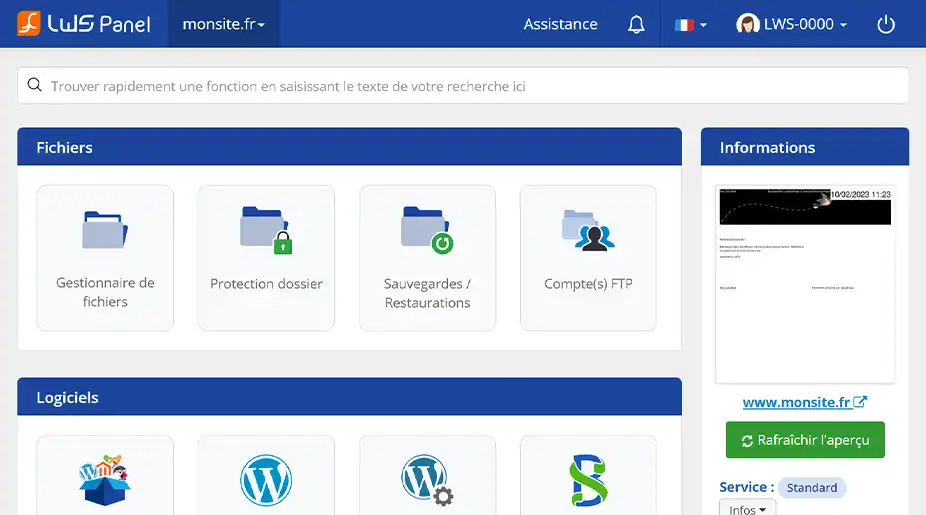
Then, in the Software section, I'll go to SSH Terminal

To start the installation, just go to the folder where the Laravel site is located. In this case, the site is installed in the root, so no special action is required. However, if the site was installed in a folder named Laravel, the following command should have been used to go to the corresponding folder:
cd Laravel
All you have to do now is enter the command mentioned above and run it.
After that, several items will appear in the terminal. Don't worry, this is perfectly normal. Composer retrieves the files needed to install them on your site and perform the necessary actions, and these lines simply represent the whole process.

Once the installation is complete, you can use the tool directly on your site when you're in Dev mode.

Rate this article :
5/5 | 2 opinion
This article was useful to you ?
Yes
No
1mn reading
How do I install a CMS with the LWS auto-installer?
1mn reading
How do I migrate a local WordPress site to my LWS shared hosting?
1mn reading
How do I set up a shop on an Ecommerce package?
1mn reading
How do I install WordPress with the LWS auto-installer?
Bonjour,
Je vous remercie pour votre message.
Si vous avez suivi correctement les procédures indiquées dans la documentation ci-dessus, vous pourrait accéder à votre site en saisissant votre nom de domaine, effectivement dans le fichier de directive .htaccess, vous avez normalement dû effectuer des changements pour pouvoir rédiger les visiteurs vers le répertoire public qui contient votre site internet en temps normal et dans une utilisation normal de Laravel.
Si toutefois vous avez besoin d'assistance complémentaire, je vous inviterais à contacter notre équipe de support technique par le biais de votre espace client.
Nous vous remercions pour votre attention et reste à votre disposition
Cordialement, L'équipe LWS.
Bonjour,
Je vous remercie pour votre message.
Malheureusement, nous ne proposons pas de formations plus complètes à l'utilisation de Laravel, mais je vous invite vivement à faire des recherches sur internet qui regorge de vidéos, tutoriaux, documentations explicatives et formations en ligne.
Je vous remercie pour votre attention et reste à votre disposition pour toute autre question ou complément d'information.
Cordialement, L'équipe LWS.
Bonjour,
Oui, les directives du fichier .htaccess restent valides même si vous installez votre application Laravel dans un sous-domaine. La procédure d'installation reste globalement la même.
Cependant, si vous rencontrez des difficultés ou des comportements inattendus, je vous recommande de contacter notre support technique, qui pourra vous accompagner plus en détail selon votre configuration spécifique.
Je vous remercie pour votre attention et reste à votre disposition pour toute autre question ou complément d'information.
Cordialement, L'équipe LWS
Bonjour,
Je vous remercie pour votre message, toutefois, je vous recommande vivement de prendre connaissance des éléments concernant Laravel sur leur documentation officielle.
Ce qui vous permettra de répondre à l'intégralité de vos questions à son propos.
Pour ce qui est du mode debug, je vous invite à consulter le lien suivant :
Je vous remercie de votre attention et reste à votre disposition pour toute autre question ou complément d'information.
Cordialement, L'équipe LWS